📝 Creating the Register Page for Our FastAPI Full-Stack Application
In this lesson, we will build the registration page for our application. This page will allow new users to create an account with all the required information, including:
Email
Username
First name / Last name
Role
Phone number
Password and password verification
The focus here is on HTML structure and styling. The actual registration functionality will be implemented later with JavaScript and FastAPI endpoints.
📁 Creating the Register Template
Navigate to the templates folder in your project:
Right-click the templates folder
Select New → HTML File
Name the file:
register.html🎨 Importing CSS
As with the login page:
Import the base CSS
Import Bootstrap CSS
<link rel="stylesheet" href="{{ url_for('static', path='css/base.css') }}">
<link rel="stylesheet" href="{{ url_for('static', path='css/bootstrap.css') }}">
<title>Todo App</title>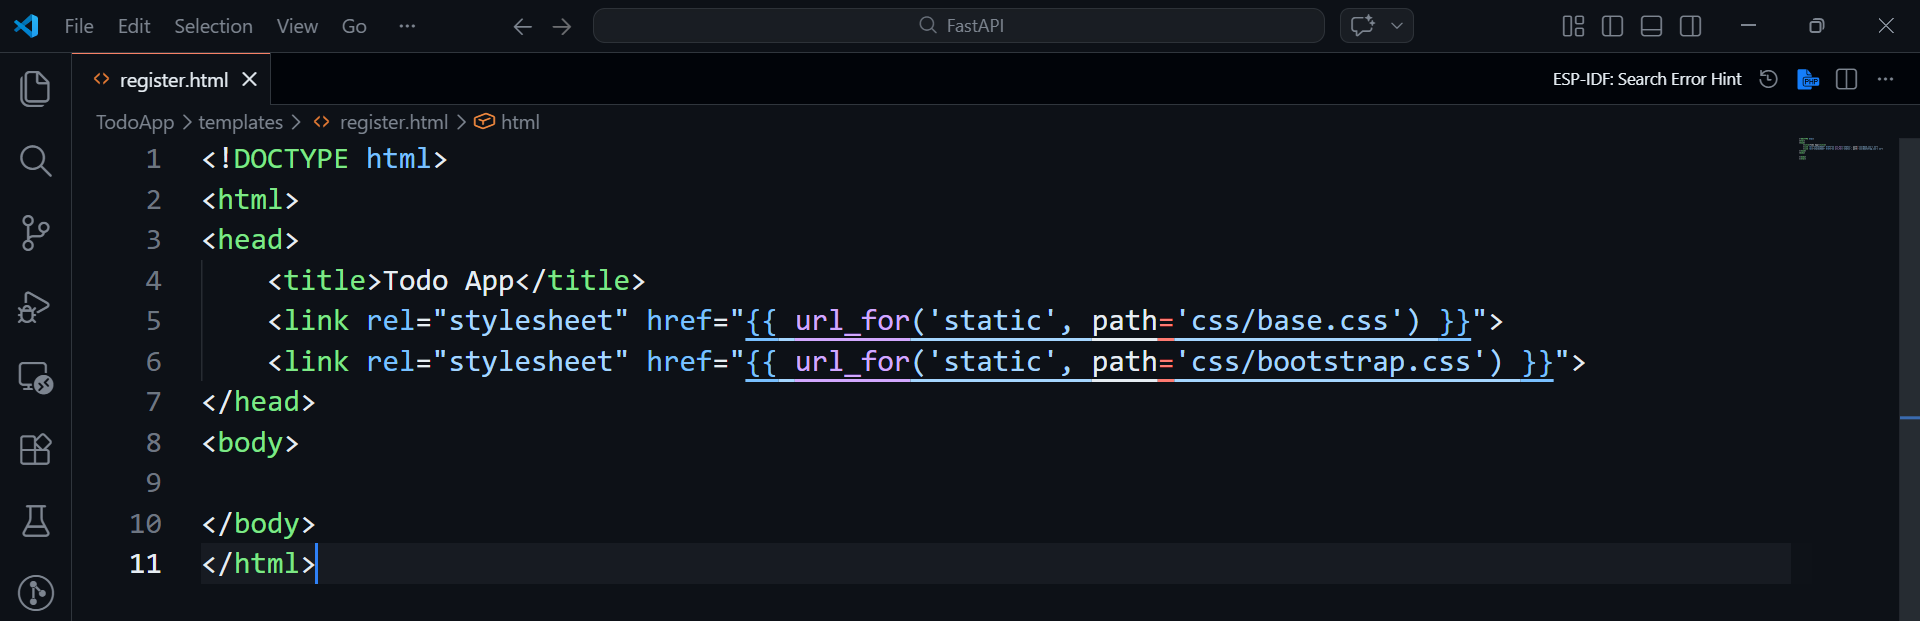
This ensures the registration form will look professional and consistent with the rest of the application.
🧱 Building the Registration Form Layout
We will use Bootstrap containers, cards, and form groups to structure the form.
HTML Structure
<div class="container">
    <div class="card">

        <div class="card-header">
            Register
        </div>

        <div class="card-body">
            <form id="registerForm">

                <div class="form-row">
                    <div class="form-group col-md-6">
                        <label>Email</label>
                        <input type="text" class="form-control" name="email" required>
                    </div>
                    <div class="form-group col-md-6">
                        <label>Username</label>
                        <input type="text" class="form-control" name="username" required>
                    </div>
                </div>

                <div class="form-row">
                    <div class="form-group col-md-6">
                        <label>First Name</label>
                        <input type="text" class="form-control" name="first_name" required>
                    </div>
                    <div class="form-group col-md-6">
                        <label>Last Name</label>
                        <input type="text" class="form-control" name="last_name" required>
                    </div>
                </div>

                <div class="form-row">
                    <div class="form-group col-md-6">
                        <label>Role</label>
                        <input type="text" class="form-control" name="role" required>
                    </div>
                    <div class="form-group col-md-6">
                        <label>Phone Number</label>
                        <input type="text" class="form-control" name="phone_number" autocomplete="phone-number" required>
                    </div>
                </div>

                <div class="form-group">
                    <label>Password</label>
                    <input type="password" class="form-control" name="password" autocomplete="new-password" required>
                </div>

                <div class="form-group">
                    <label>Verify Password</label>
                    <input type="password" class="form-control" name="password2" autocomplete="new-password" required>
                </div>

                <button type="submit" class="btn btn-primary">Sign In</button>

            </form>
        </div>

        <div class="card-footer text-muted">
            <a href="/auth/login-page">Already have an account?</a>
        </div>

    </div>
</div>
⚙️ Adding the Route in FastAPI
Next, we will configure FastAPI to render the register page.
Open:
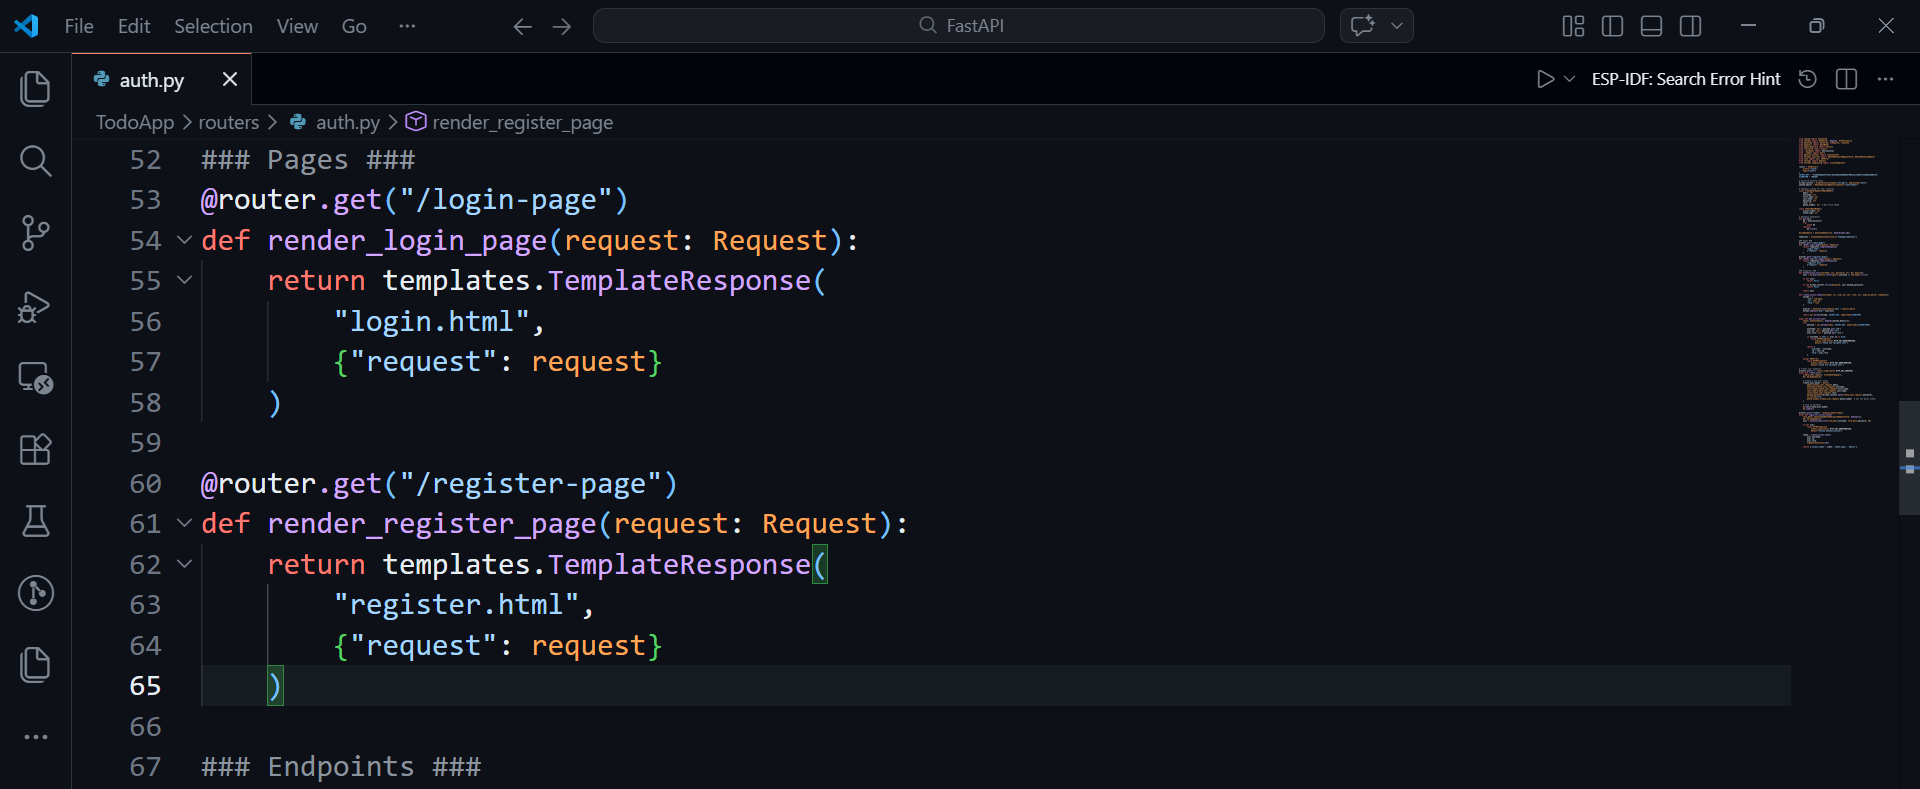
routers/auth.pySteps:
Scroll to the section where you handle page routes (
# Pages)Copy the login page endpoint structure
@router.get("/register-page")
def render_register_page(request: Request):
    return templates.TemplateResponse(
        "register.html",
        {"request": request}
    )
Place this code in the pages section above your other API endpoints.
▶️ Running the Application
Start the application:
uvicorn TodoApp.main:app --reload🌍 Viewing the Register Page
Open the browser and navigate to the login page:
<http://127.0.0.1:8000/auth/login-page>Click the Register? link
You should now see the registration form with all required fields:
Email
Username
First Name / Last Name
Role
Phone Number
Password / Verify Password
Clicking Already have an account? will navigate back to the login page.
⚠️ Current Limitations
At this stage:
The registration form does not yet submit data
Fields will not validate or save because we have not implemented JavaScript or backend handling
Passwords are still plain text for now
This will be addressed in later lessons when we integrate JavaScript and FastAPI endpoints for authentication.
🎬 Next Steps
In the next lesson, we will:
Set up JavaScript functionality to handle form submission
Connect the registration page to FastAPI endpoints
Implement validation and secure authentication
This will allow users to register accounts and interact with the Todo application fully.
📝 Summary
In this lesson, we:
Created the
register.htmltemplateImported base CSS and Bootstrap CSS
Built a Bootstrap card layout for the registration form
Added all necessary fields for registration
Included navigation links to switch between login and register pages
Configured a FastAPI route to render the registration page
The frontend for user registration is now ready, and we will soon connect it to the backend.