🔐 Building the Login Page for Our FastAPI Full-Stack Application
In this lesson, we will begin building the authentication interface for our application by creating a Login Page.
This page will allow users to enter their username and password before accessing the Todo application.
At this stage, we are focusing on building the HTML structure and styling. The actual login functionality will be implemented later using JavaScript and FastAPI endpoints.
📁 Creating the Login Template
First, navigate to the templates directory in your project.
Steps
Right-click the templates folder
Select New → HTML File
Name the file:
login.htmlThis file will contain the layout and form used for user authentication.
🎨 Importing CSS Styles
Just like we did in the home page, we need to import our stylesheets.
Copy the CSS link used in home.html and paste it inside the <head> section of login.html.
Then update the page title:
<title>Todo App</title>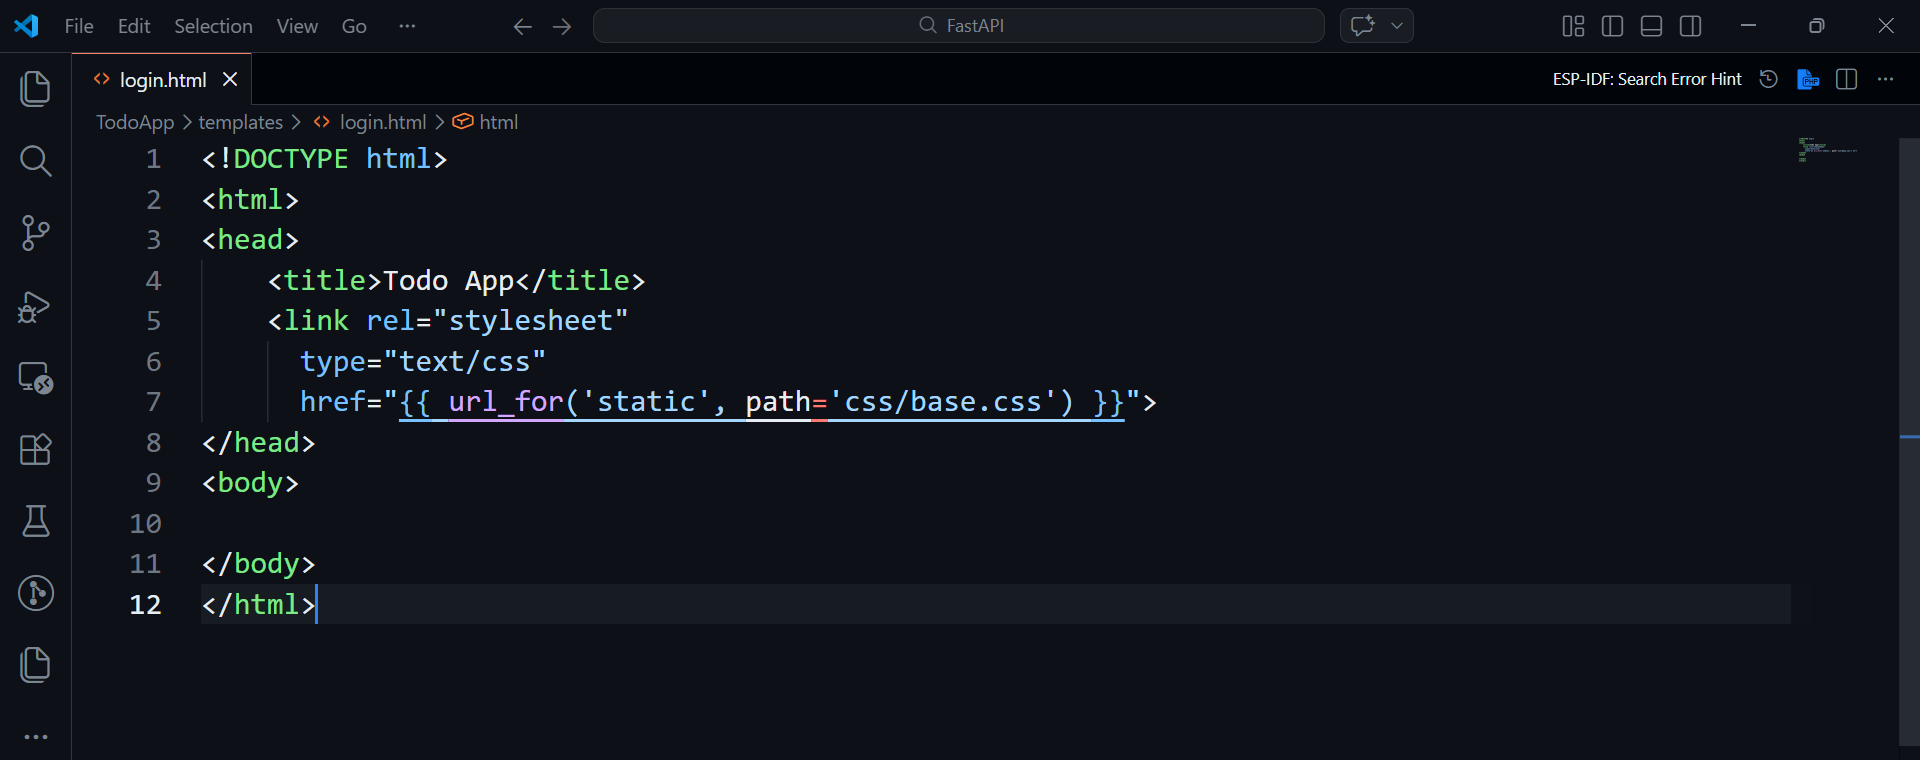
Adding Bootstrap Styling
In addition to our base stylesheet, we also need to import Bootstrap CSS, which provides many UI components and layout utilities.
Add the Bootstrap stylesheet below the base CSS link:
<link rel="stylesheet" href="{{ url_for('static', path='css/base.css') }}">
<link rel="stylesheet" href="{{ url_for('static', path='css/bootstrap.css') }}">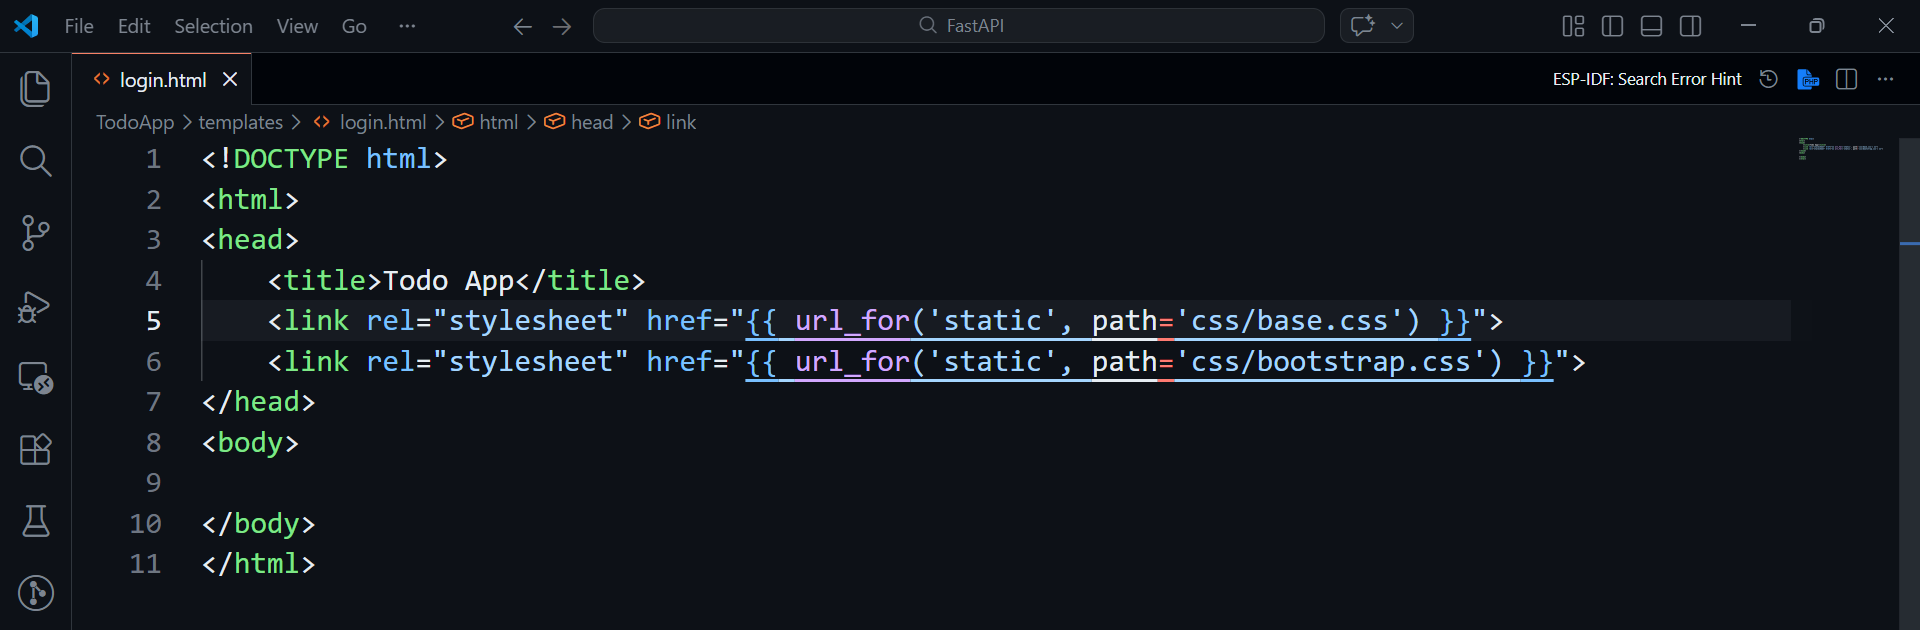
This will give our login form a modern and professional appearance.
🧱 Building the Login Form Layout
Now we can begin writing the HTML structure inside the <body>.
The page will use a Bootstrap container and card layout.
HTML Structure
<div class="container">
    <div class="card">

        <div class="card-header">
            Login
        </div>

        <div class="card-body">
            <form id="loginForm">

                <div class="form-group">
                    <label>Username</label>
                    <input type="text"
                           class="form-control"
                           name="username"
                           autocomplete="username"
                           required>
                </div>

                <div class="form-group">
                    <label>Password</label>
                    <input type="password"
                           class="form-control"
                           name="password"
                           autocomplete="current-password"
                           required>
                </div>

                <button type="submit" class="btn btn-primary">
                    Login
                </button>

            </form>
        </div>

        <div class="card-footer text-muted">
            <a href="/auth/register-page">Register?</a>
        </div>

    </div>
</div>
📌 Form Structure Explained
Container
<div class="container">Creates a centered layout using Bootstrap.
Card Component
<div class="card">The card component provides a styled panel used to display the login form.
Card Header
<div class="card-header">
Login
</div>
Displays the title of the card.
Form Inputs
We include two required fields:
Username
Password
Both inputs use Bootstrap classes such as:
class="form-control"This ensures consistent styling.
Password Input Type
The password field uses:
type="password"This ensures the password is hidden and displayed as dots when users type.
Register Link
At the bottom of the form, we add a navigation link:
<a href="/auth/register-page">Register?</a>This will later allow users to navigate to the registration page.
Although the registration page does not exist yet, we add the link now so the structure is ready.
⚙️ Rendering the Login Page in FastAPI
Now we need to configure FastAPI to render this template.
Open the file:
routers/auth.pyImport Required Modules
Add the following imports at the top of the file:
from fastapi import Request
from fastapi.templating import Jinja2Templates
Initialize Templates
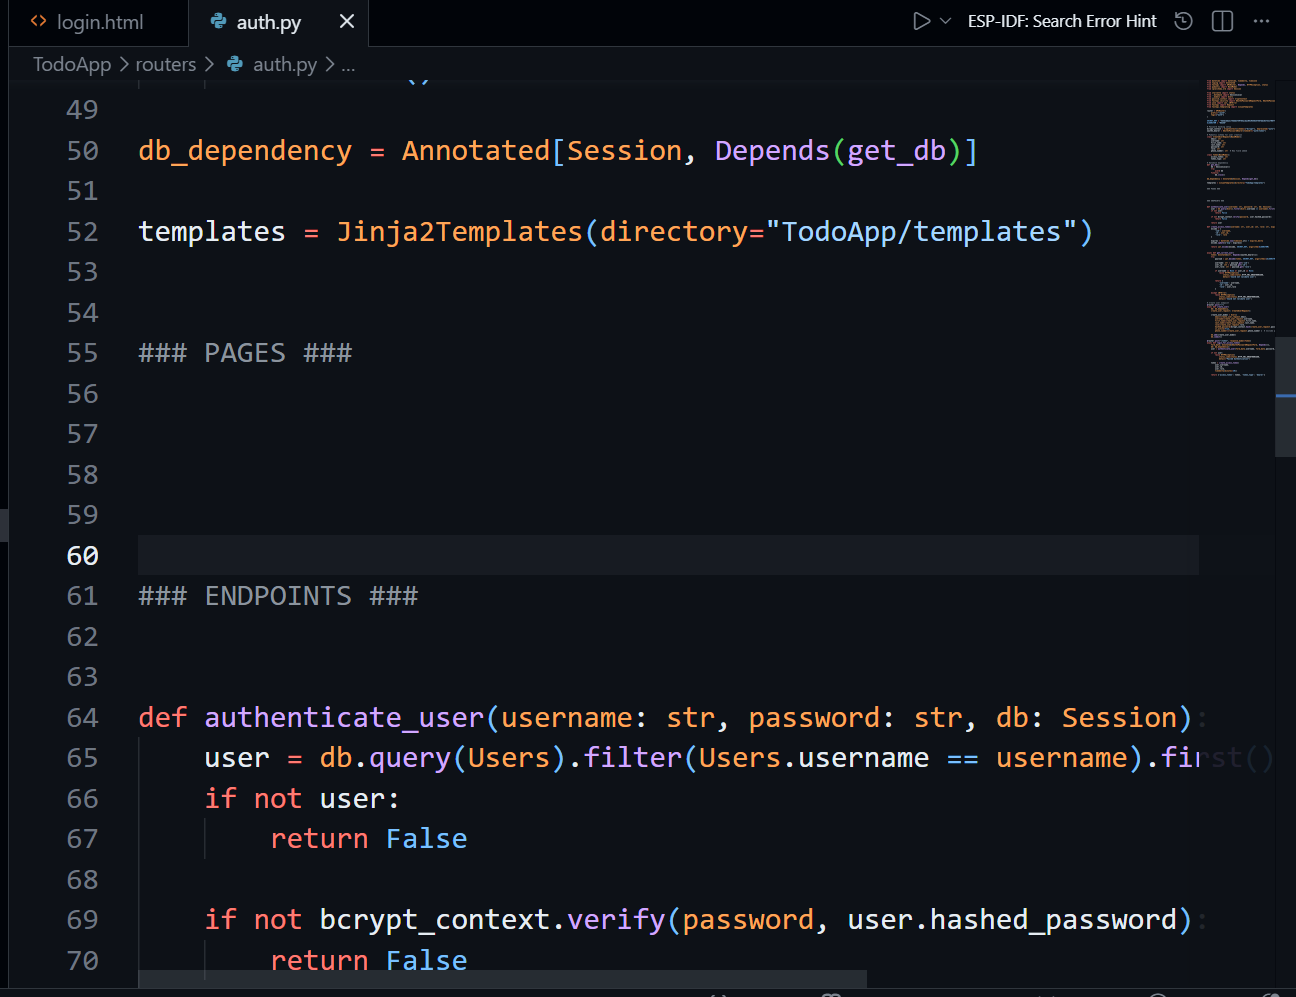
Before the endpoints are defined, create a template instance:
templates = Jinja2Templates(directory="TodoApp/templates")

def authenticate_user(username: str, password: str, db: Session):
    user = db.query(Users).filter(Users.username == username).first()
    if not user:
        return False

    if not bcrypt_context.verify(password, user.hashed_password):
        return False

    return user
🧭 Organizing Page Routes
To keep the code organized, we can separate page routes from API endpoints.
Example structure:
### Pages ###Then below that:
### Endpoints ###This makes it easier to distinguish between:
Pages that render HTML
Endpoints that return JSON responses
🌐 Creating the Login Page Route
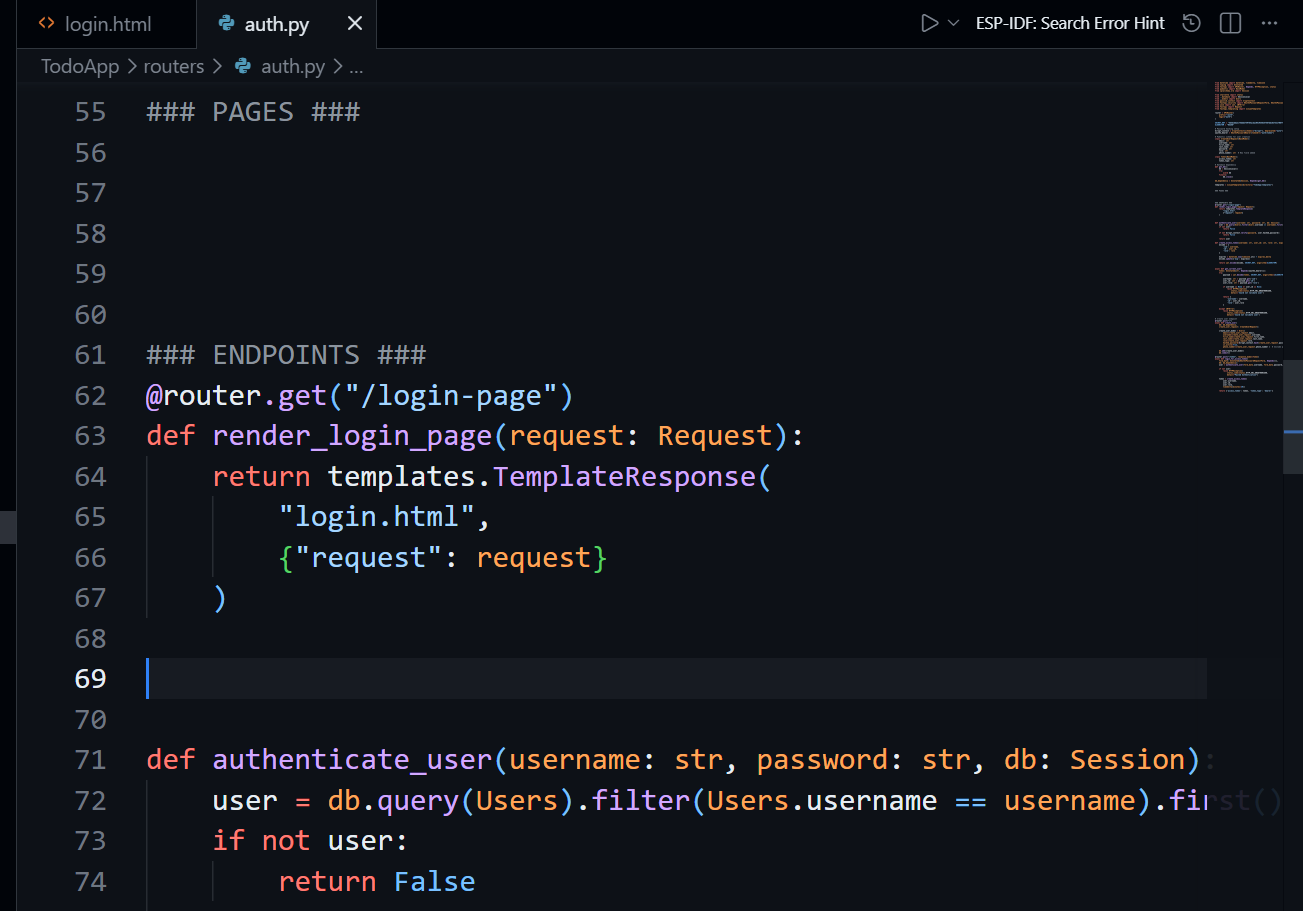
Now create the endpoint that renders the login template.
@router.get("/login-page")
def render_login_page(request: Request):
    return templates.TemplateResponse(
        "login.html",
        {"request": request}
    )
▶️ Running the Application
Start the FastAPI application using Uvicorn:
uvicorn TodoApp.main:app --reload🌍 Viewing the Login Page
Open your browser and visit:
<http://127.0.0.1:8000/auth/login-page>You should now see a fully styled login page with:
Username field
Password field
Login button
Register link
⚠️ Current Limitations
At this stage:
The login button does not perform authentication
The password is still sent as plain text
No JavaScript validation or secure request handling is implemented yet
These issues will be resolved once we add the JavaScript logic that interacts with our FastAPI authentication endpoints.
For now, our goal is simply to create the frontend structure.
🎬 Next Steps
In the next lesson, we will create another HTML page and continue expanding the frontend of our FastAPI full-stack application.
Gradually, we will connect these pages to our backend logic and build a complete authentication system.
📝 Summary
In this lesson, we:
Created the
login.htmltemplateImported Base CSS and Bootstrap CSS
Built a styled login form using Bootstrap
Added username and password input fields
Included a register page link
Created a FastAPI route to render the login page
Successfully displayed the login interface in the browser
Our authentication interface is now beginning to take shape as we continue building the full-stack FastAPI Todo application.