🔑 Creating and Using AWS Access Keys
This lesson covers creating AWS Access Keys and setting up the AWS CLI to work with your account from the command line.
Access keys are how you authenticate programmatically — through the CLI, SDKs, or any application running outside AWS itself.
By the end, you'll know how to:
Create AWS Access Keys
Find your Access Key ID and Secret Access Key
Configure the AWS CLI with them
See how IAM permissions shape what your CLI commands can actually do
⚙️ Step 1: Create an Access Key
First, we need to create an access key for our IAM user.
Click on your username in the Identity and Access Management (IAM).
Navigate to Security Credentials.
Scroll down to the Access Keys section.
Click Create Access Key.
AWS will ask what you're using it for — CLI access, an app running locally, or an app running on AWS.
A note from AWS: it'll nudge you toward more secure alternatives like AWS CloudShell or CLI v2 with IAM Identity Center. Those are better practice, but for this lesson, we'll create a plain access key instead.
To proceed: select CLI → check "I understand the above recommendation" → click Create Access Key.
⚠️ Important
AWS will show you the Access Key ID and Secret Access Key once.
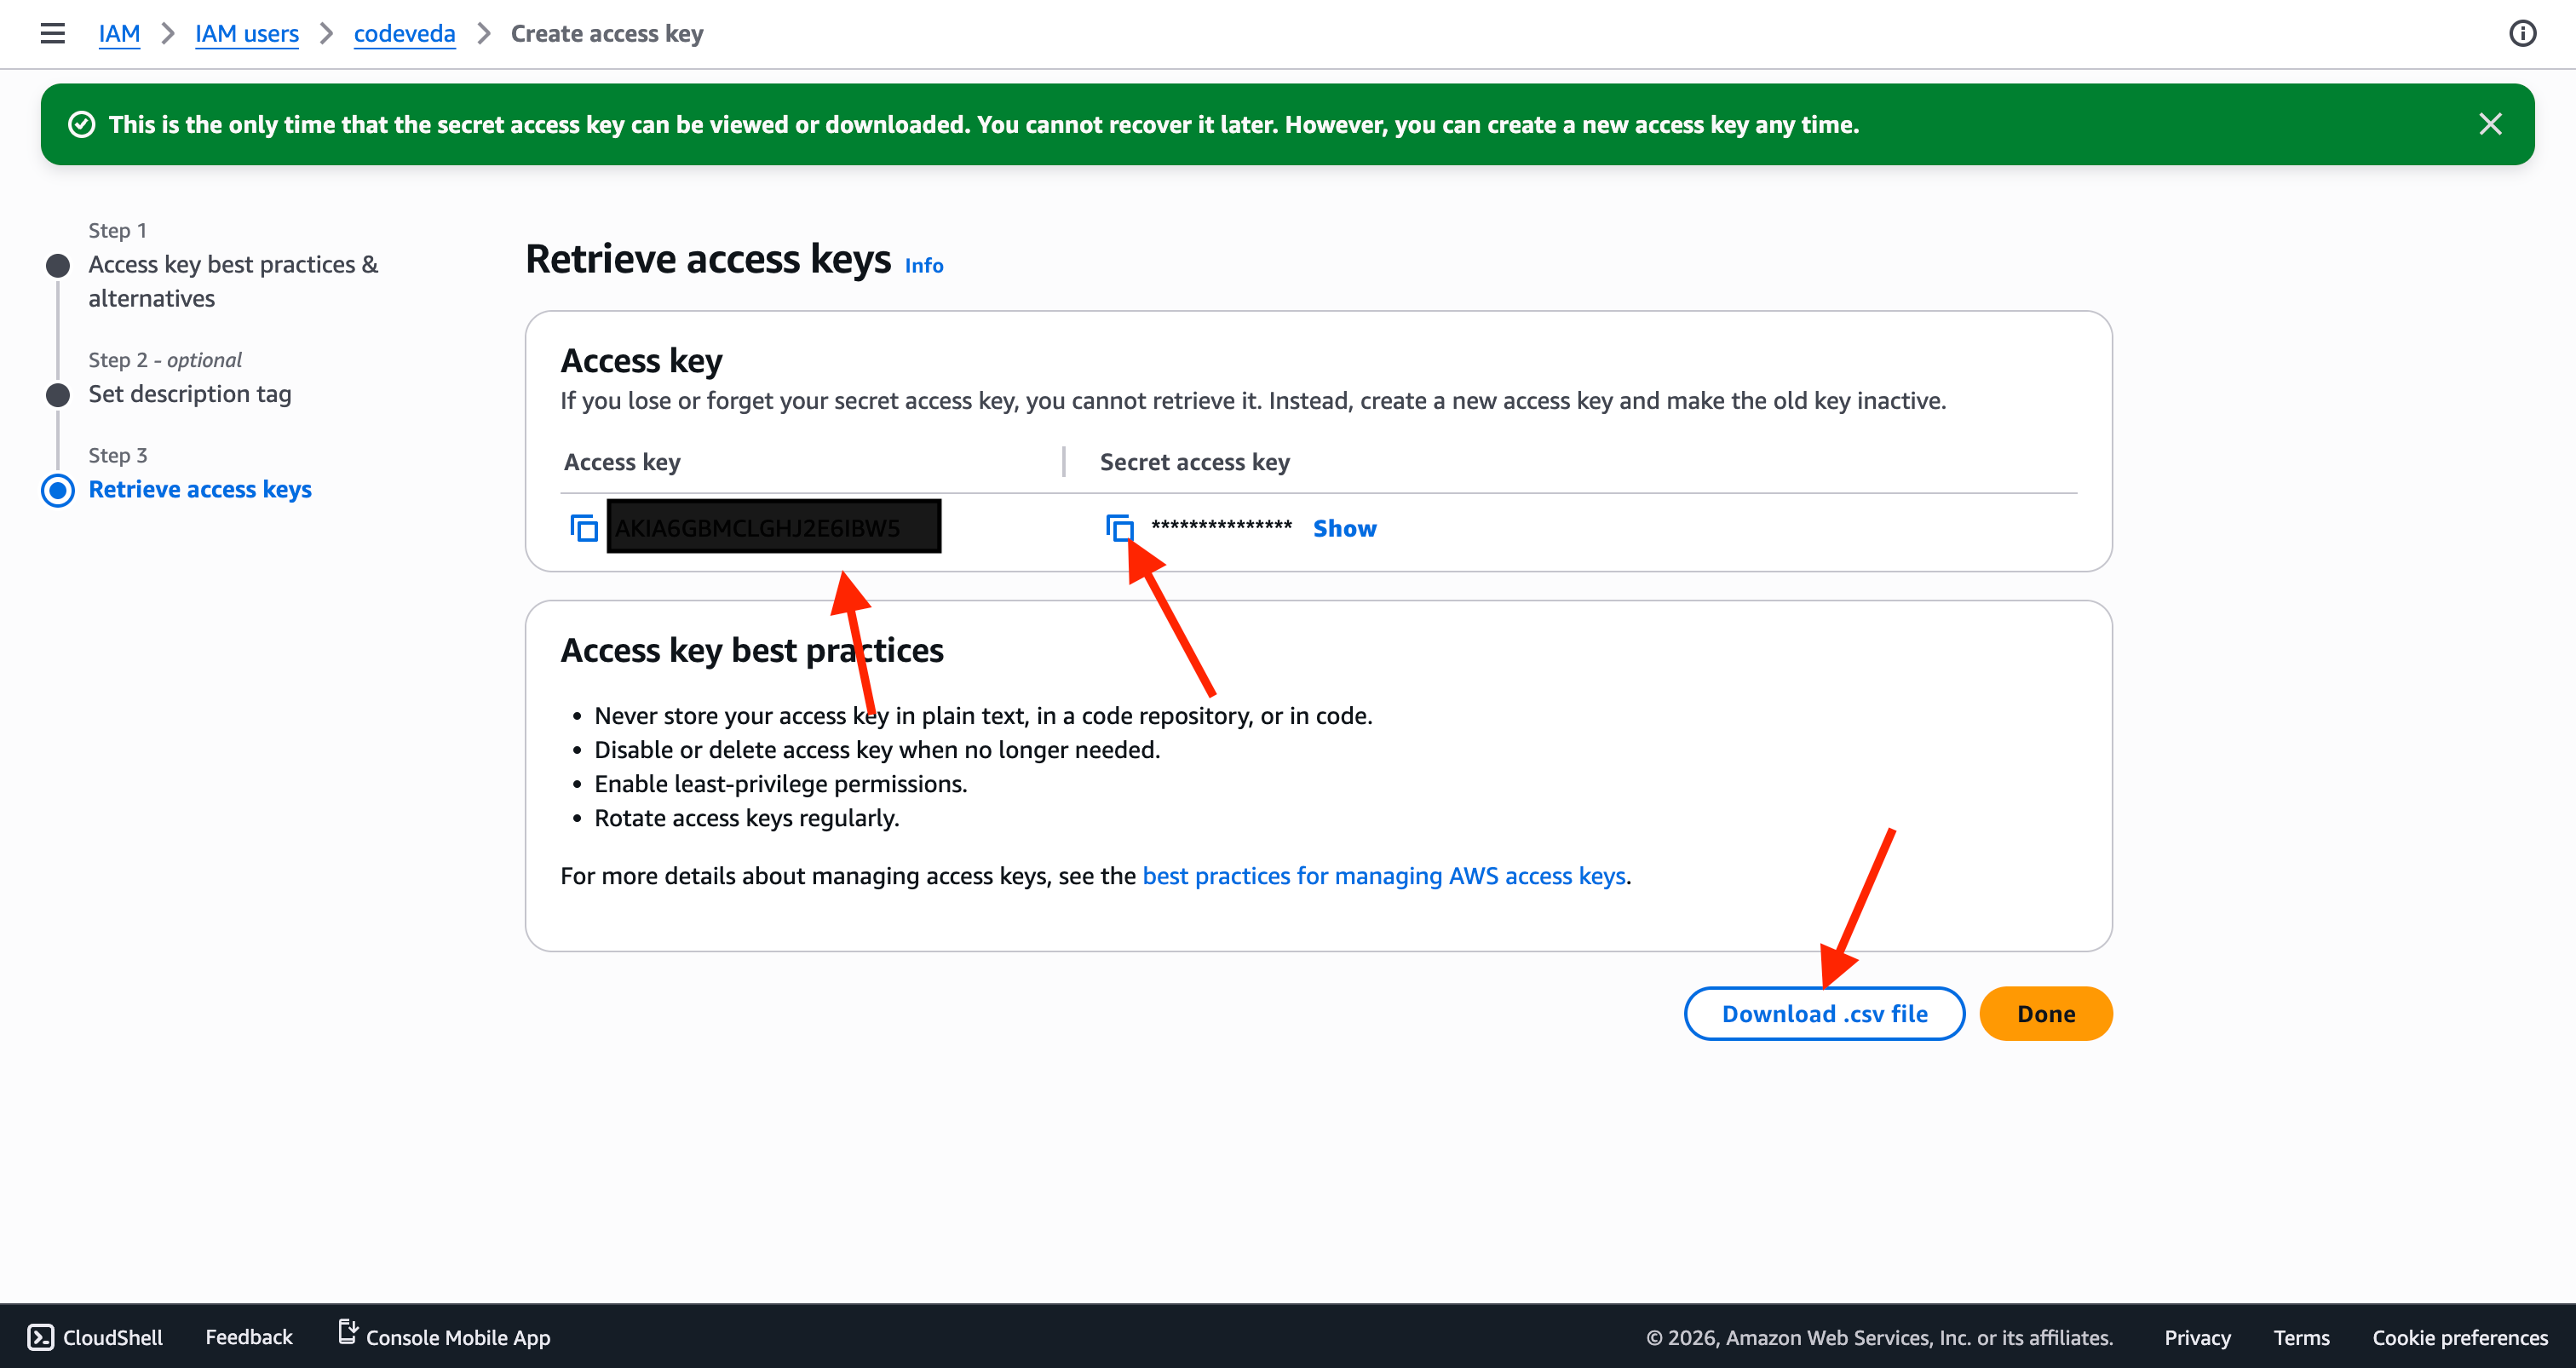
❗ That's the only time you'll see the secret key. Copy it, download the credentials file, and store it somewhere safe before you move on.
💻 Step 2: Configure the AWS CLI
With your access keys ready, point the CLI at your account. Open your terminal and run:
aws configureYou'll be prompted for four things, one at a time:
1. Access Key ID
AWS Access Key ID [None]: YOUR_ACCESS_KEYPaste the Access Key ID you generated in the last step.
2. Secret Access Key
AWS Secret Access Key [None]: YOUR_SECRET_KEYPaste the Secret Access Key.
3. Default region
Default region name [None]: ap-south-1This is the AWS region your commands will target by default. You'll find region codes in the region dropdown in the console — it lists both the name and the code side by side. This tutorial uses Mumbai (ap-south-1); another common choice is N. Virginia (us-east-1). Pick whichever is closest to you or matches where your resources live.
4. Output format
Default output format [None]:Just press Enter to accept the default.
That's it — the CLI is configured.

🔎 Step 3: Test It
Confirm everything's working:
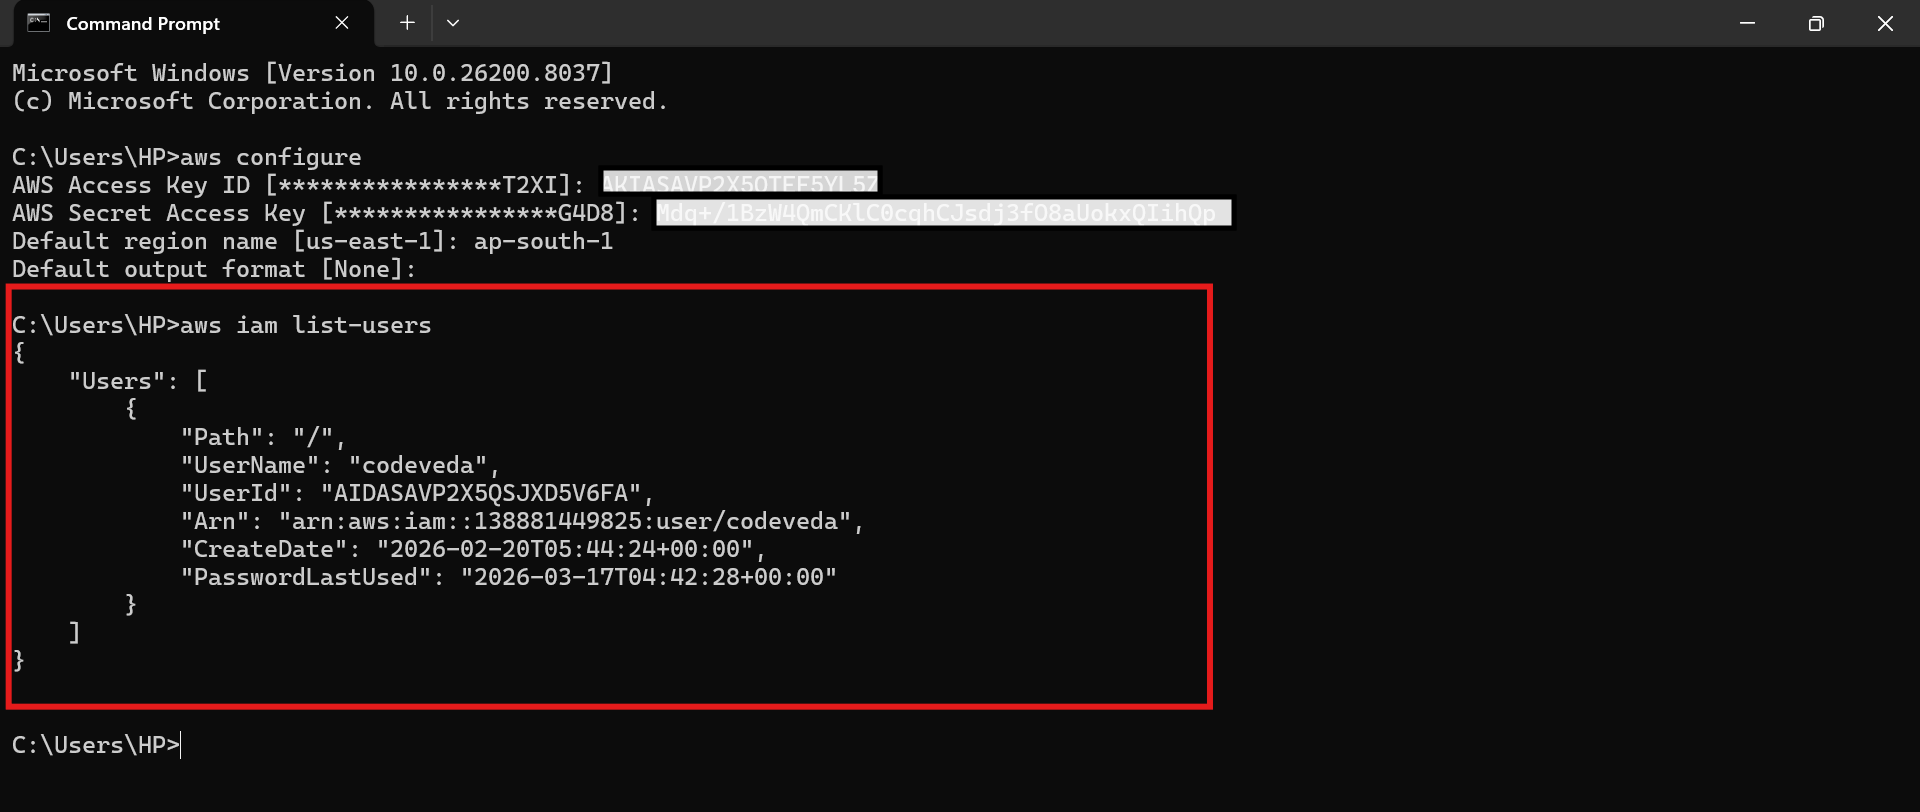
aws iam list-usersThis pulls up every IAM user in your account — username, user ID, ARN, creation date, and last password use. Same data you'd see in the Console, just from the terminal.
🔐 Understanding IAM Permissions
The CLI and the Console both answer to the same IAM permissions — neither gets special treatment.
To see this in action: remove a user from the Admins group. After that:
The Console starts throwing access denied errors
The same happens on the CLI — running
aws iam list-usersno longer returns data, it gets rejected for insufficient permissions

The takeaway: IAM permissions apply the same way everywhere — Console, CLI, or raw API calls. There's no separate set of rules per interface.
🔧 Restoring Access
To give the user their permissions back:
Go to IAM → Groups
Open the Admins group
Add the user back
Once added, admin access returns immediately.