📁 First Things First — Set Up Your File Structure
Before we dive in, let's get organized:
In your project root, create a new folder called
level1Inside that folder, create a new notebook file called
part1.ipynb
Your structure should look like this:
llm_engineering/
└── level1/
    └── part1.ipynb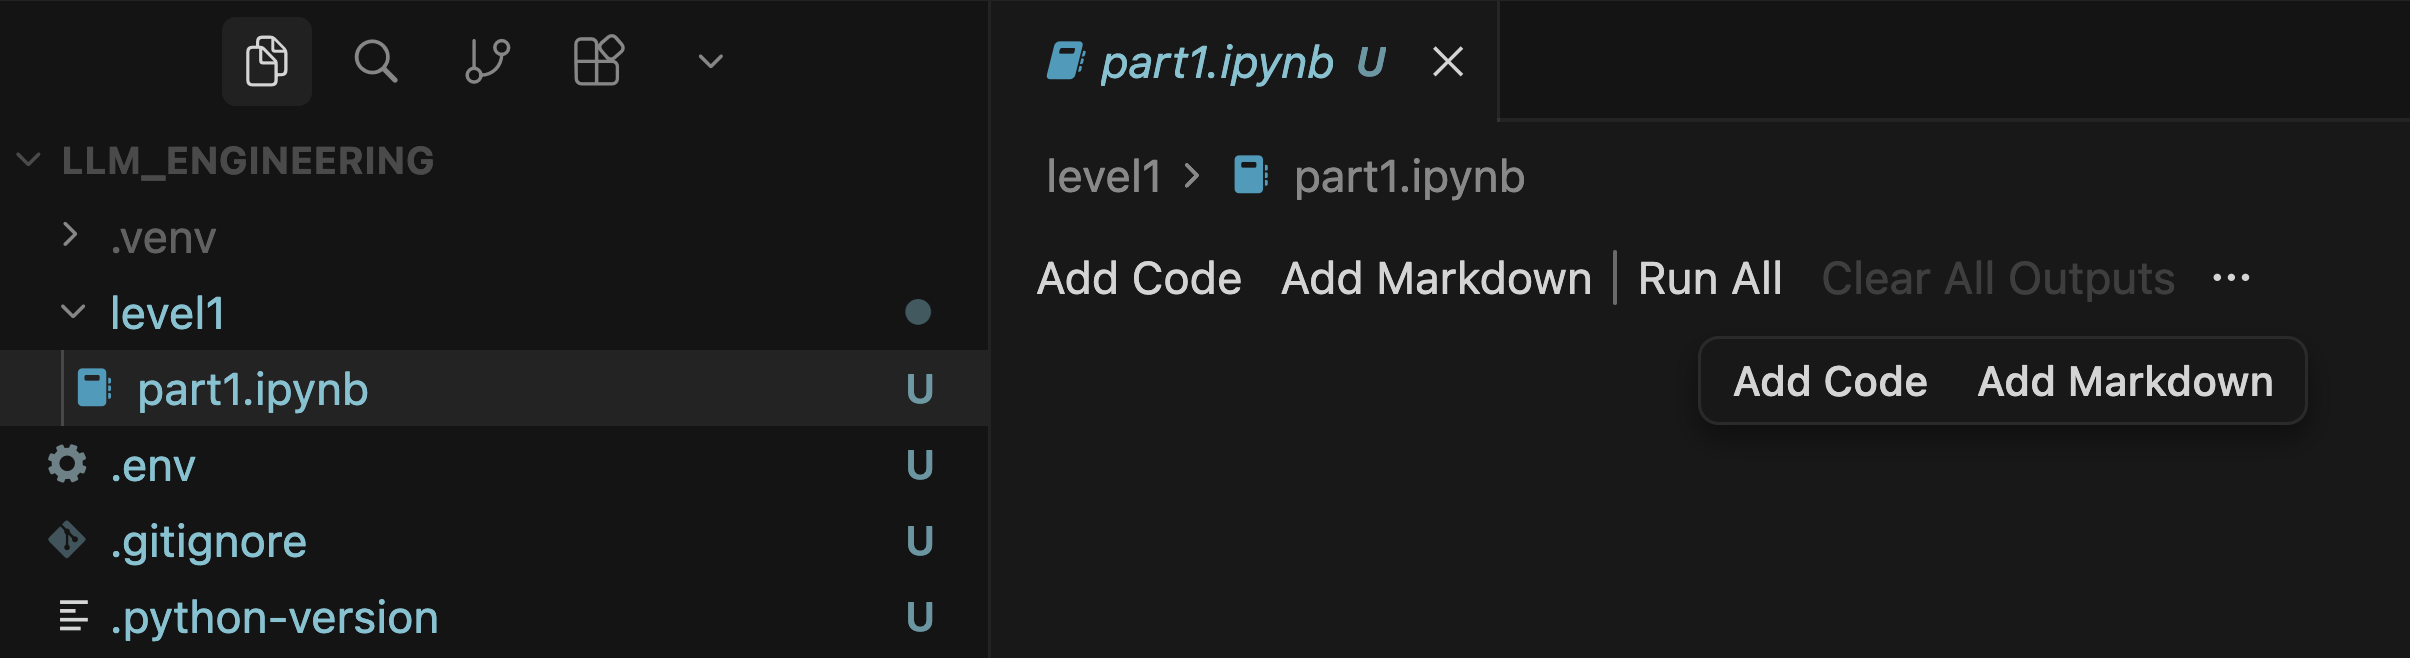
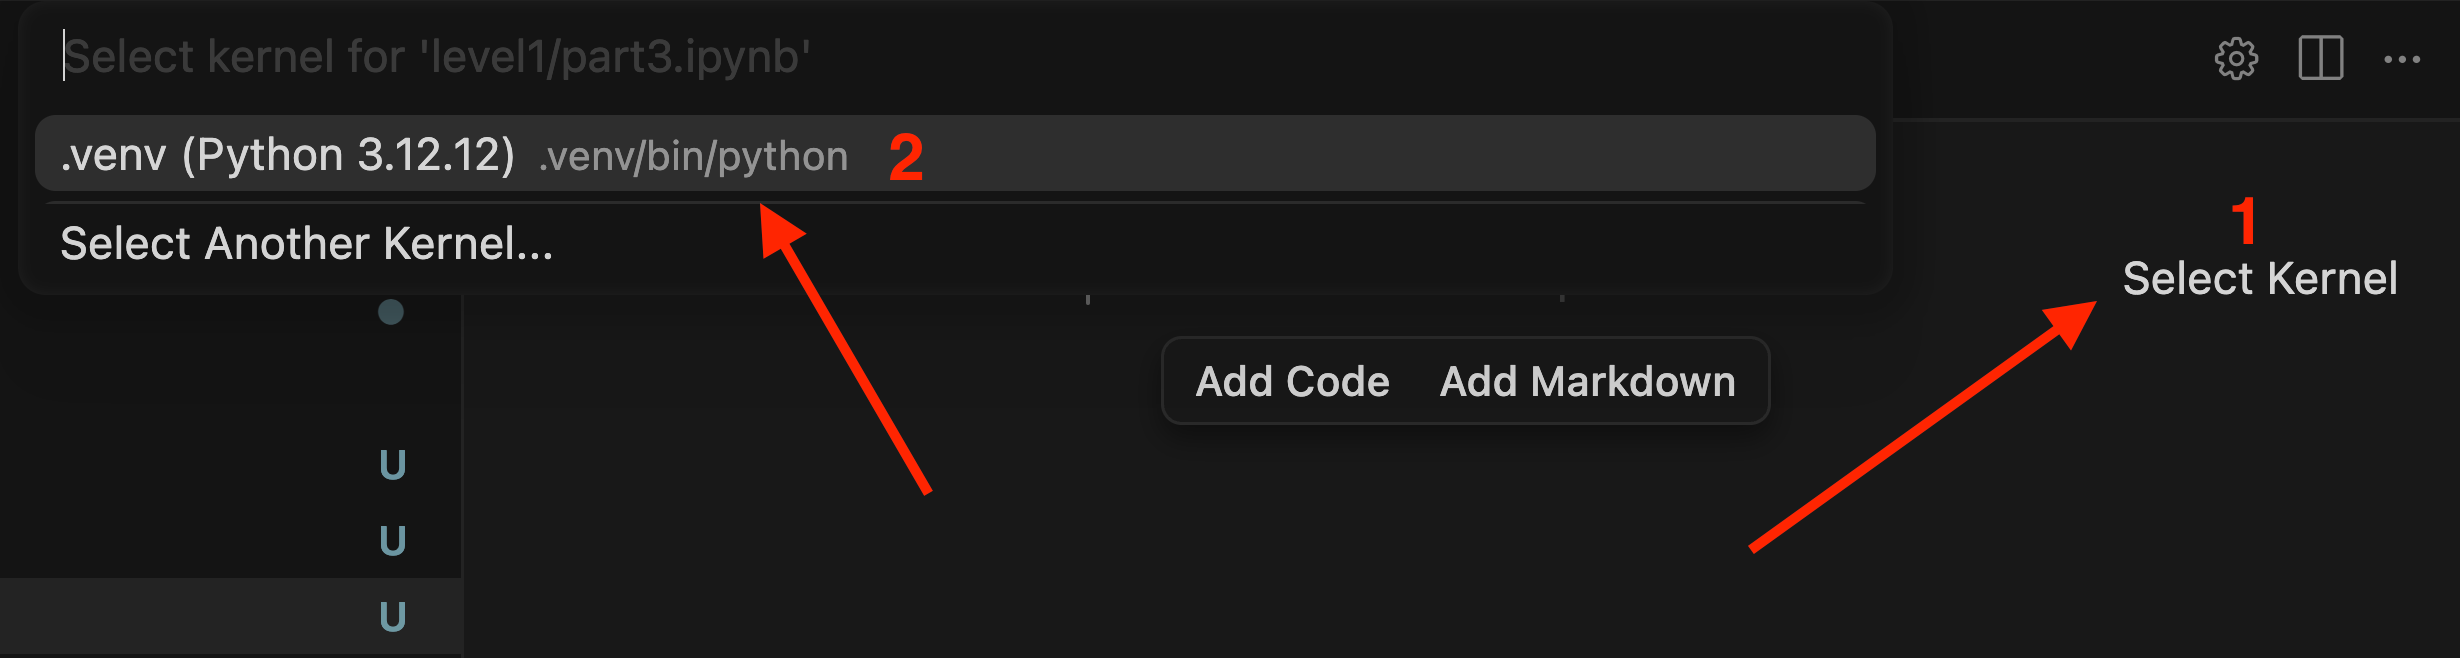
✅ Make sure your Kernel is pointed to the correct virtual environment before running anything! 🐍
🧩 Step 1 — Import the Necessary Packages
▶️ Create a new code cell and run it:
import os
from dotenv import load_dotenv
from IPython.display import Markdown, display
from openai import OpenAI
⚠️ Common Issue: Kernel Problems
If the cell hangs forever, throws import errors, or simply won't execute, the culprit is usually the Python kernel. Double check the top-right corner of your notebook — it should be pointing to your local .venv virtual environment, not the system Python.
🔑 Step 2 — Load Your Environment Variables
▶️ Create another code cell and run it:
# Load environment variables from .env file
load_dotenv(override=True)
api_key = os.getenv('OPENAI_API_KEY')

# Validate the key
if not api_key:
    print("No API key was found - please head over to the troubleshooting notebook in this folder to identify & fix!")
elif not api_key.startswith("sk-proj-"):
    print("An API key was found, but it doesn't start sk-proj-; please check you're using the right key - see troubleshooting notebook")
elif api_key.strip() != api_key:
    print("An API key was found, but it looks like it might have space or tab characters at the start or end - please remove them - see troubleshooting notebook")
else:
    print("API key found and looks good so far!")
🔍 What's happening under the hood?
📂 Reads your
.envfile📥 Loads the environment variables into memory
🔎 Fetches the
OPENAI_API_KEYvalue✅ Validates the key format and structure
Expected output:
API key found and looks good so far!🌩️ Step 3 — Your First Cloud LLM Call
Now comes the exciting part — your very first real request to OpenAI! 🎉
Unlike local models like Ollama that run on your machine, this sends a request to OpenAI's cloud-hosted models and gets a response back in real time.
▶️ Create a new code cell and run it:
# Preview: this is all it takes to send a message to OpenAI!
message = "Hello, GPT! This is my first ever message to you! Hi!"
messages = [{"role": "user", "content": message}]
messages
This simply prepares your message in the format OpenAI expects. ✉️
▶️ Now create another code cell and run it:
openai = OpenAI()

response = openai.chat.completions.create(model="gpt-4o-mini", messages=messages)
response.choices[0].message.content
This actually sends the request to OpenAI and prints back the model's reply.
openai = OpenAI()Creates the OpenAI client using your API key so your Python app can communicate with OpenAI.
response = openai.chat.completions.create(
    model="gpt-4o-mini",
    messages=messages
)
Sends your prompt (messages) to the gpt-4o-mini model and asks it to generate a response.
chat→ chat-based interactioncompletions→ generate an answercreate()→ send the request
response.choices[0].message.contentExtracts the actual text reply from the response object.
Flow:
Your prompt → OpenAI API → AI generates answer → extract response text
Expected Output
You should see a friendly response from GPT printed below the cell — if you do, congratulations! You've just made your first ever LLM API call! 🎊

✅ Special Note
📌 Important Reminders — Keep These in Mind!
These two points are crucial — remember them for all upcoming lessons:
🖥️ Always select your virtual environment as the kernel before running any notebook. You can check this in the top-right corner of your notebook.
▶️ Always create a separate code cell for each step and run it immediately. Don't skip running a cell before moving to the next one — skipping this is one of the most common causes of errors!
💡 Get into the habit of these two practices from the start and you'll save yourself a lot of headaches down the road! 🙌