📘 OpenAI API Access for LLM Development
At this stage of the course, the focus shifts from running local models to setting up access to OpenAI’s API, which allows you to use some of the most powerful frontier AI models in your projects.
However, this step is optional.
You can continue the course using free/open-source models.
OpenAI is recommended because of model quality and ease of use.
But it is not mandatory.
🧠 Understanding a Common Confusion: ChatGPT vs OpenAI API
This is one of the biggest misconceptions beginners run into. Many people assume:
"I already pay for ChatGPT — so why can't I use the API?"
The answer is simple: they are two completely separate products.
🤖 ChatGPT — The Consumer App
This is the product built for everyday users. You've probably used it here:
📱 Mobile app
💬 Conversational chat interface
It's designed for personal use with a simple subscription plan — just open it and start chatting.
⚙️ OpenAI API — The Developer Platform
This is the product built for developers and builders. You use it when creating:
🤖 Chatbots
🛠️ Applications & SaaS products
🔄 Automation systems
🧩 AI-powered workflows
Instead of a subscription, it runs on a pay-as-you-go model — you only pay for what you use, and you access it programmatically through code.
🚕 Simple Analogy
ChatGPT - Using Uber as a passenger
OpenAI API - Building your own taxi app using Uber's infrastructure
🤝 OpenAI Platform Setup
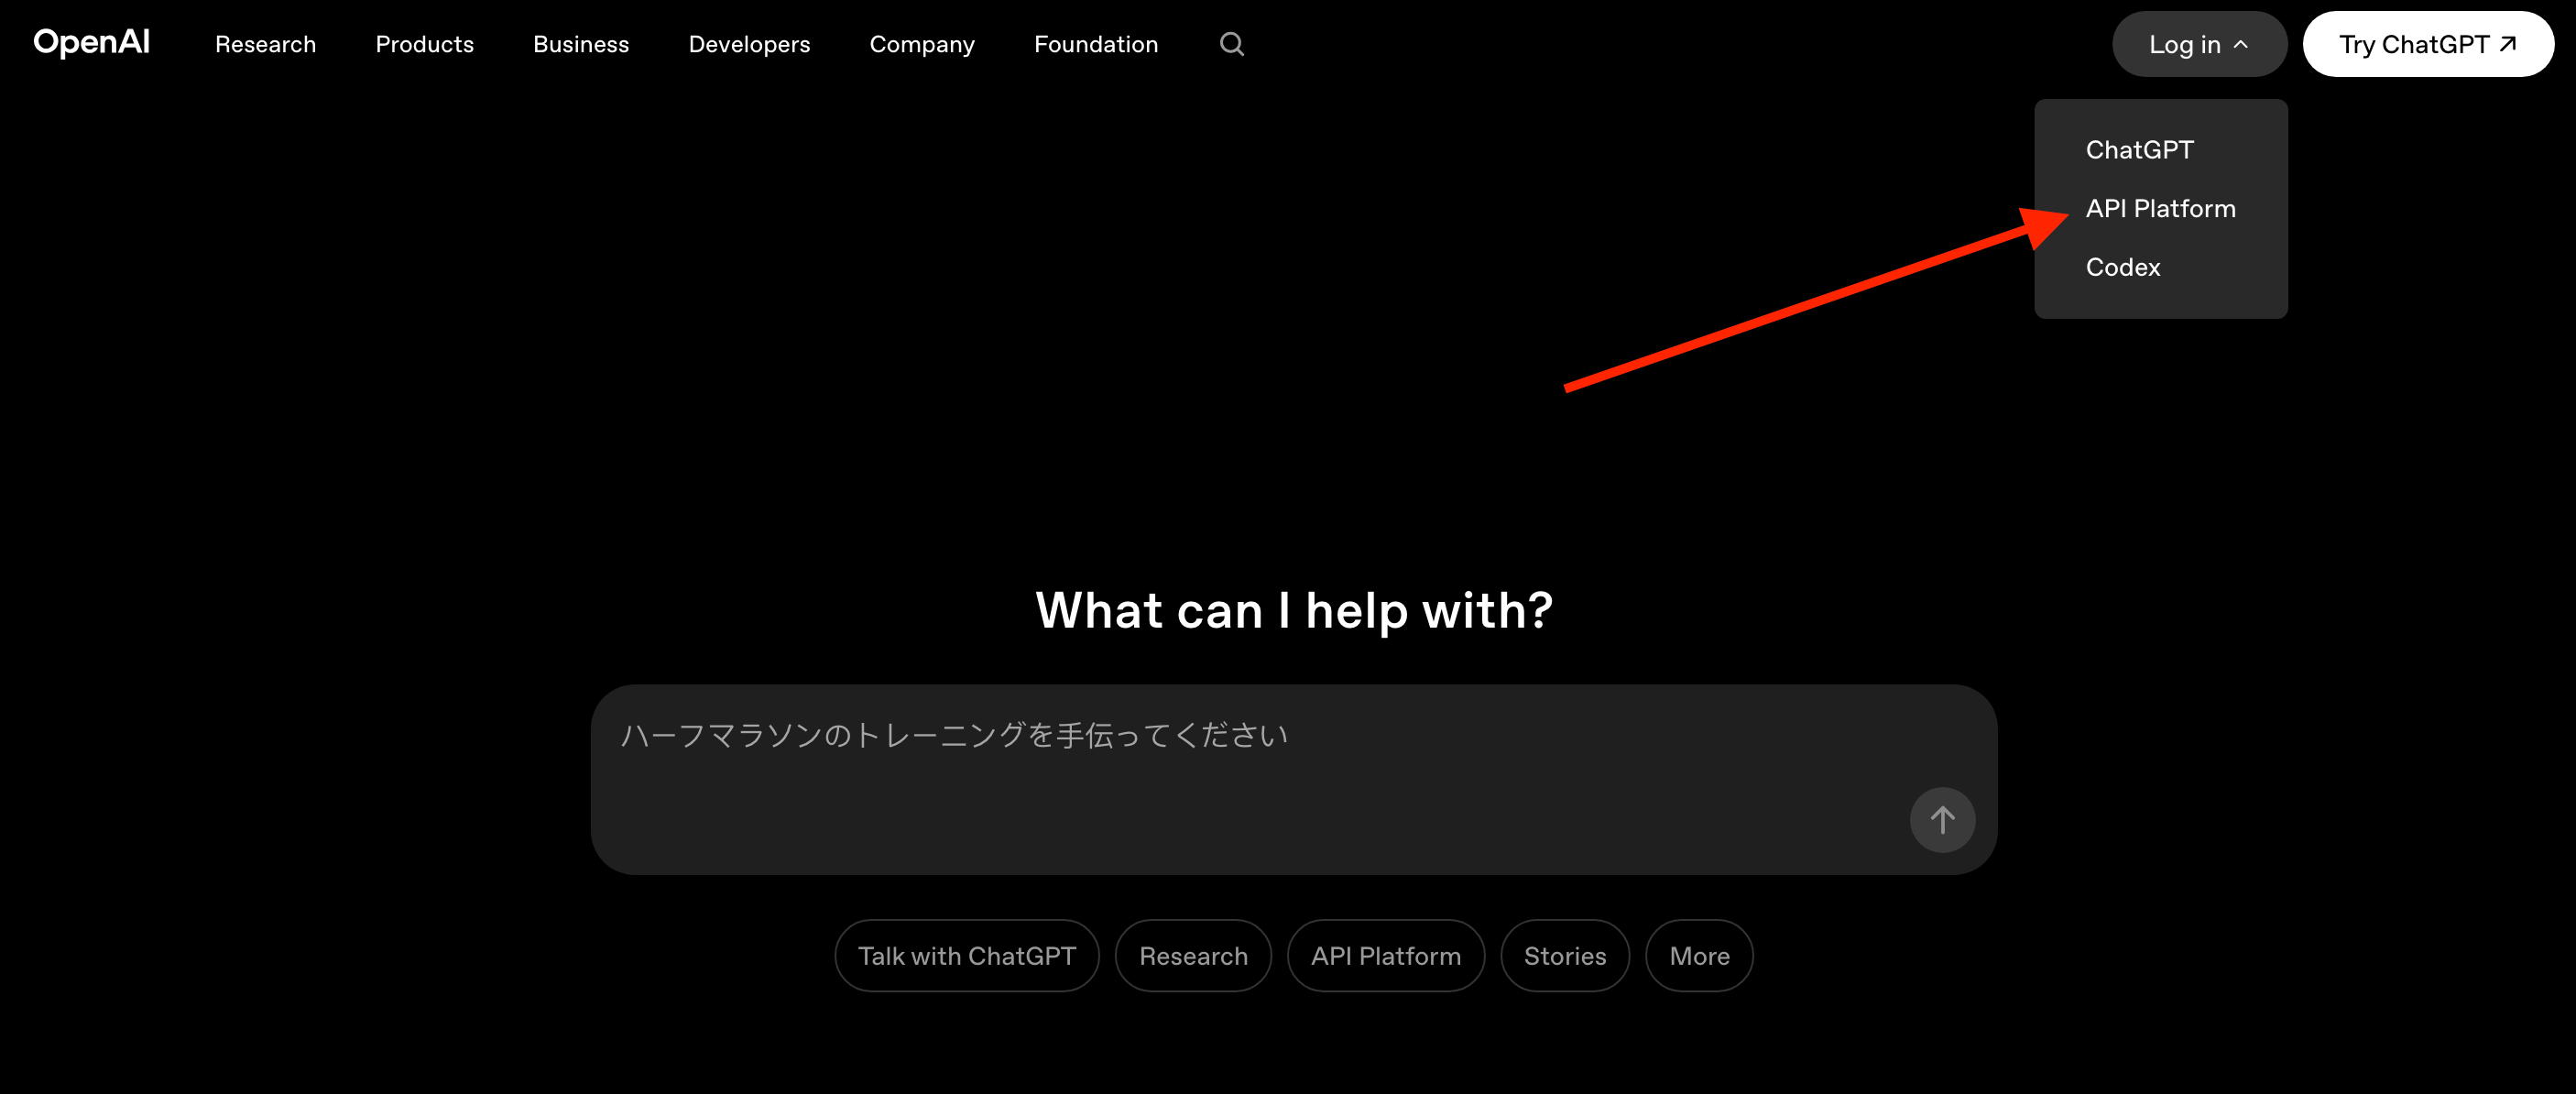
Visit OpenAI platform and Sign In
Click Settings icon and Then click Billing
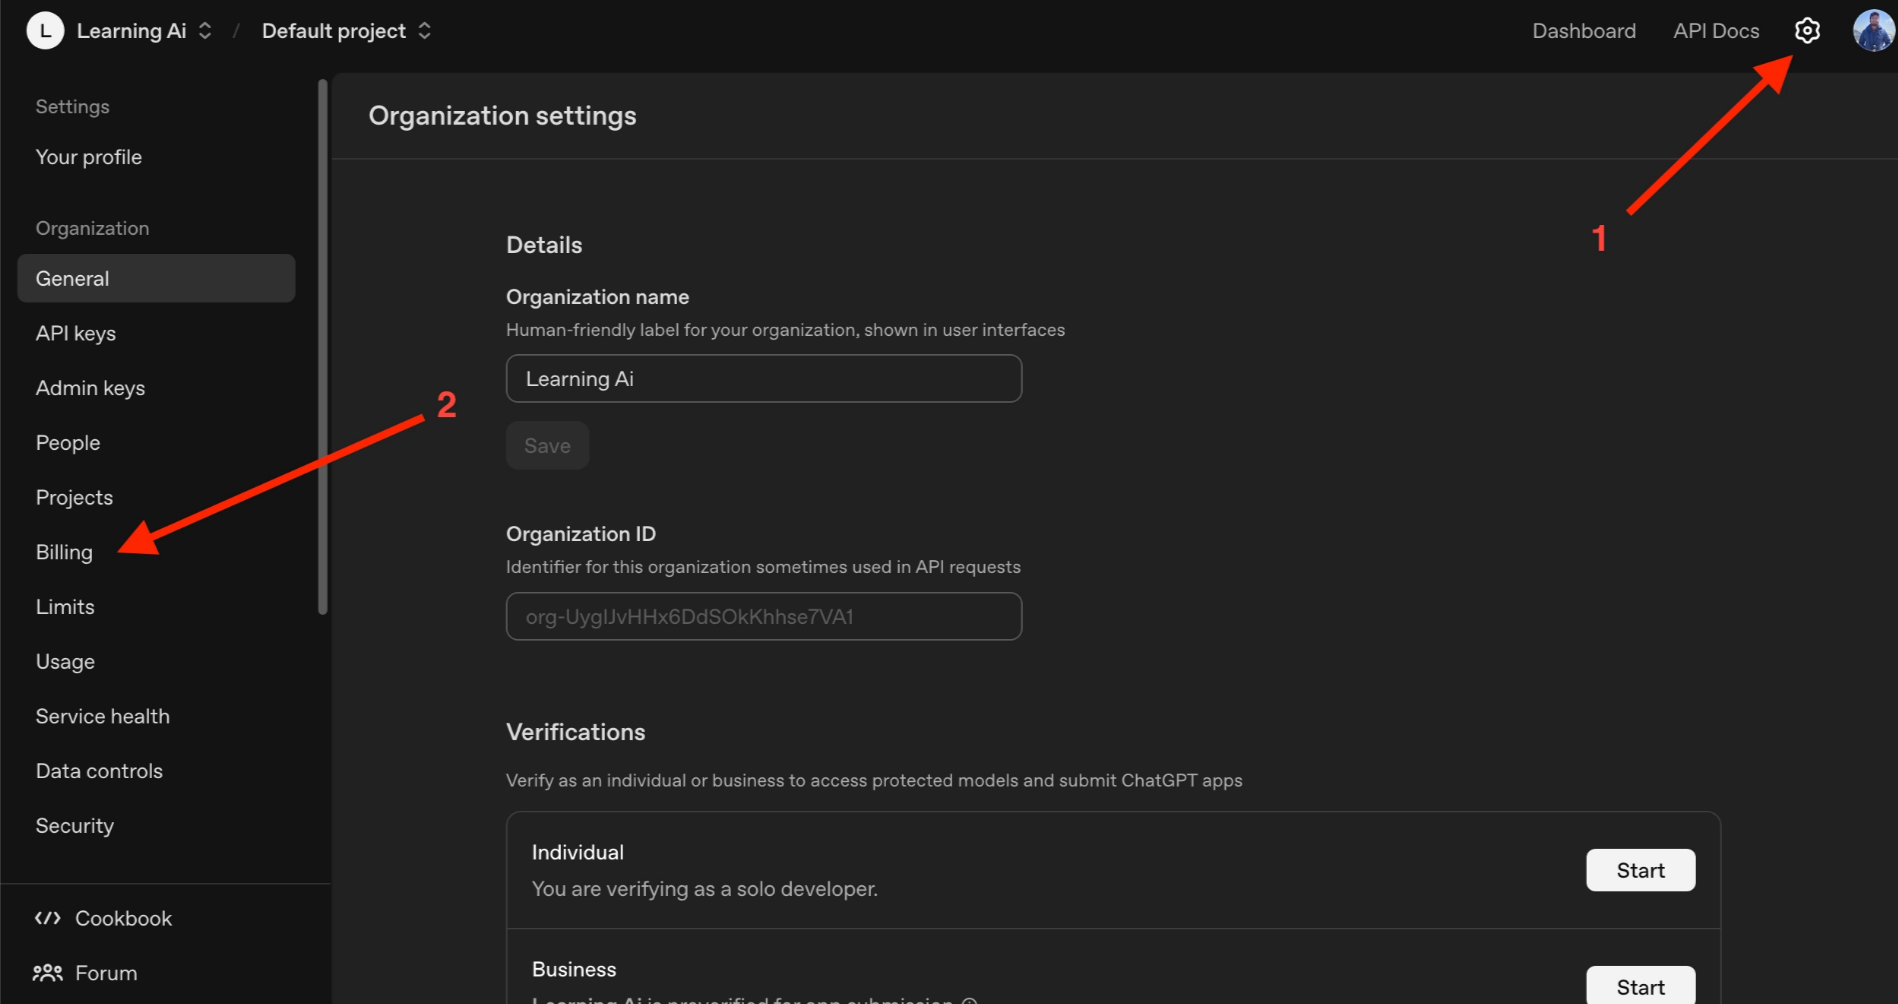
Add Billing details
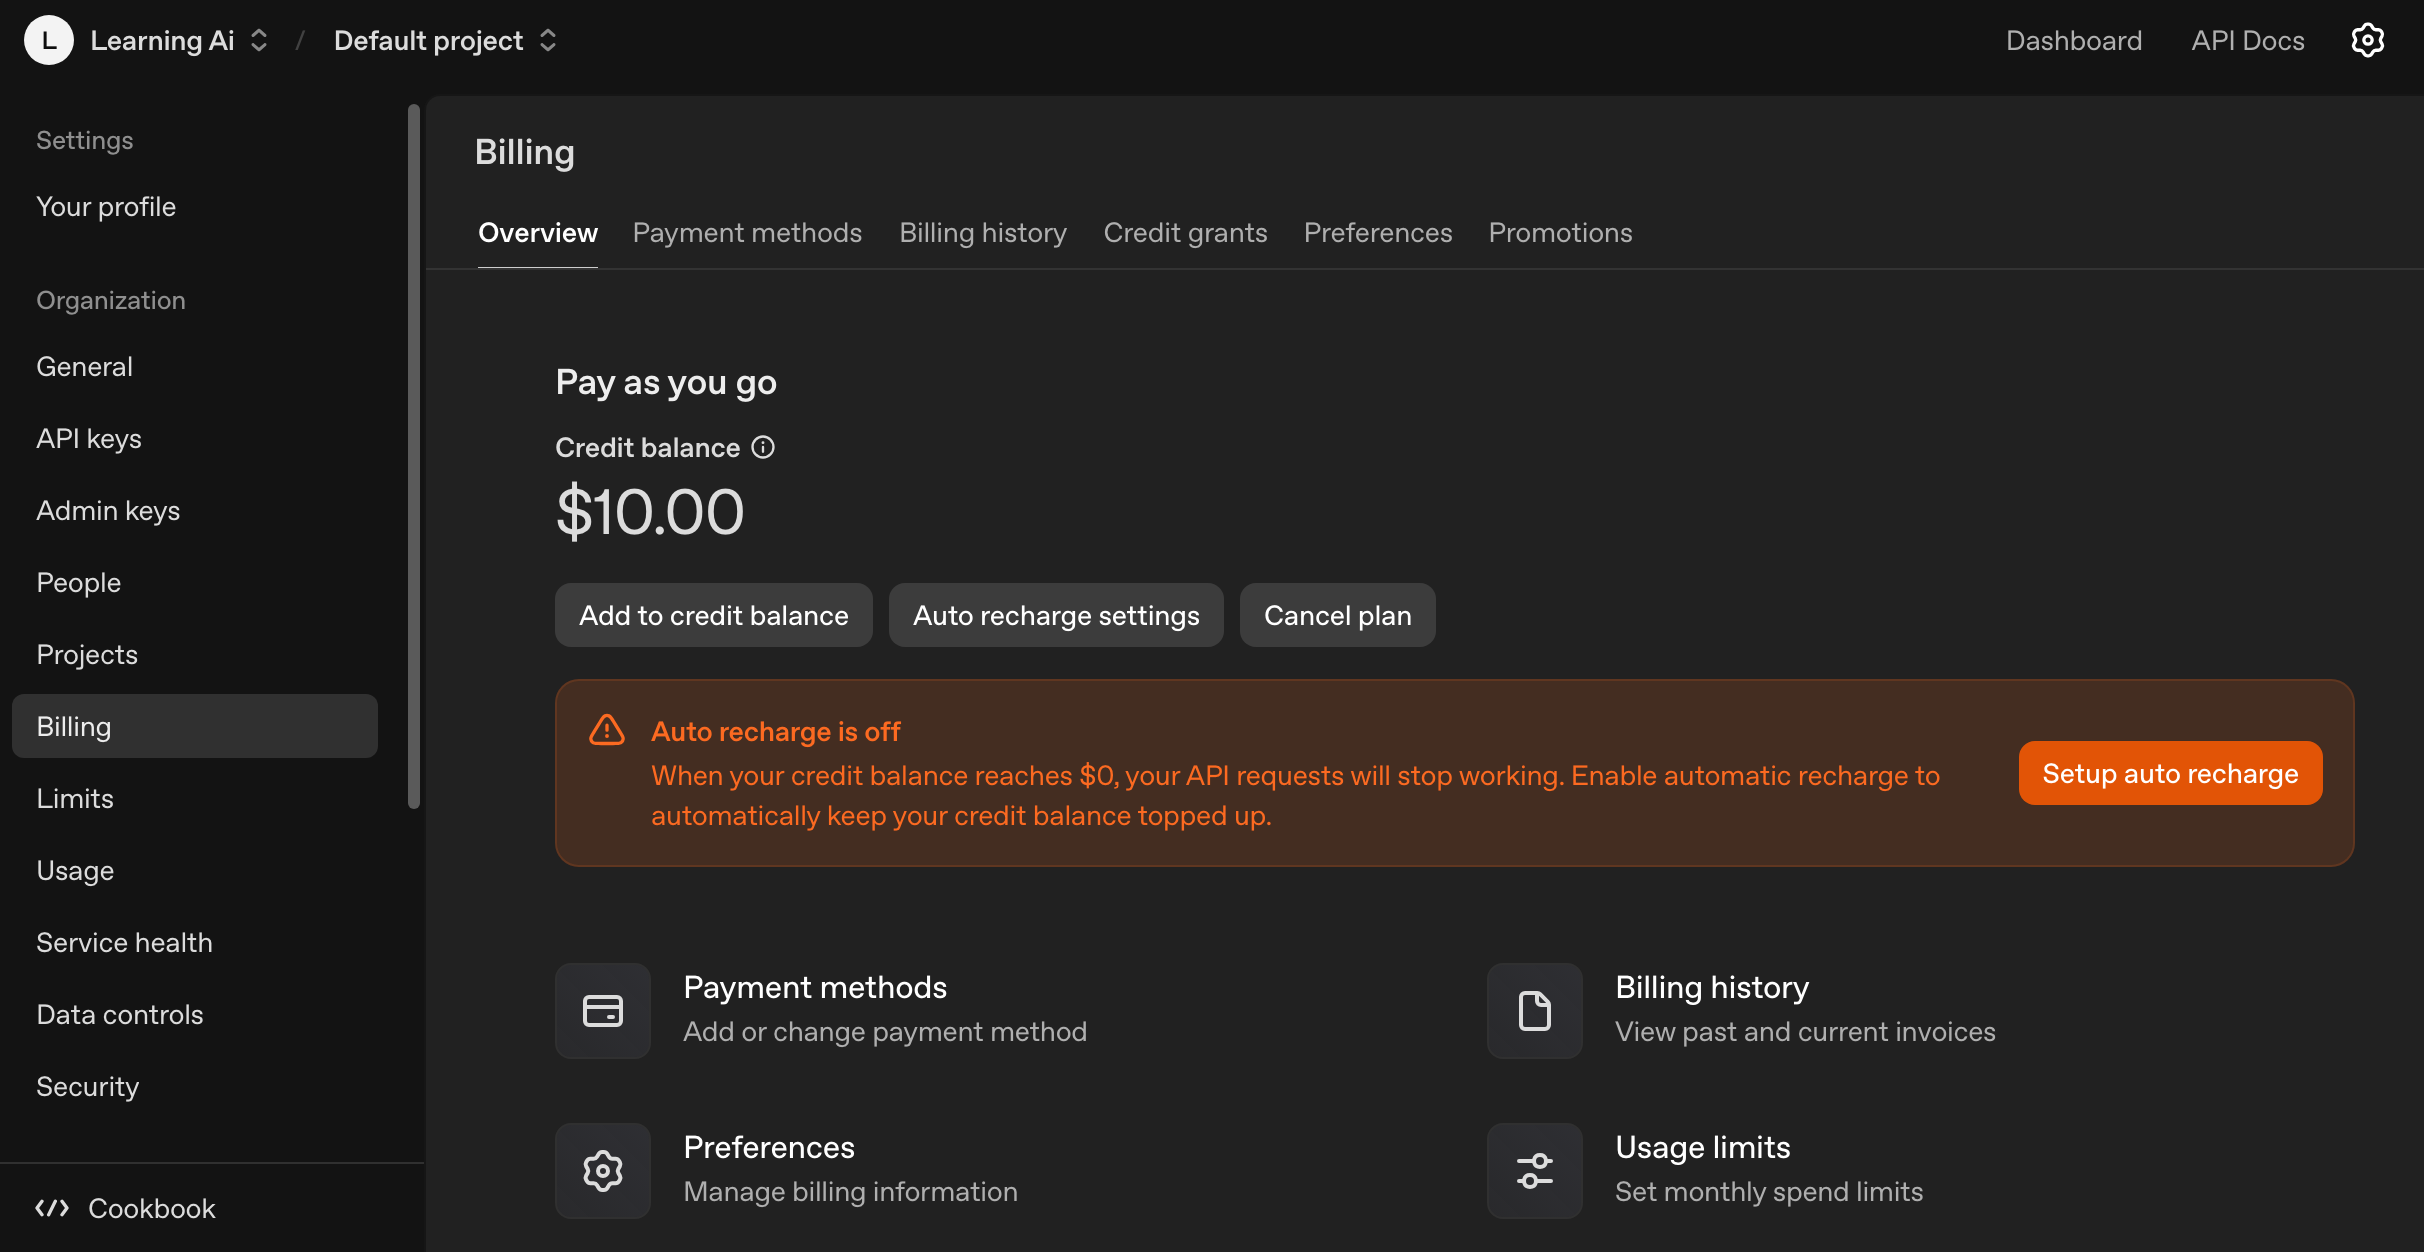
Click Add to credit balance
If no card attached already it will ask for card details
If card already attached, enter the amount (5$ or 10$) and proceed with the payment
And after successful transaction click API keys
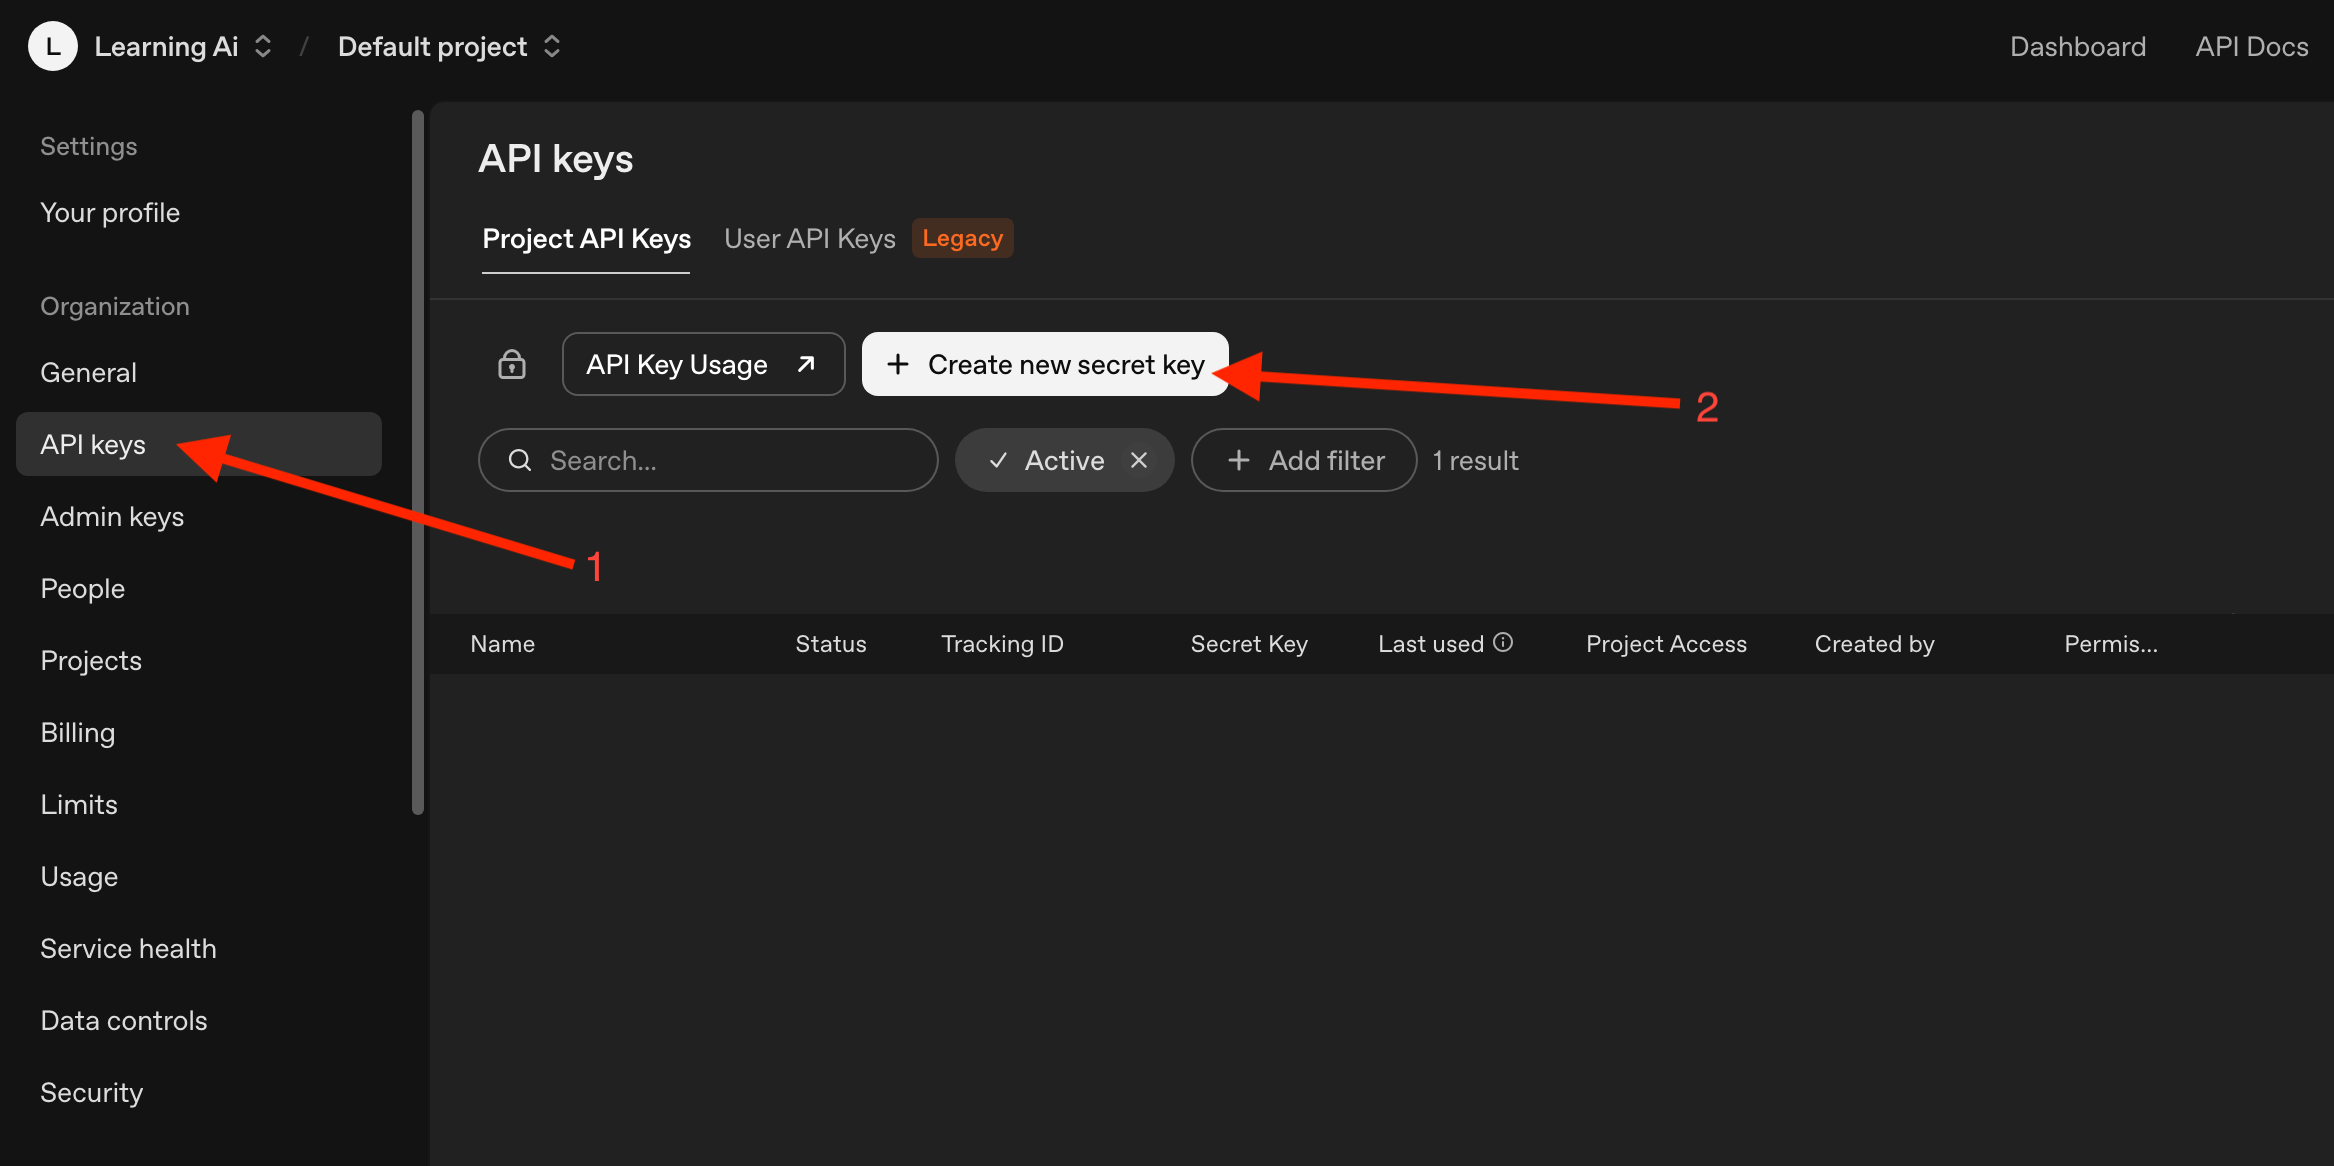
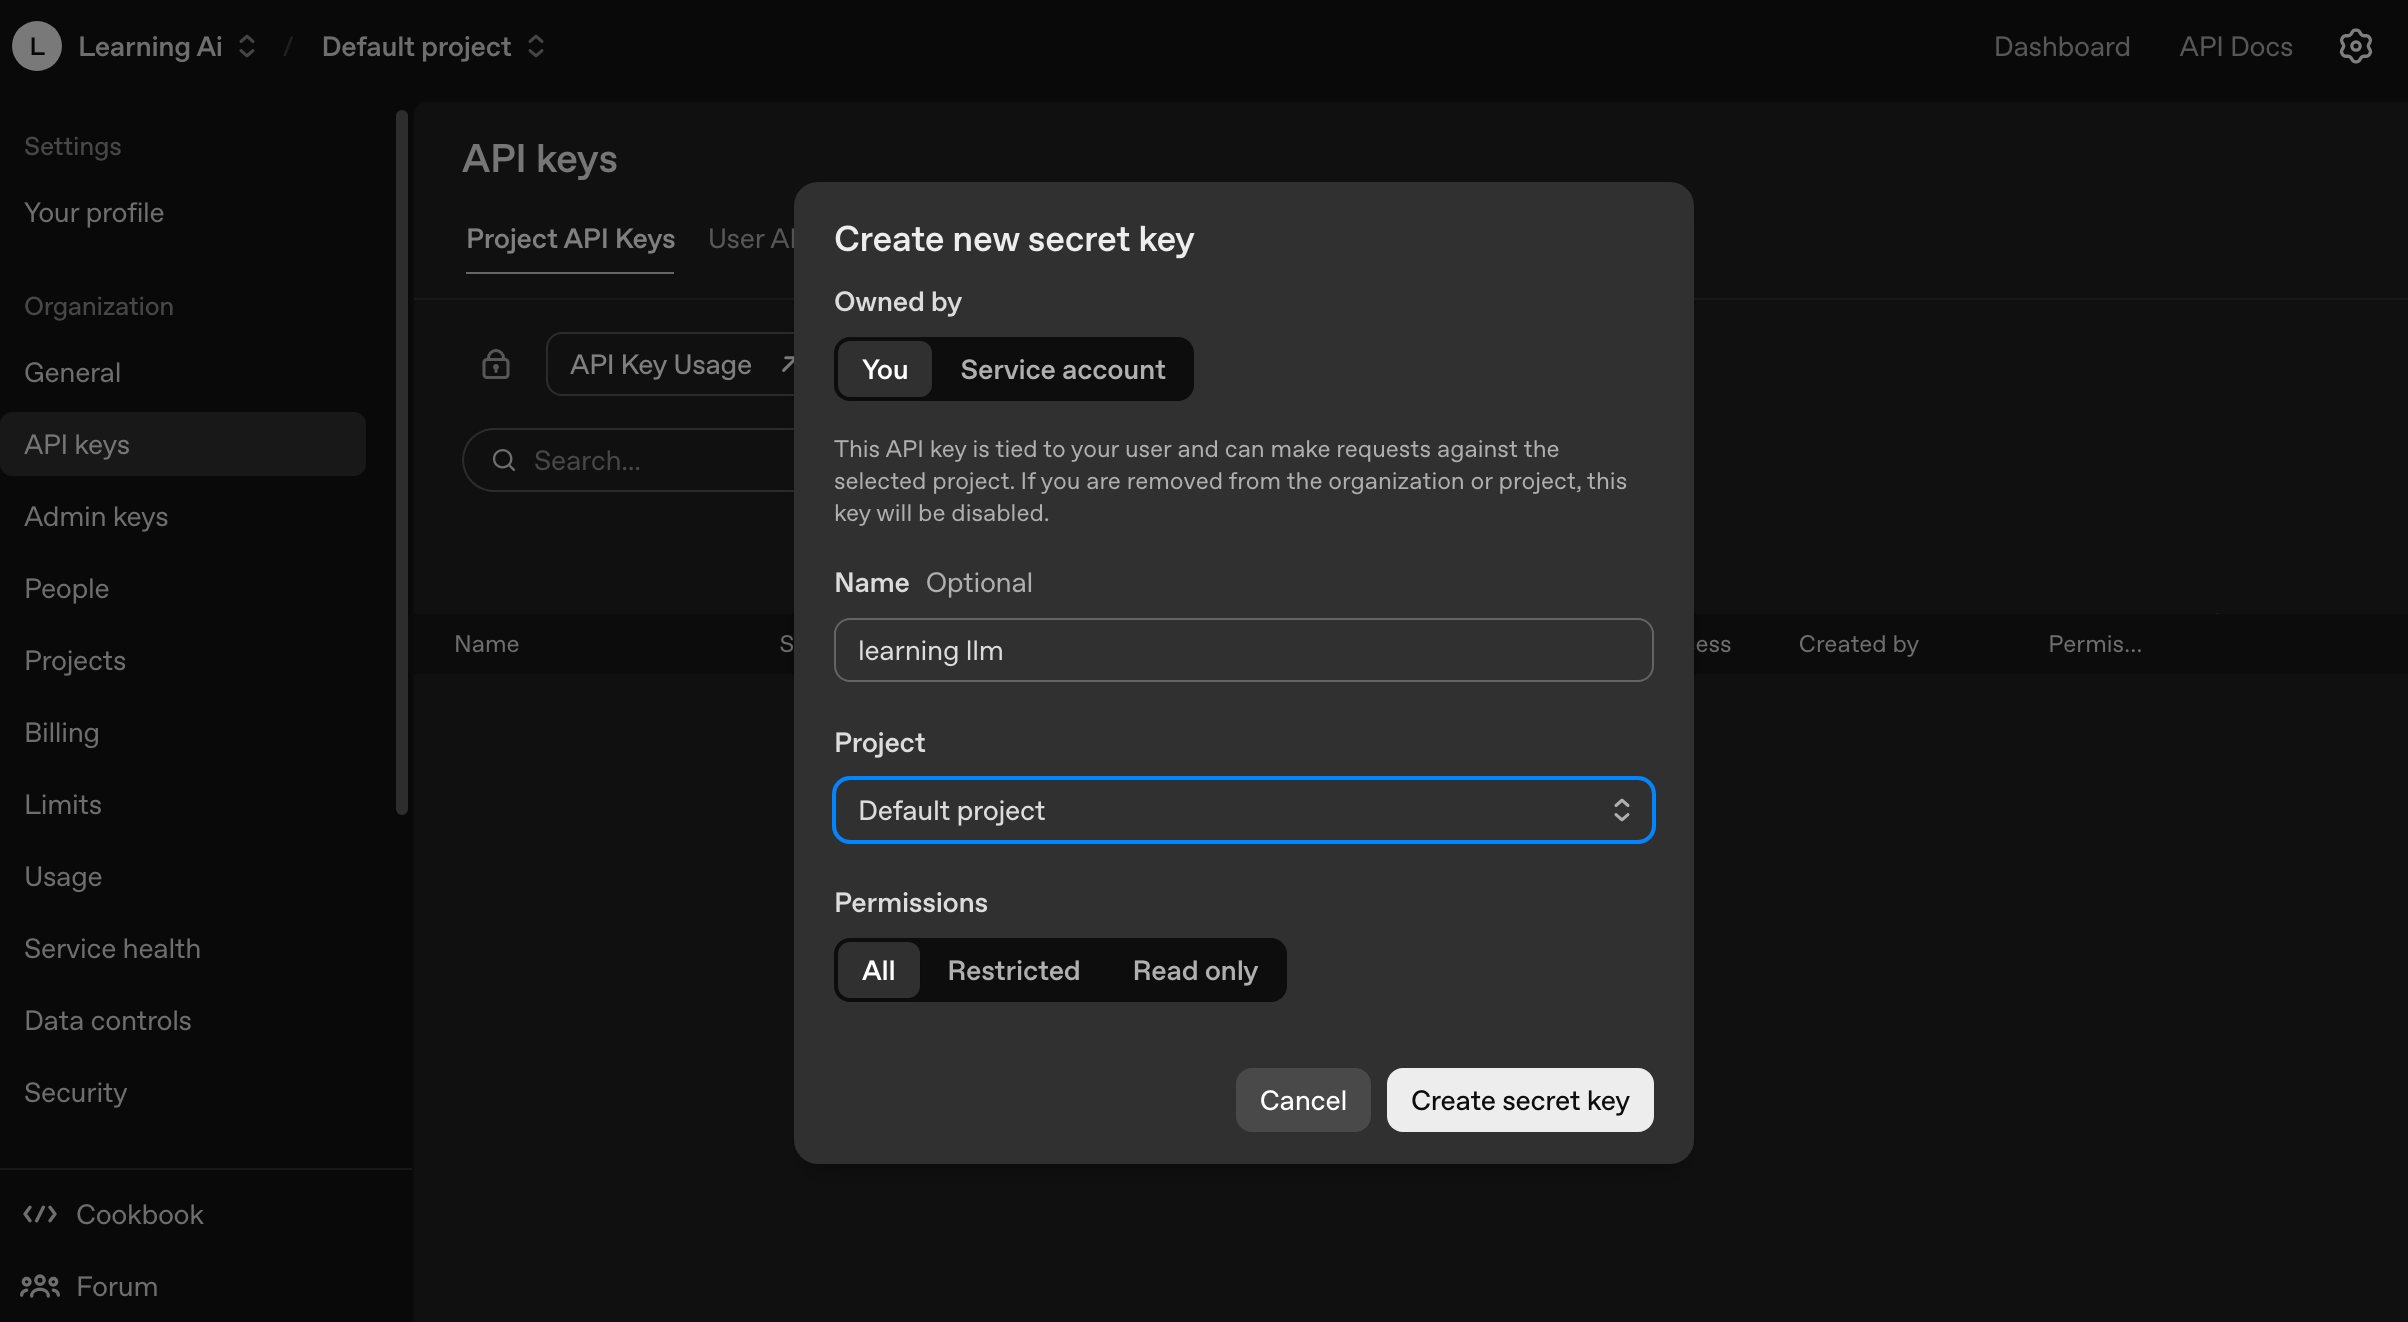
Click Create new secret key
Enter Name and Select Project
Click Create secret key
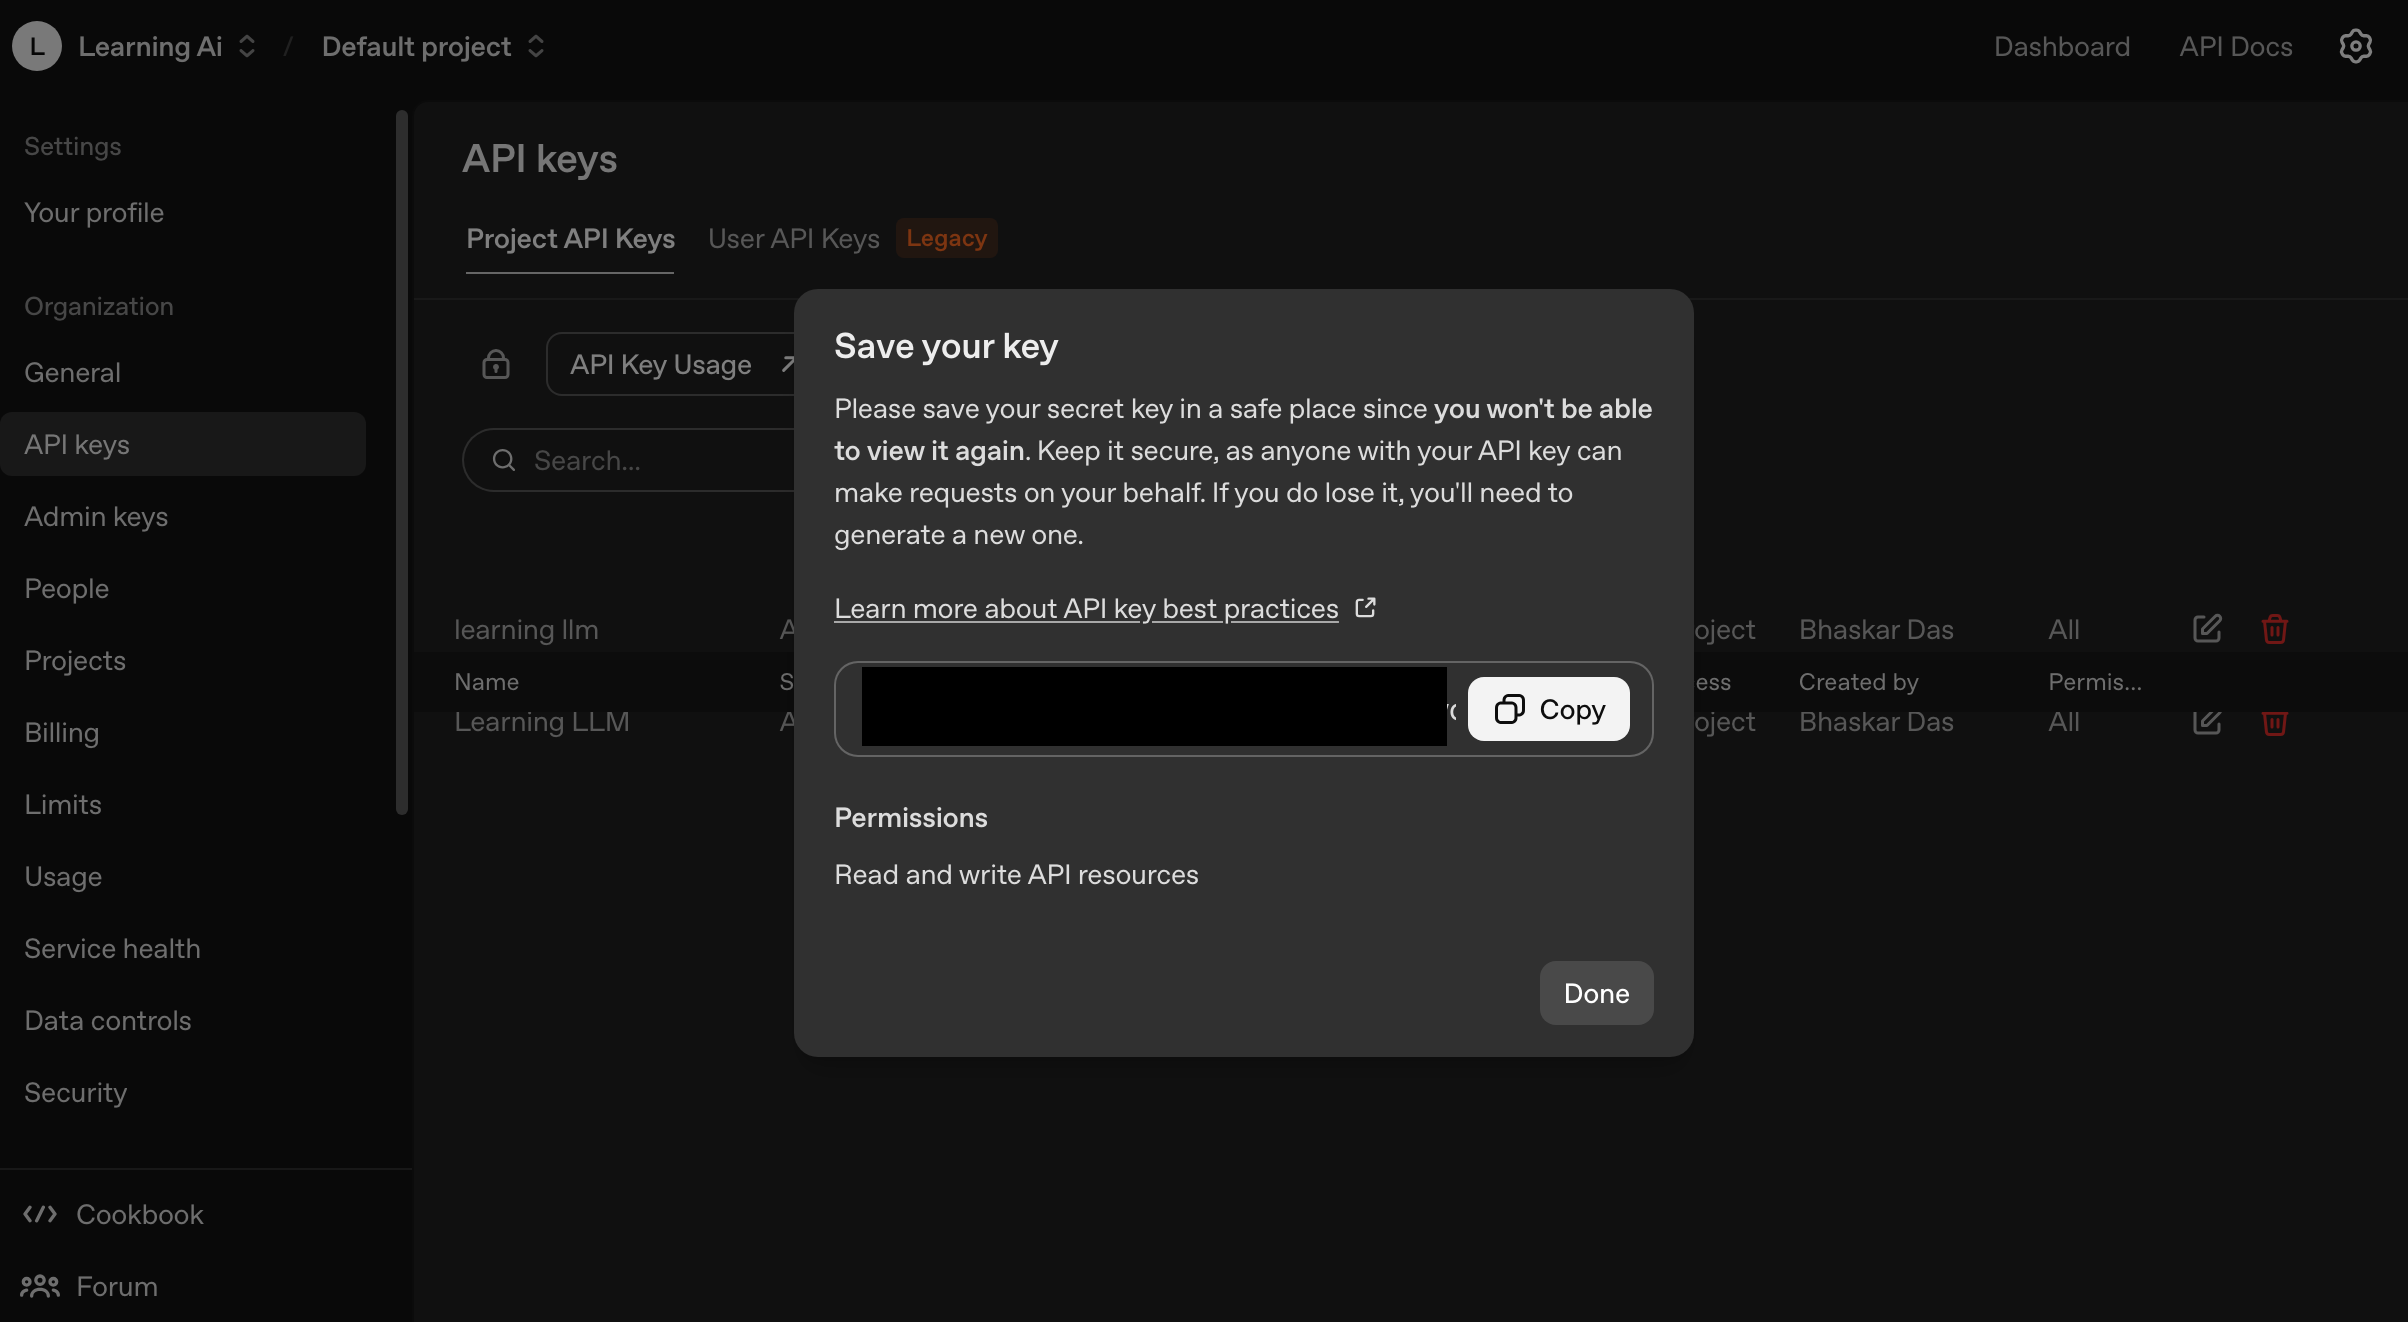
d. After api key is generated, Click copy and then Click Done
🔒 .env File Setup
❓ What Is a .env File?
A .env file stores secret configuration values.
Examples:
API keys
database passwords
access tokens
Keep secrets separate from source code.
🔐 Setting Up Your OpenAI API Key
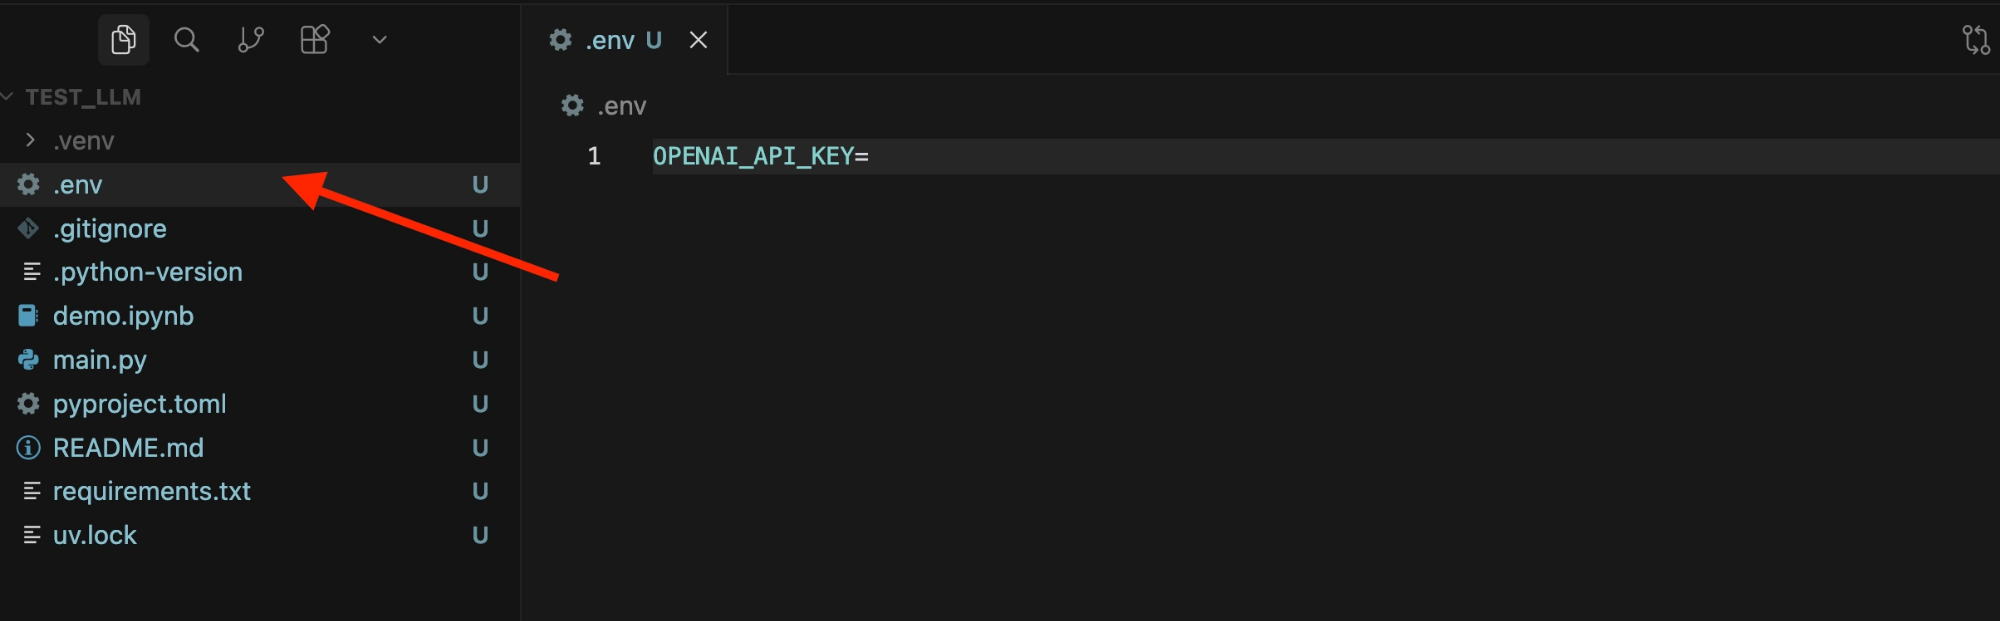
In the root of your project, create a new file called
.envAdd the following variable inside it:
OPENAI_API_KEY=your-api-key-hereReplace your-api-key-here with your actual API key from OpenAI
⚠️ Important: Never share your
.envfile or commit it to GitHub. Add.envto your.gitignoreto keep your API key safe and private. 🔒
❌ Common Mistakes to Avoid
Using a card that blocks international transactions
Assuming payment failure is always OpenAI’s issue
Not copying the API key immediately after creation
Sharing or exposing the API key publicly
Naming the file incorrectly (
.env.txtinstead of.env)Placing
.envin the wrong folder (must be project root)Misspelling
OPENAI_API_KEYAdding extra spaces or modifying the API key accidentally
Forgetting to save the
.envfileHardcoding API keys in source code
Uploading
.envto GitHub/public repositories