🎨 Adding CSS to Our FastAPI Full-Stack Application
In the previous lesson, we created our home.html template and successfully rendered it using TemplateResponse in FastAPI.
Now, we will enhance our application by adding CSS styling. Styling is an essential part of any full-stack application because it controls the visual appearance of the user interface.
To achieve this, we will set up a static files directory, which will store assets such as CSS stylesheets and JavaScript files.
📁 Creating the Static Directory
First, we need to create a new folder called static inside our project.
The static directory is used to store files that do not change dynamically, such as:
CSS stylesheets
JavaScript files
Images
Fonts
Project Structure
Create the following directory structure inside your project:
TodoApp
│
├── static
│   ├── css
│   └── js
│
└── templatesExplanation
static/css→ Stores all stylesheet filesstatic/js→ Stores JavaScript files
📄 Creating the Base CSS File
Next, we will create a stylesheet that will apply styling to our HTML page.
Inside the static/css folder, create a new file called:
base.cssNow add the following CSS rule:
h1 {
    color: red;
}What this does
This CSS rule overrides all <h1> elements and changes their text color to red.
⚙️ Configuring Static Files in FastAPI
For FastAPI to serve static files such as CSS and JavaScript, we must configure the StaticFiles module.
Open your main.py file and import the following:
from fastapi.staticfiles import StaticFilesNext, mount the static directory in your application.
Add the following code below your template configuration:
app.mount(
    "/static",
    StaticFiles(directory="todoapp/static"),
    name="static"
)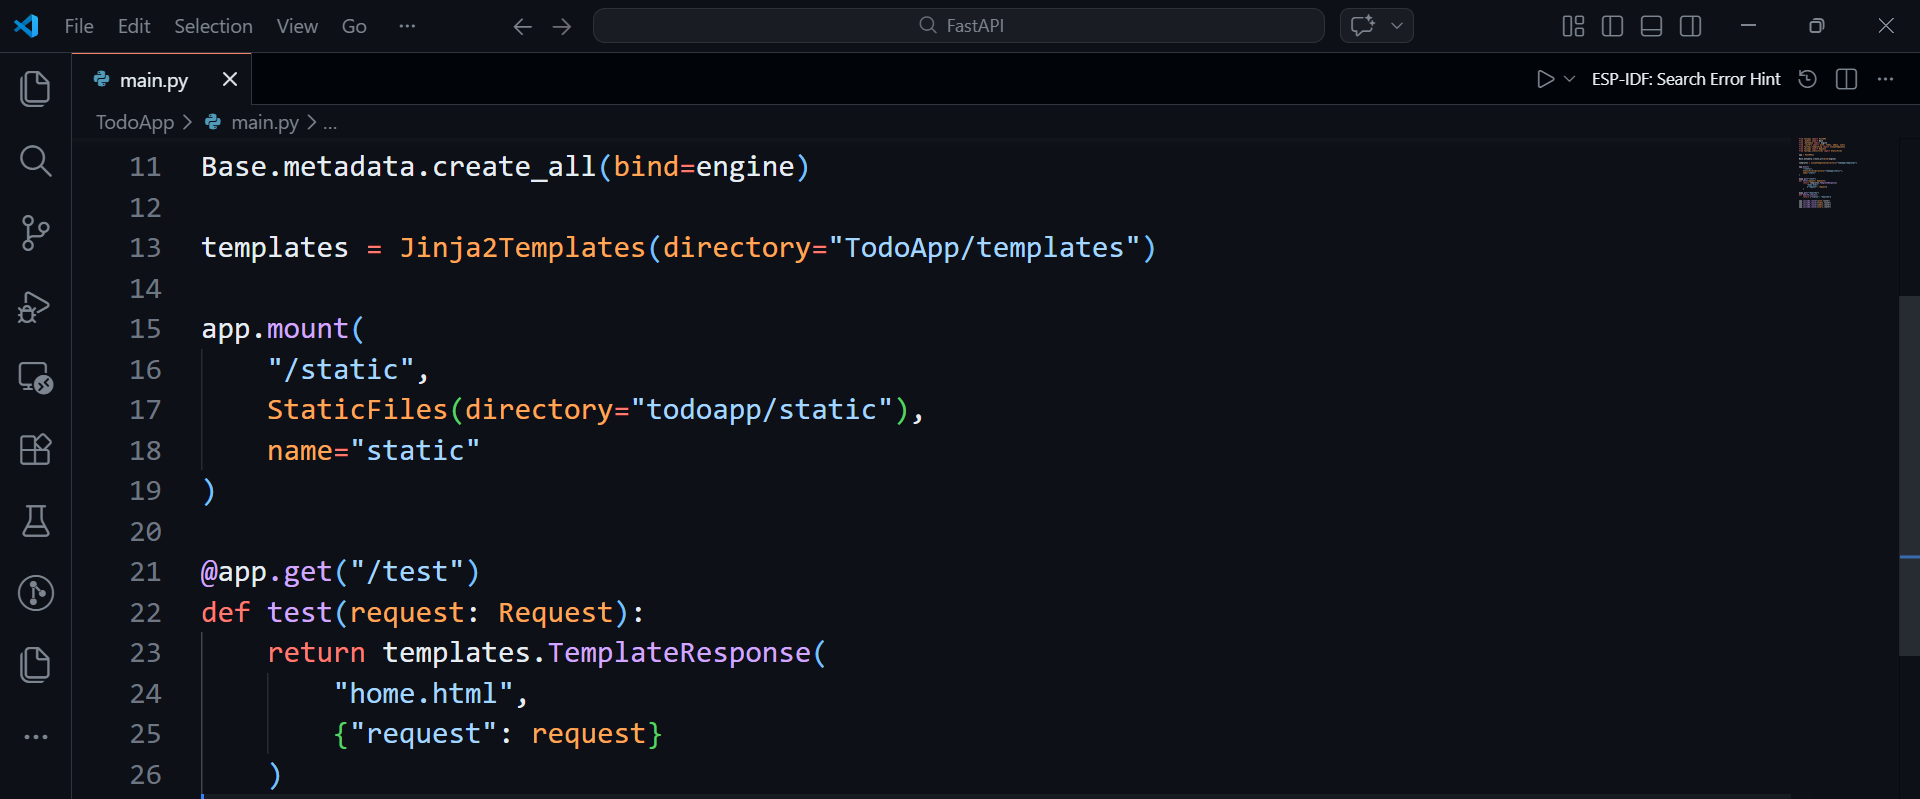
What this does
This tells FastAPI:
When a template requests files from
/staticLook inside the
TodoApp/staticdirectoryServe those files to the browser
This enables our application to load CSS, JavaScript, and other static assets.
🔗 Linking the CSS File in HTML
Now we need to connect our CSS file to the HTML template.
Open home.html and add the following inside the <head> section:
<link rel="stylesheet"
      type="text/css"
      href="{{ url_for('static', path='css/base.css') }}">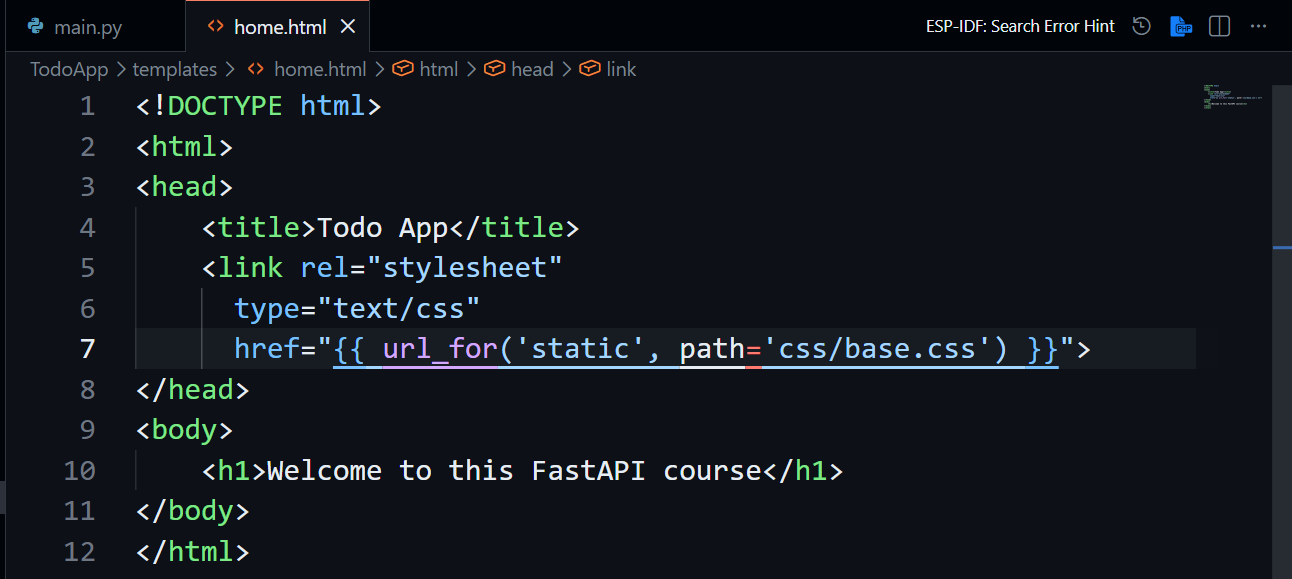
Explanation
rel="stylesheet"→ Indicates that the file is a stylesheettype="text/css"→ Specifies the file typeurl_for('static', path='css/base.css')→ Uses Jinja templating to dynamically locate the CSS file inside the static directory
This ensures that FastAPI correctly loads the stylesheet.
🧪 Testing the CSS Styling
Now that everything is configured, we can test the styling.
Run the application using Uvicorn:
uvicorn TodoApp.main:app --reloadThen open your browser and visit:
<http://127.0.0.1:8000/test>When the page loads, you should see:
"Welcome to this FastAPI course" displayed in red text.
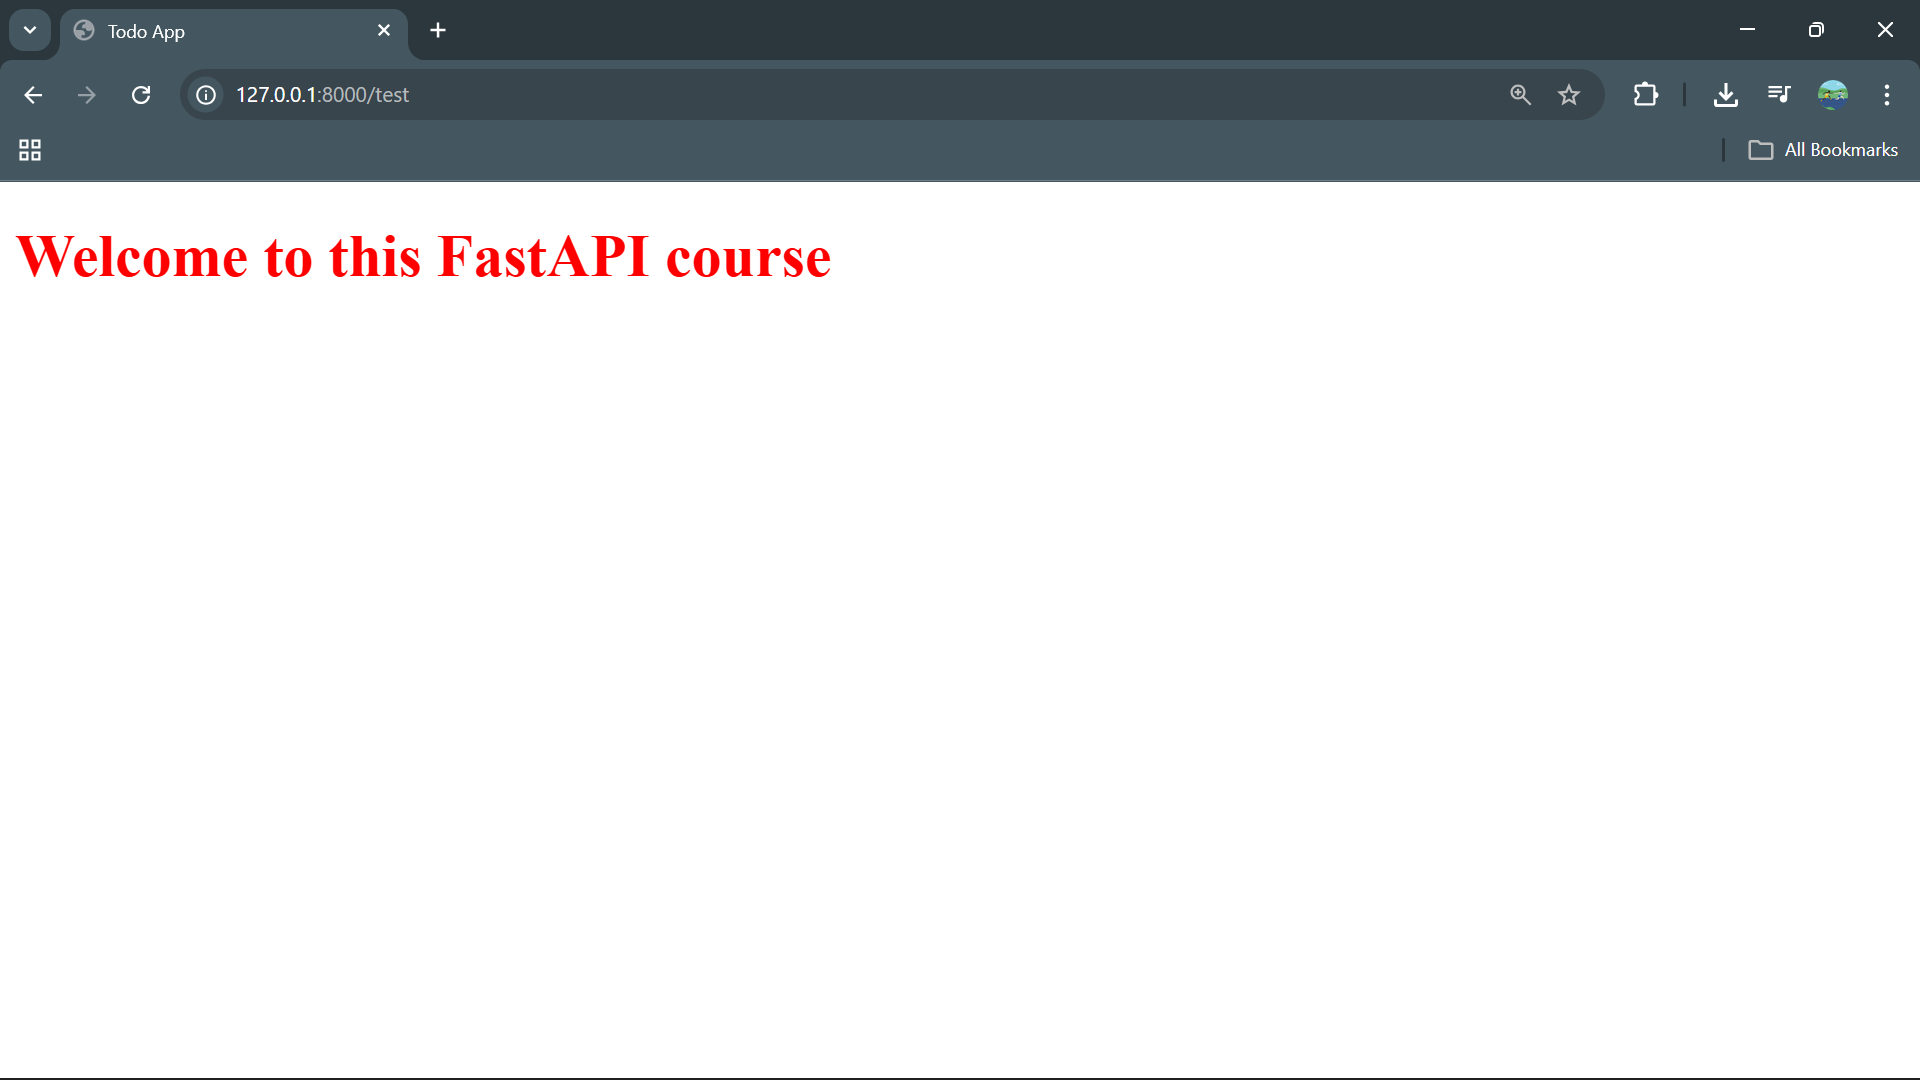
This confirms that our CSS styling is working correctly.
🧱 How Everything Works Together
At this stage, our application consists of three connected components:
1️⃣ CSS File
Defines styling rules.
h1 {
    color: red;
}
2️⃣ HTML Template
Imports the stylesheet and displays the content.
<h1>Welcome to this FastAPI course</h1>
3️⃣ FastAPI Backend
Configures static files so the template can access the stylesheet.
app.mount("/static", StaticFiles(directory="todoapp/static"), name="static")
🎬 Next Steps
Now that our CSS styling system is set up, we can continue building and improving the frontend interface of our full-stack FastAPI application.
In the next lesson, we will continue expanding the frontend and begin adding more structure and functionality to the application.
📝 Summary
In this lesson, we:
Created a
staticdirectory for frontend assetsOrganized it into
cssandjsfoldersCreated a stylesheet
base.cssConfigured FastAPI to serve static files using StaticFiles
Linked the stylesheet to our HTML template
Verified that our CSS styling is correctly applied
Our application now supports frontend styling, which is an important step in building a complete full-stack FastAPI web application.