🔐 Working with IAM Users in AWS
In this lecture, we will practice using AWS Identity and Access Management (IAM) to create users inside your AWS account.
IAM is one of the most important services in AWS — and understanding it early will help you build secure architectures from day one.
🔎 Accessing the IAM Console
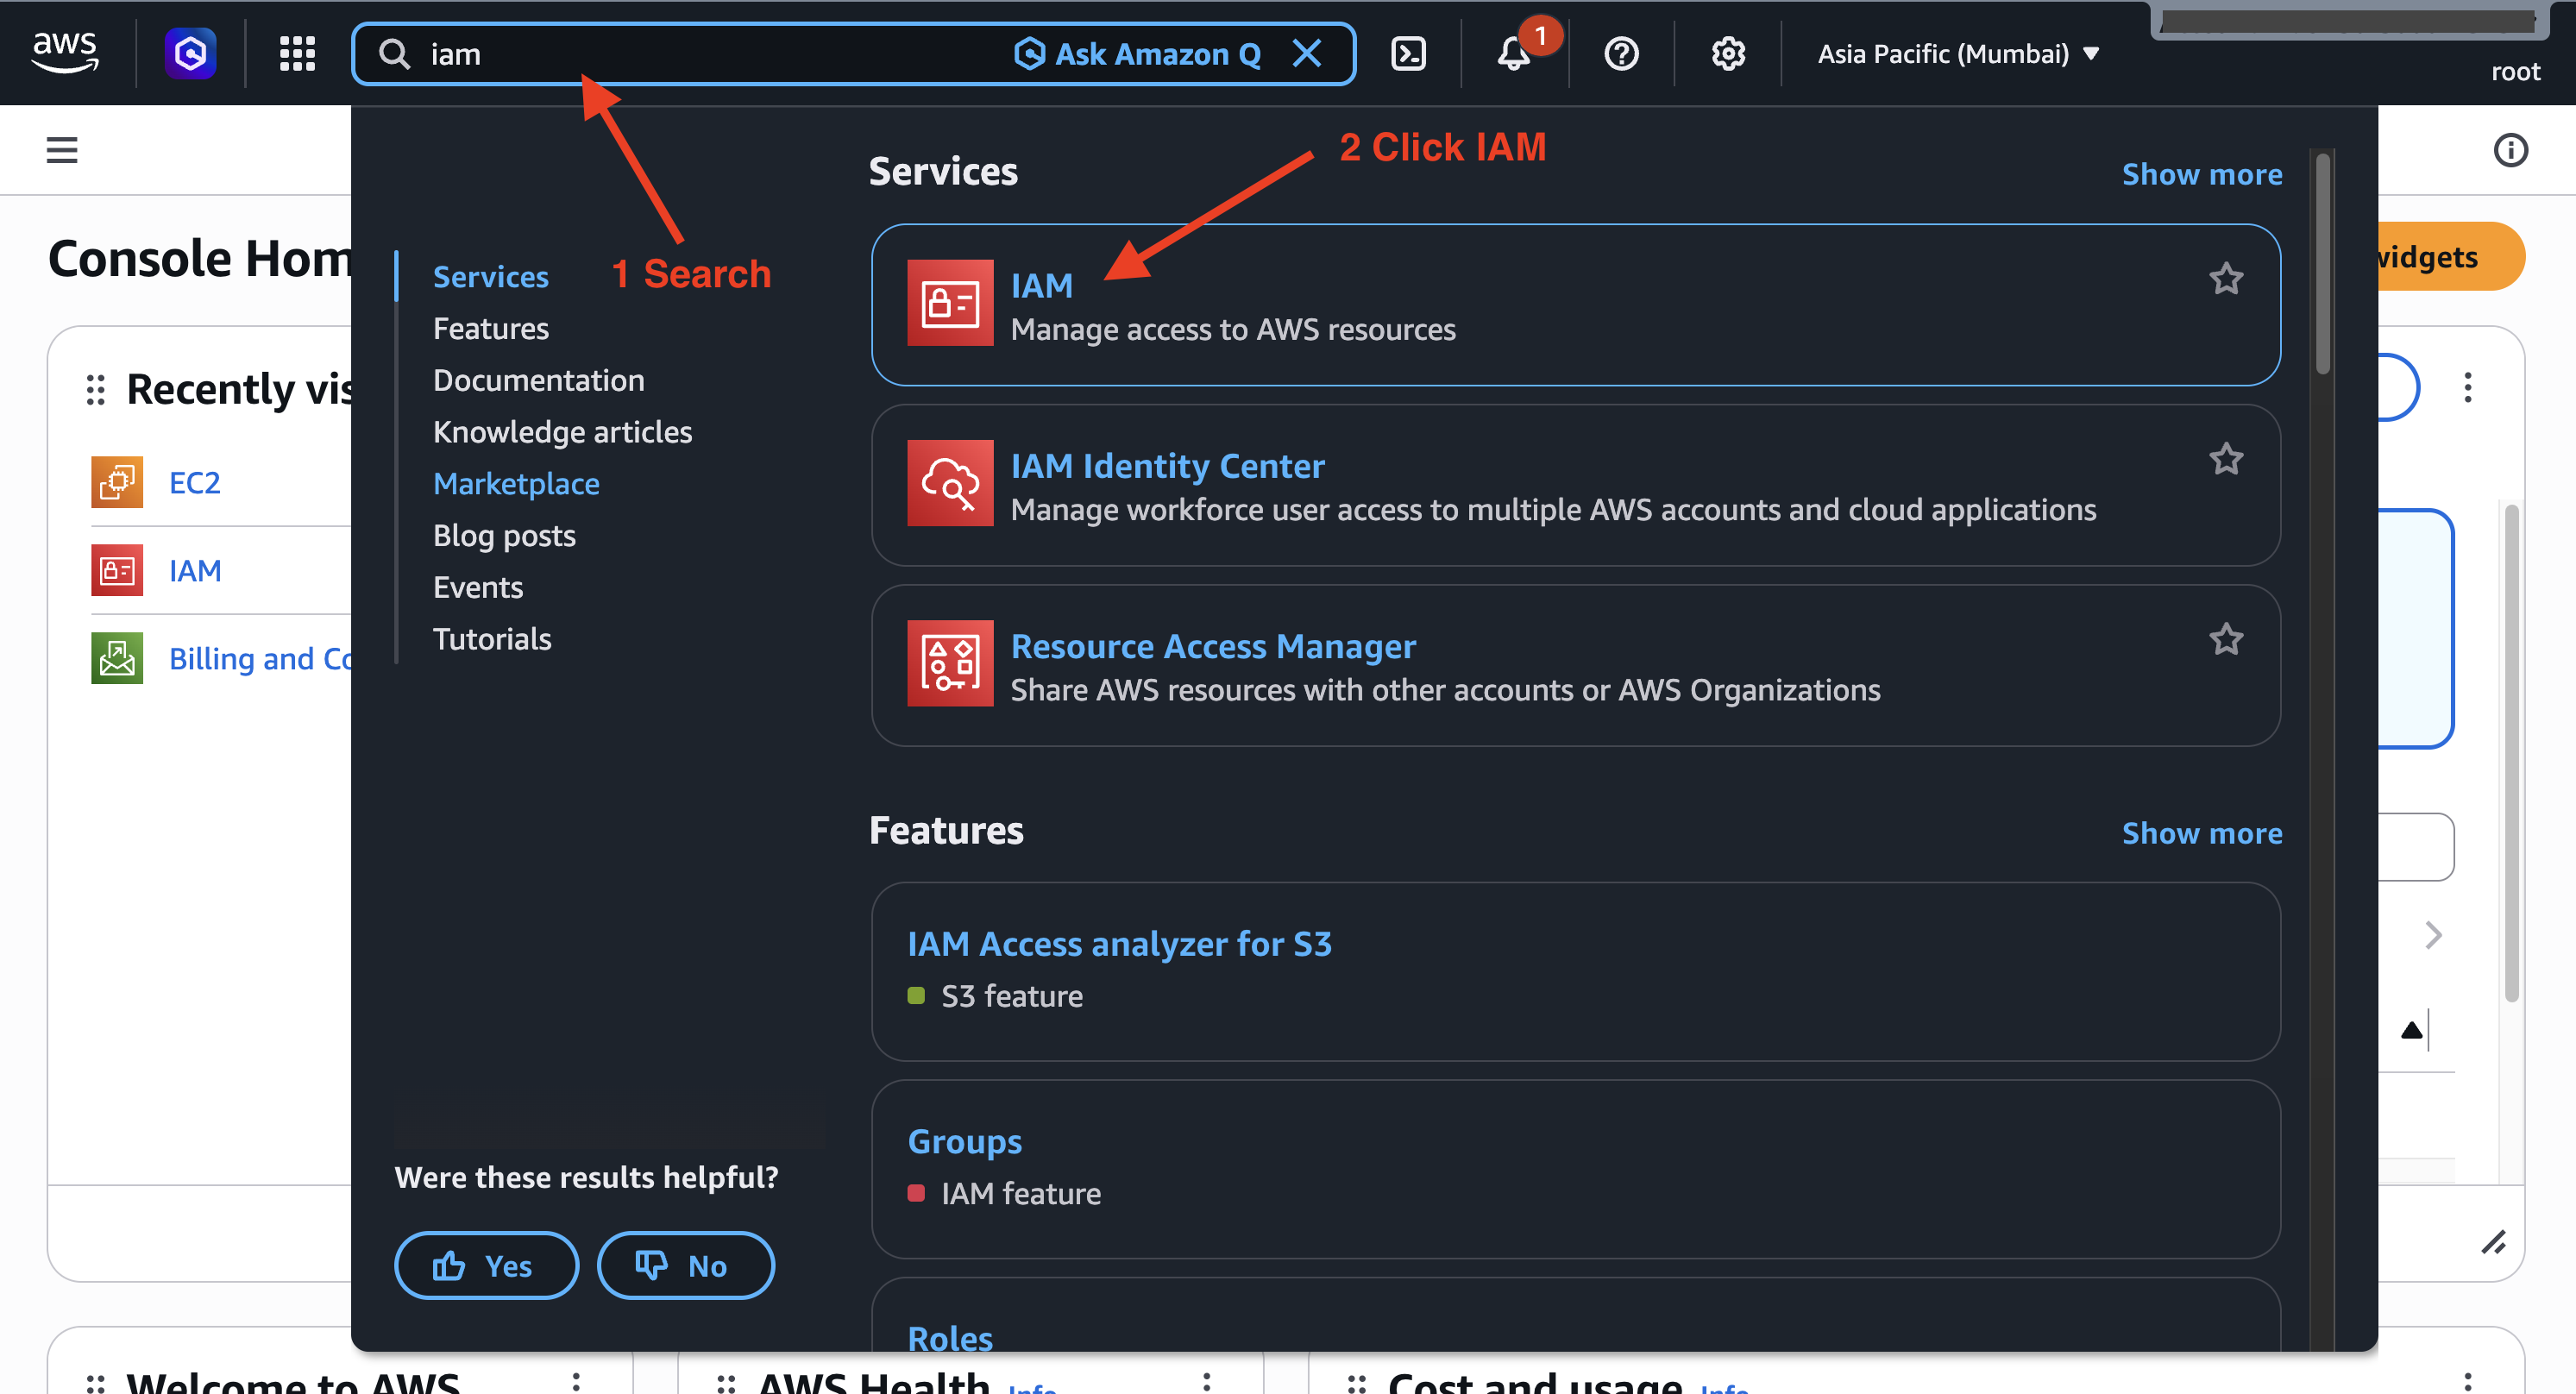
Go to the AWS Management Console (AWS Dashboard which shown after login)
In the search bar, type IAM
🌍 IAM is a Global Service
Once you're inside the IAM Dashboard, notice something very important.
If you look at the top-right corner, you’ll see that the region selector is disabled.
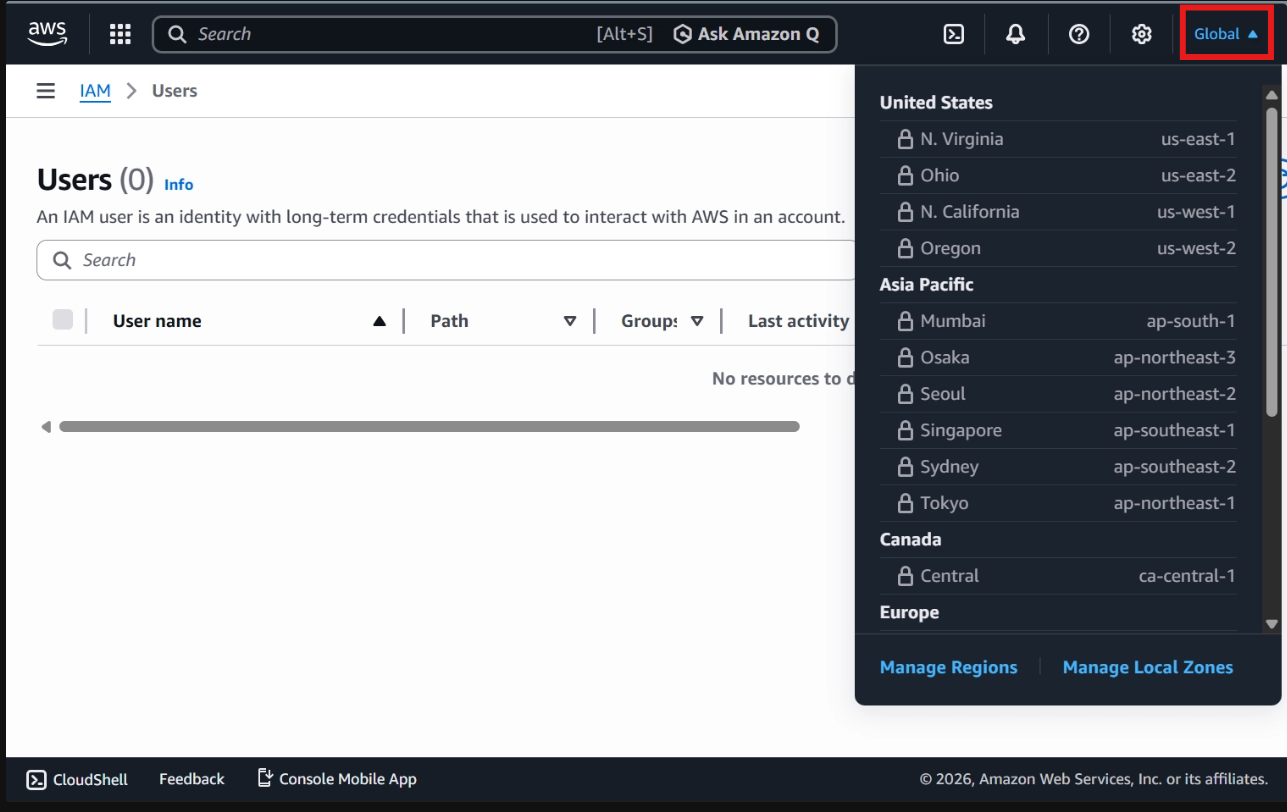
That means:
There is no region selection
Users you create are available across all AWS regions
Permissions apply account-wide
⚠️ This is different from services like EC2 or S3, which are region-specific.
👤 Why Do We Create IAM Users?
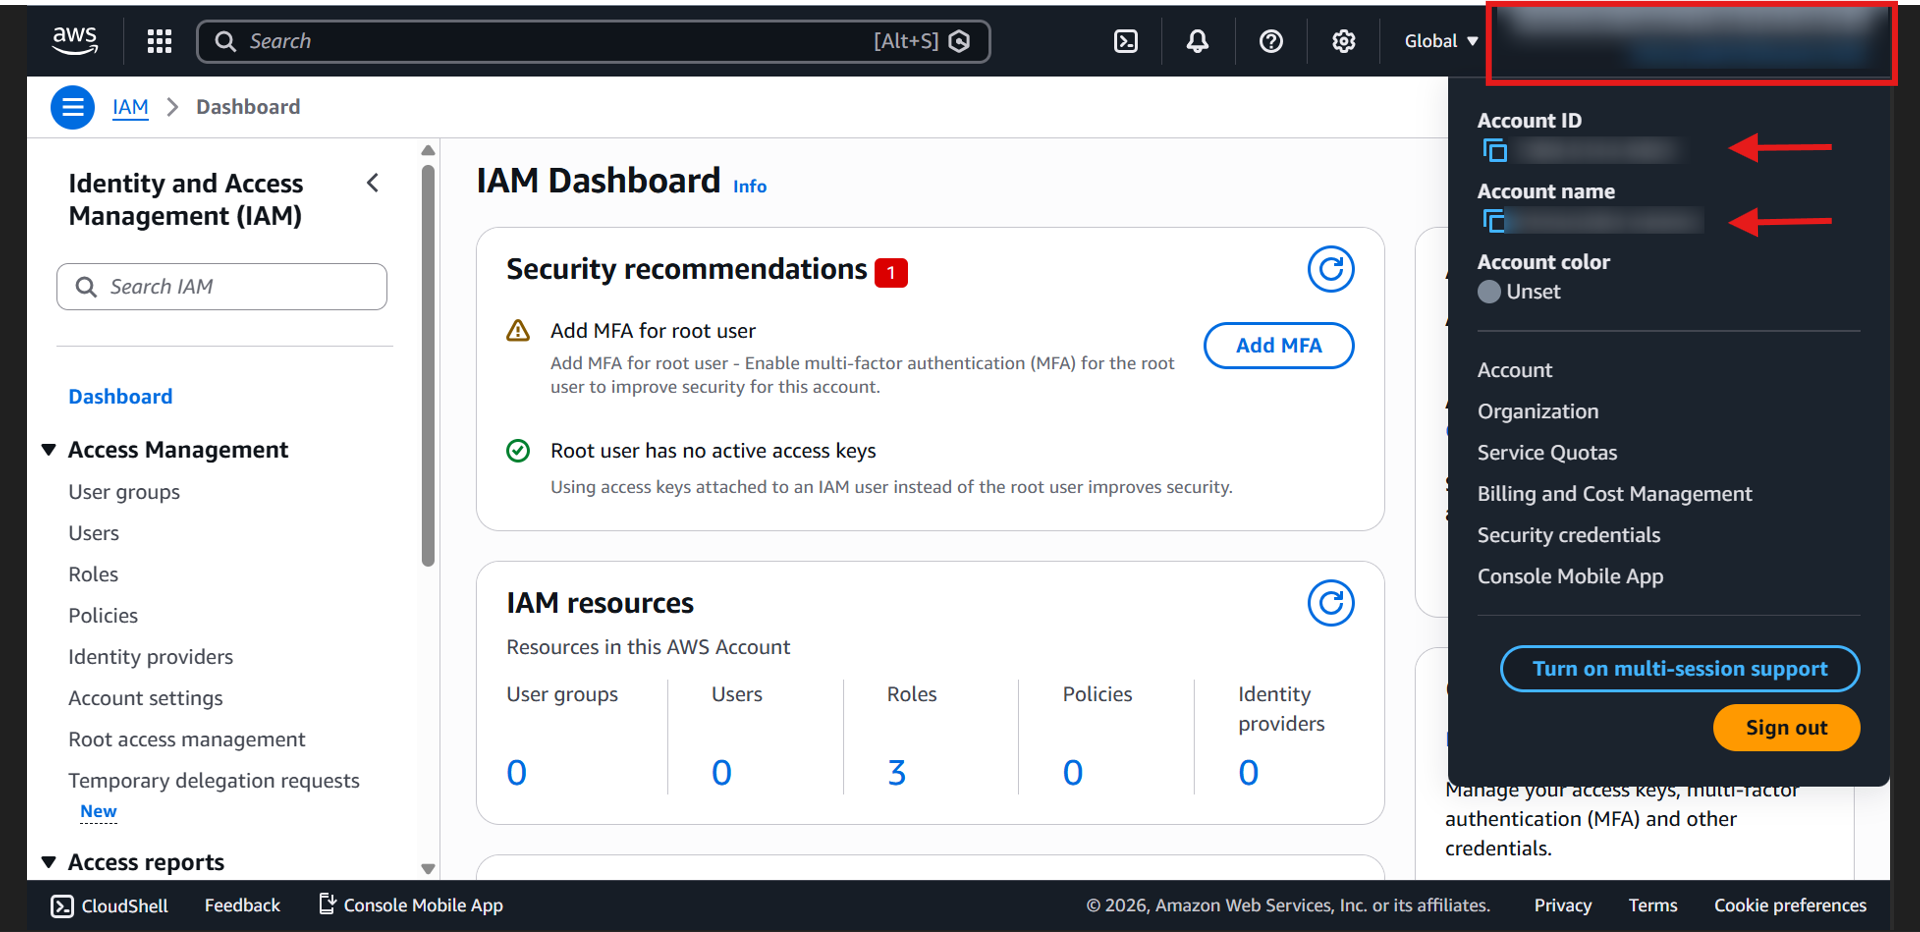
Right now, you are logged in as the root user (account owner).
✅ You can confirm this because:
You see your Account ID ( IAM user does not have their own Account ID)
You logged in using the root credentials
👉 Best Practice:
Never use the root account for daily activities.
Create IAM users. Grant them appropriate permissions
Use them for regular access. This significantly improves your account security.
🛠 Creating an IAM User
1. In the left sidebar, click Users or IAM users
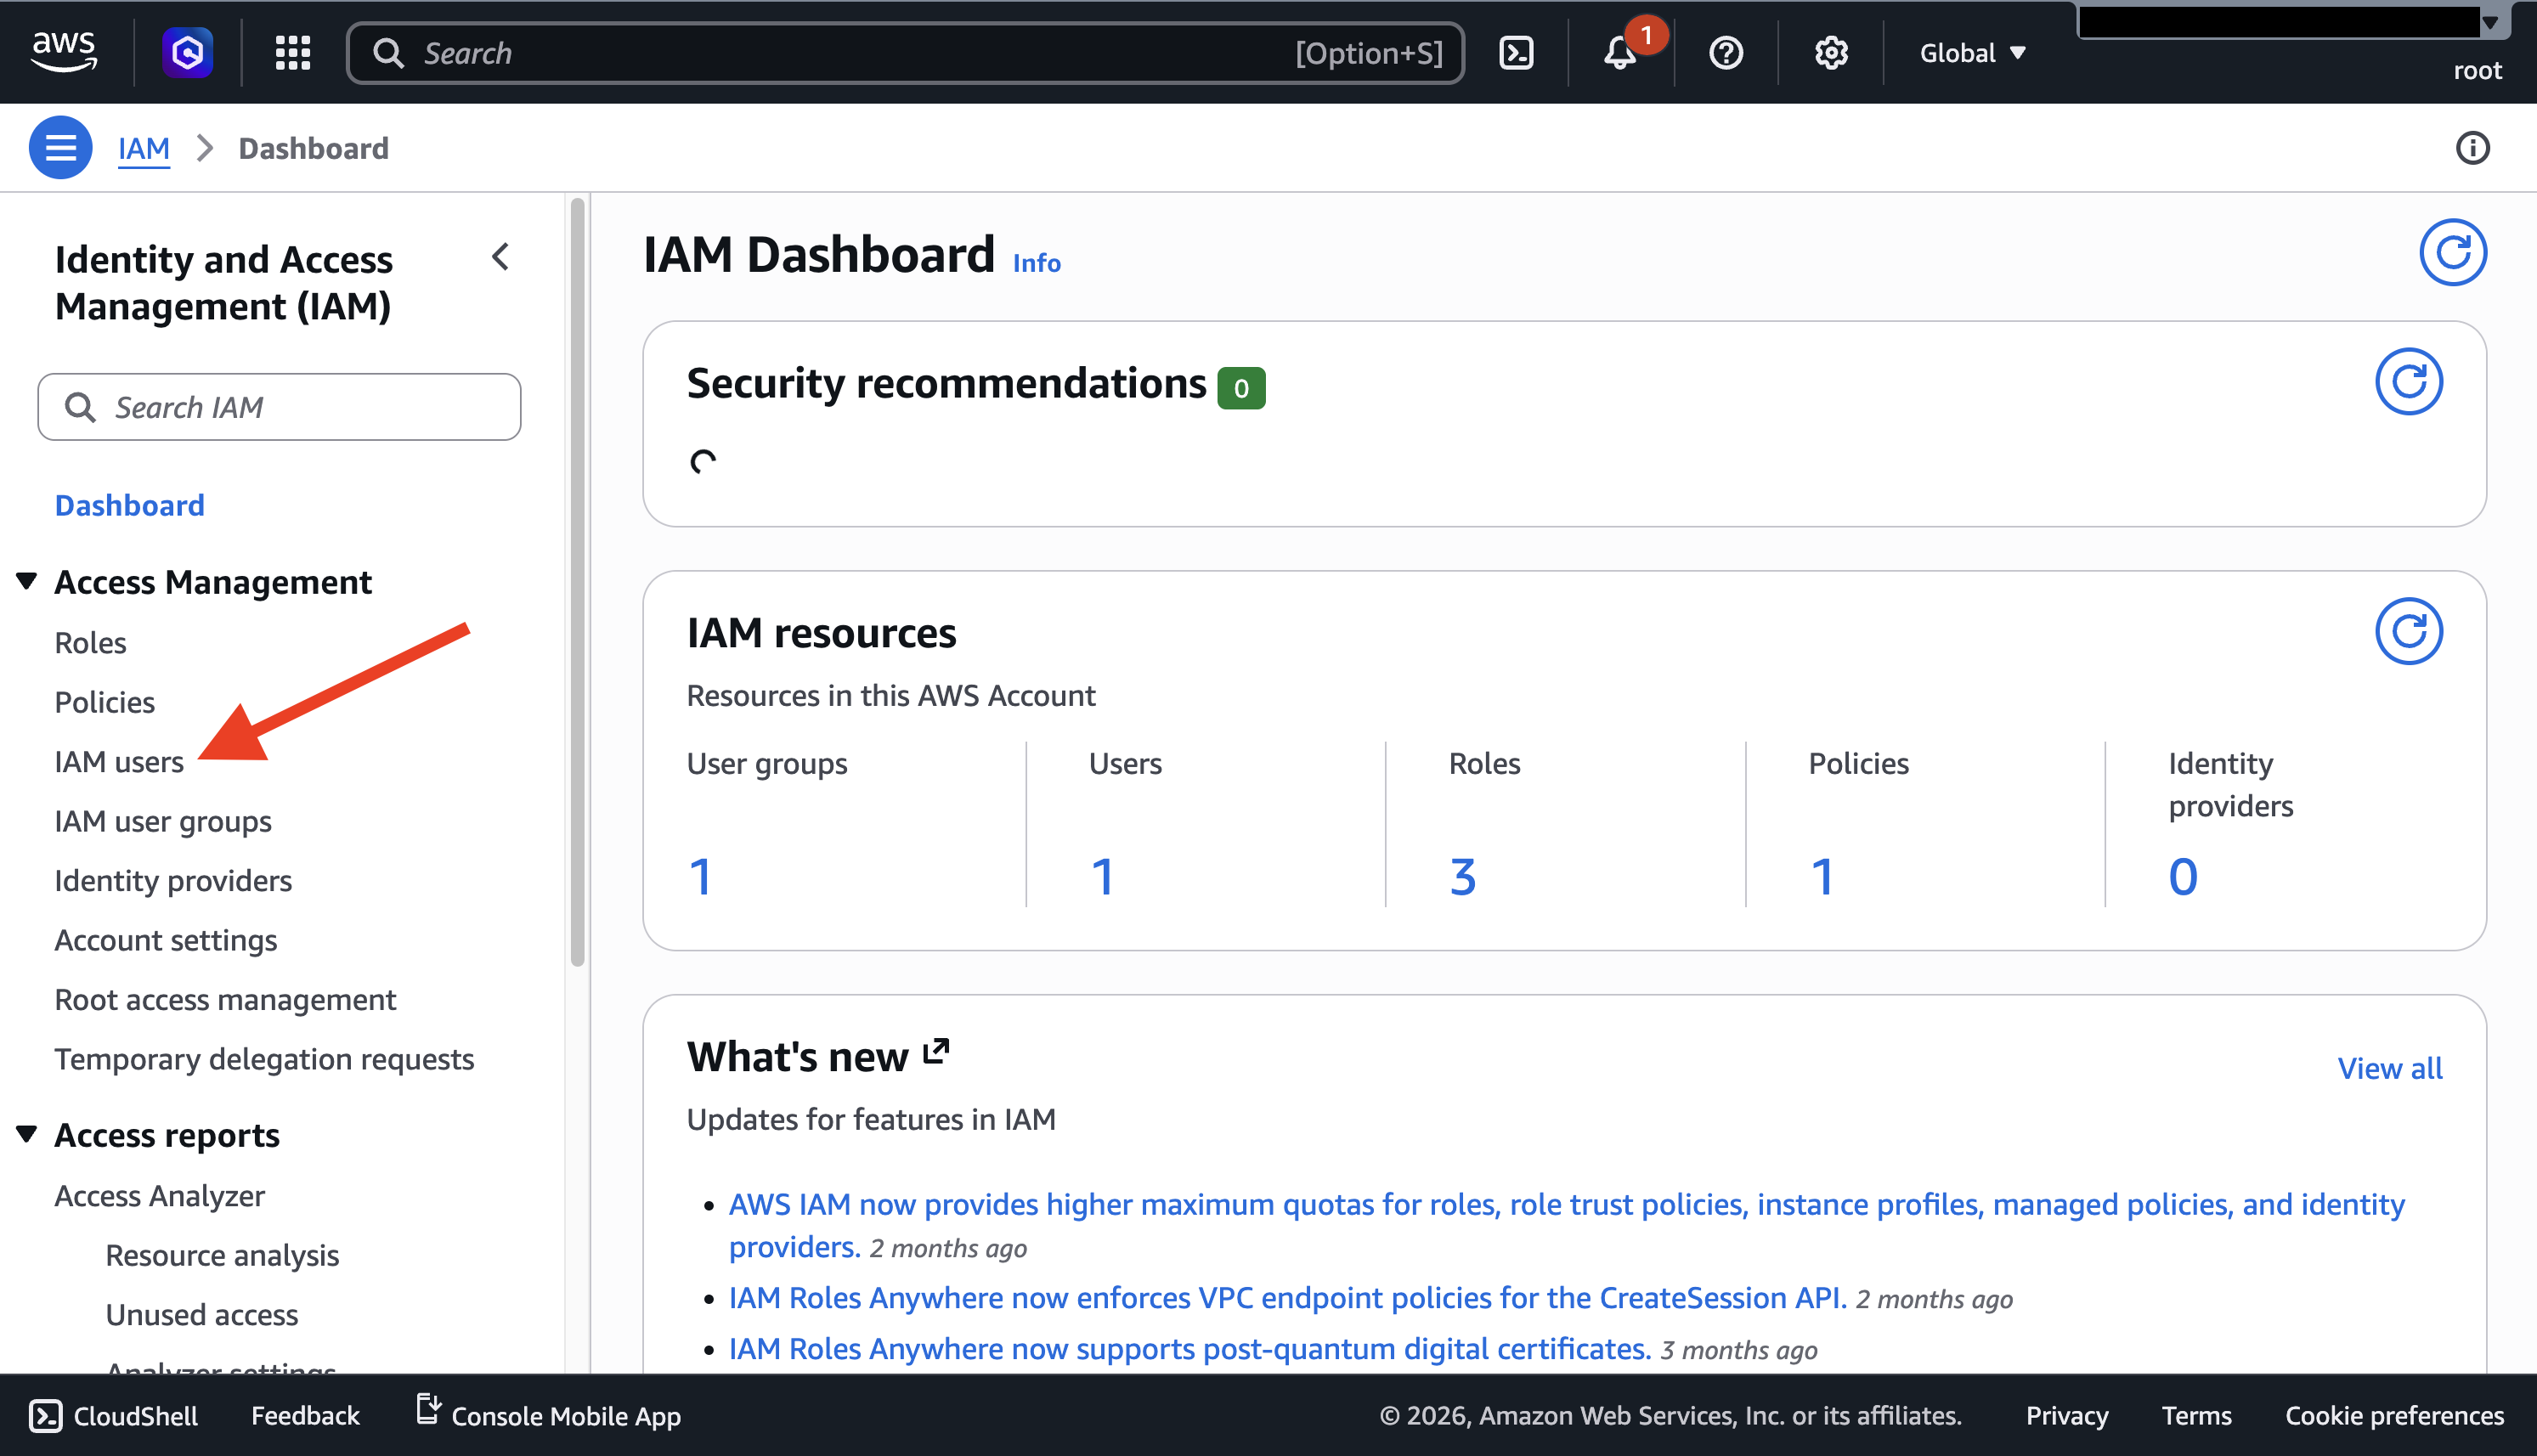
2. Click Create user
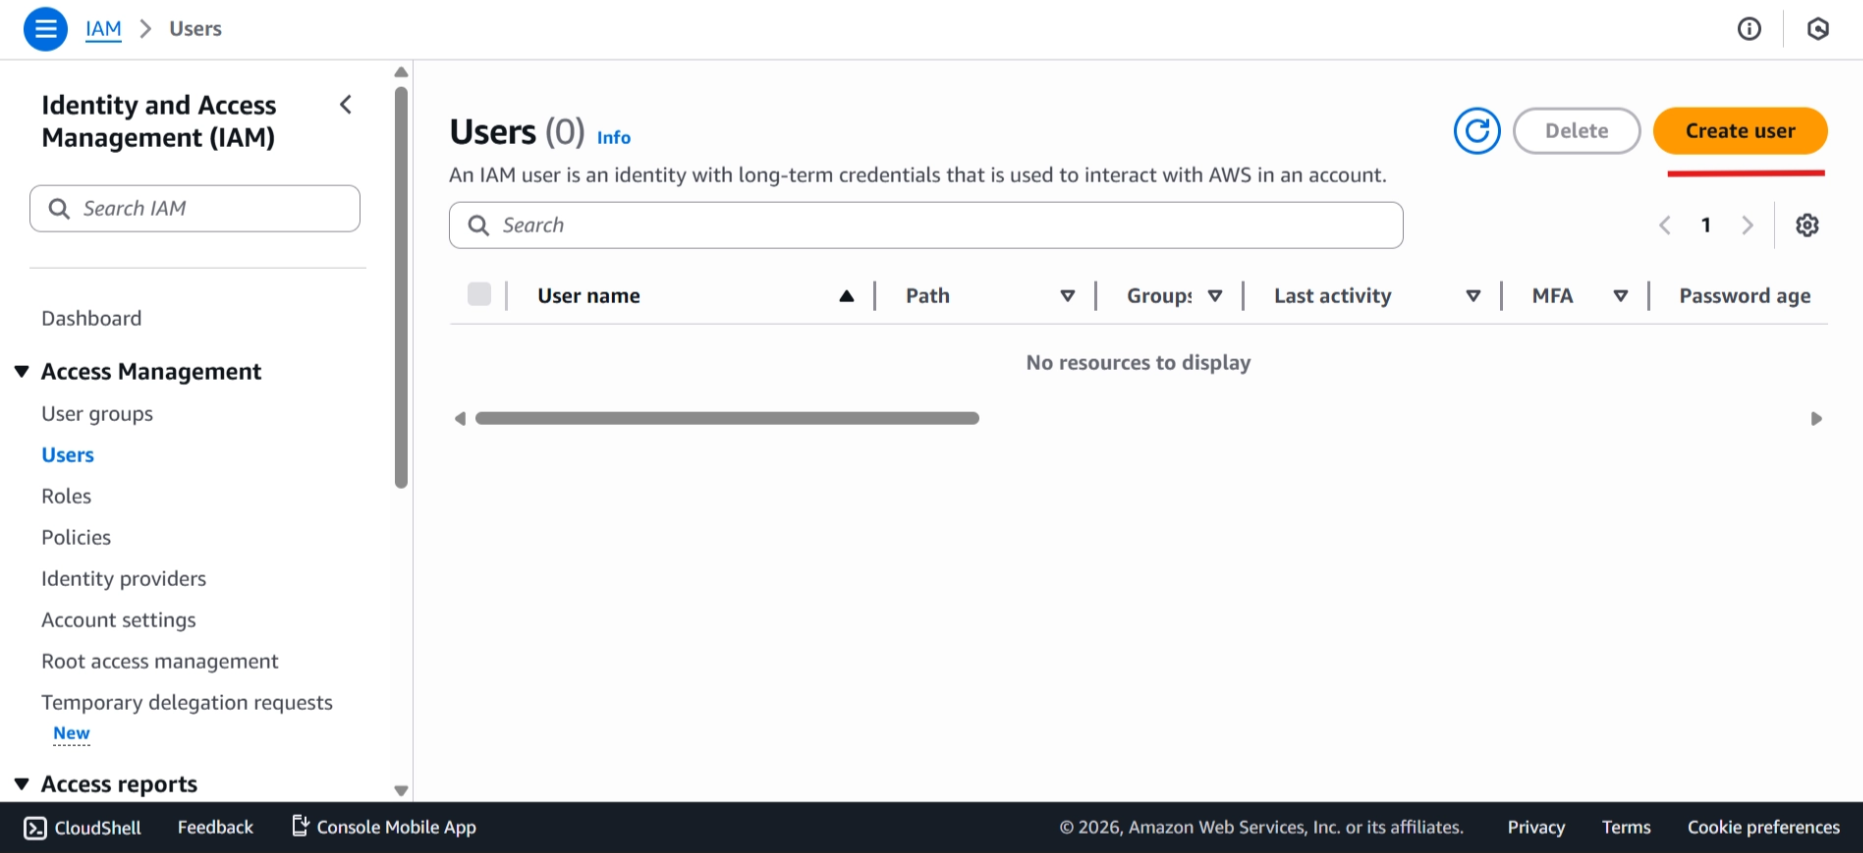
3. Specify User Details
Enter a User name (example:
codeveda)Enable Provide user access to the AWS Management Console
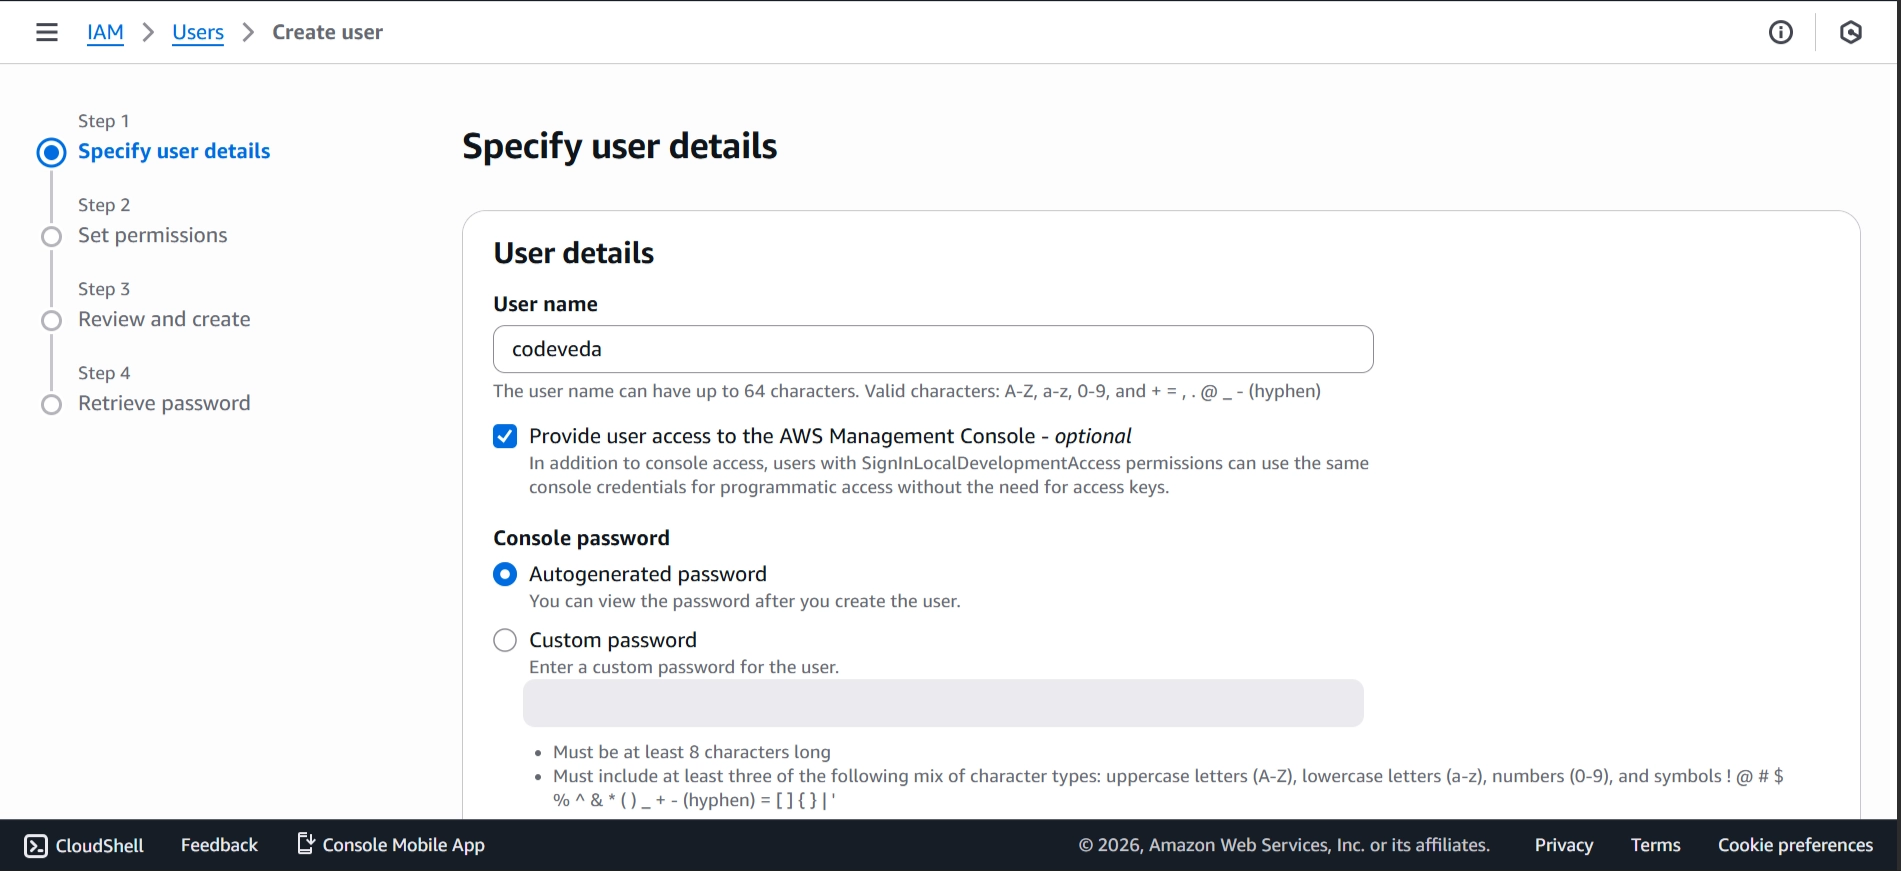
Click Next
Beginners often mix these up:
✅ Authentication — Can the user log in?
❌ Authorization — What can the user do once logged in?
Turning on console access only lets a user log in. It doesn't give them any permissions.
👉 To grant access to specific things, you need to attach IAM policies.
Without any policies attached, the user will hit "Access Denied" on almost everything.
4. Setting the Password
🎲 Auto-generated password
✍️ Custom password
🎲 Keep auto-generated enabled
🔄 Turn on "Require password reset at next sign-in"
✍️ Choose a custom password
☑️ You can uncheck "Require password reset"
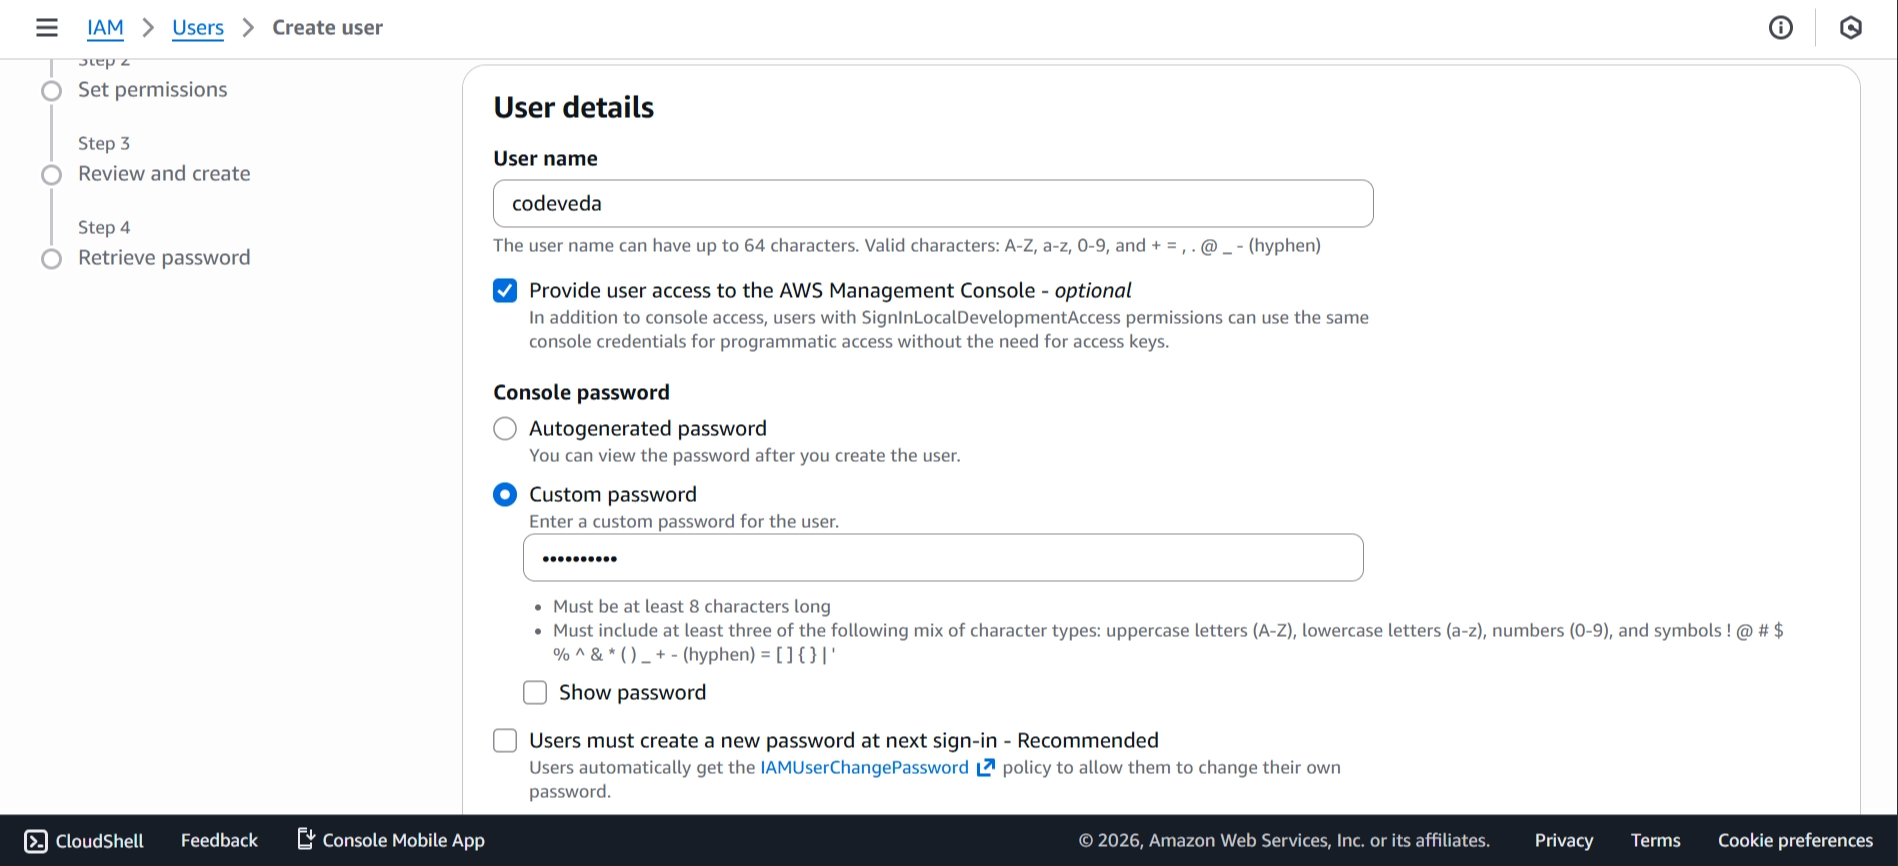
Click Next
5. Set Permissions
Now assign permissions. You have three options:
Attach policies directly — Permissions apply only to this user. Simple, but hard to manage at scale.
Add user to a group — Permissions come from the group. Easiest to manage as your team grows.
Copy permissions from another user — Duplicates an existing user's permissions onto this one. Quick, but you inherit their exact setup, including anything outdated.
👉 Best practice: Use groups
.👥 Creating an Admin Group
Click Create group
Group name:
AdminAttach policy: AdministratorAccess (This policy grants full access to AWS)
Add the user to the Admin group
Click Next
6. Review and Create
‼️ Review your configuration carefully
👤 User name → codeveda
🔑 Console password → Custom
🔄 Require password reset → No
👥 Group → Admin
📋 Policy → AdministratorAccess
🏷️ Key → department
🏷️ Value → technology
👉 Tags are key-value metadata pairs that help you organize and identify AWS resources.
Click Create user
7. Retrieve the Password
This is the only time you can download or view the password (if auto-generated).
Options:
Download CSV
Email sign-in instructions
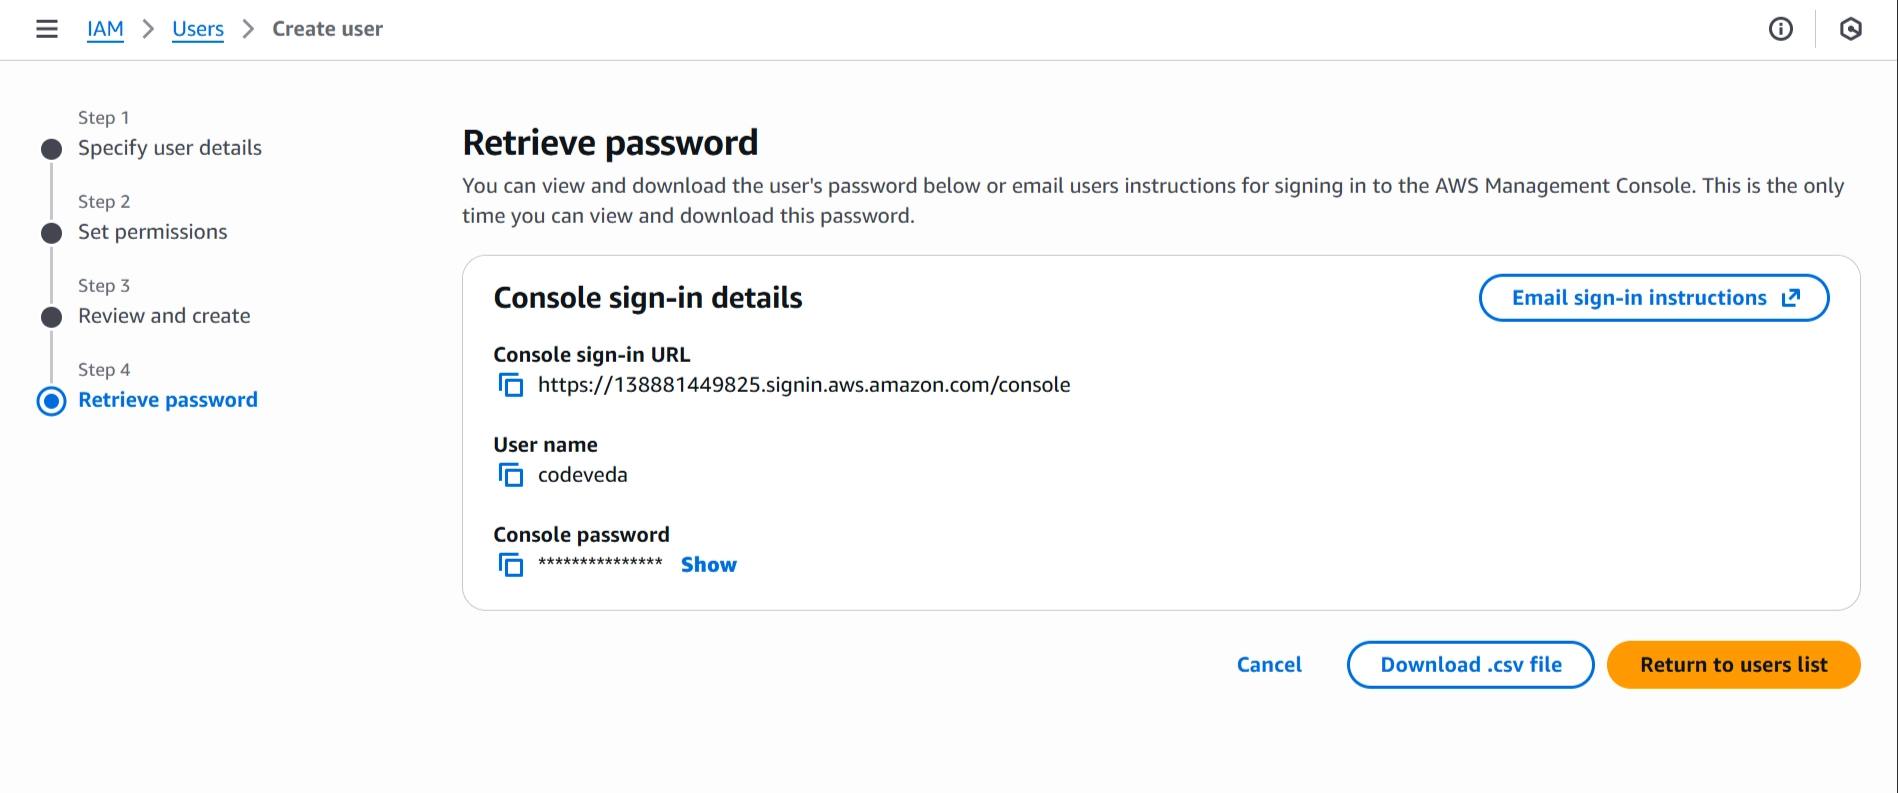
⚠️ If you lose this password, you must reset it manually.
👥 Understanding Permission Inheritance
If you open User Groups, you'll see a group called Admins — and inside it, one user: codeveda.
Check the group's permissions, and you'll find AdministratorAccess attached there.
Now check the user codeveda directly — it also shows AdministratorAccess. But it's not attached to the user. It's inherited from the group.
In short:
👥 Any permission attached to a group
⚡ Automatically applies to every user inside that group
🔗 Signing in as the IAM User
Now let’s log in using the new IAM user. But before that, Go to 👉
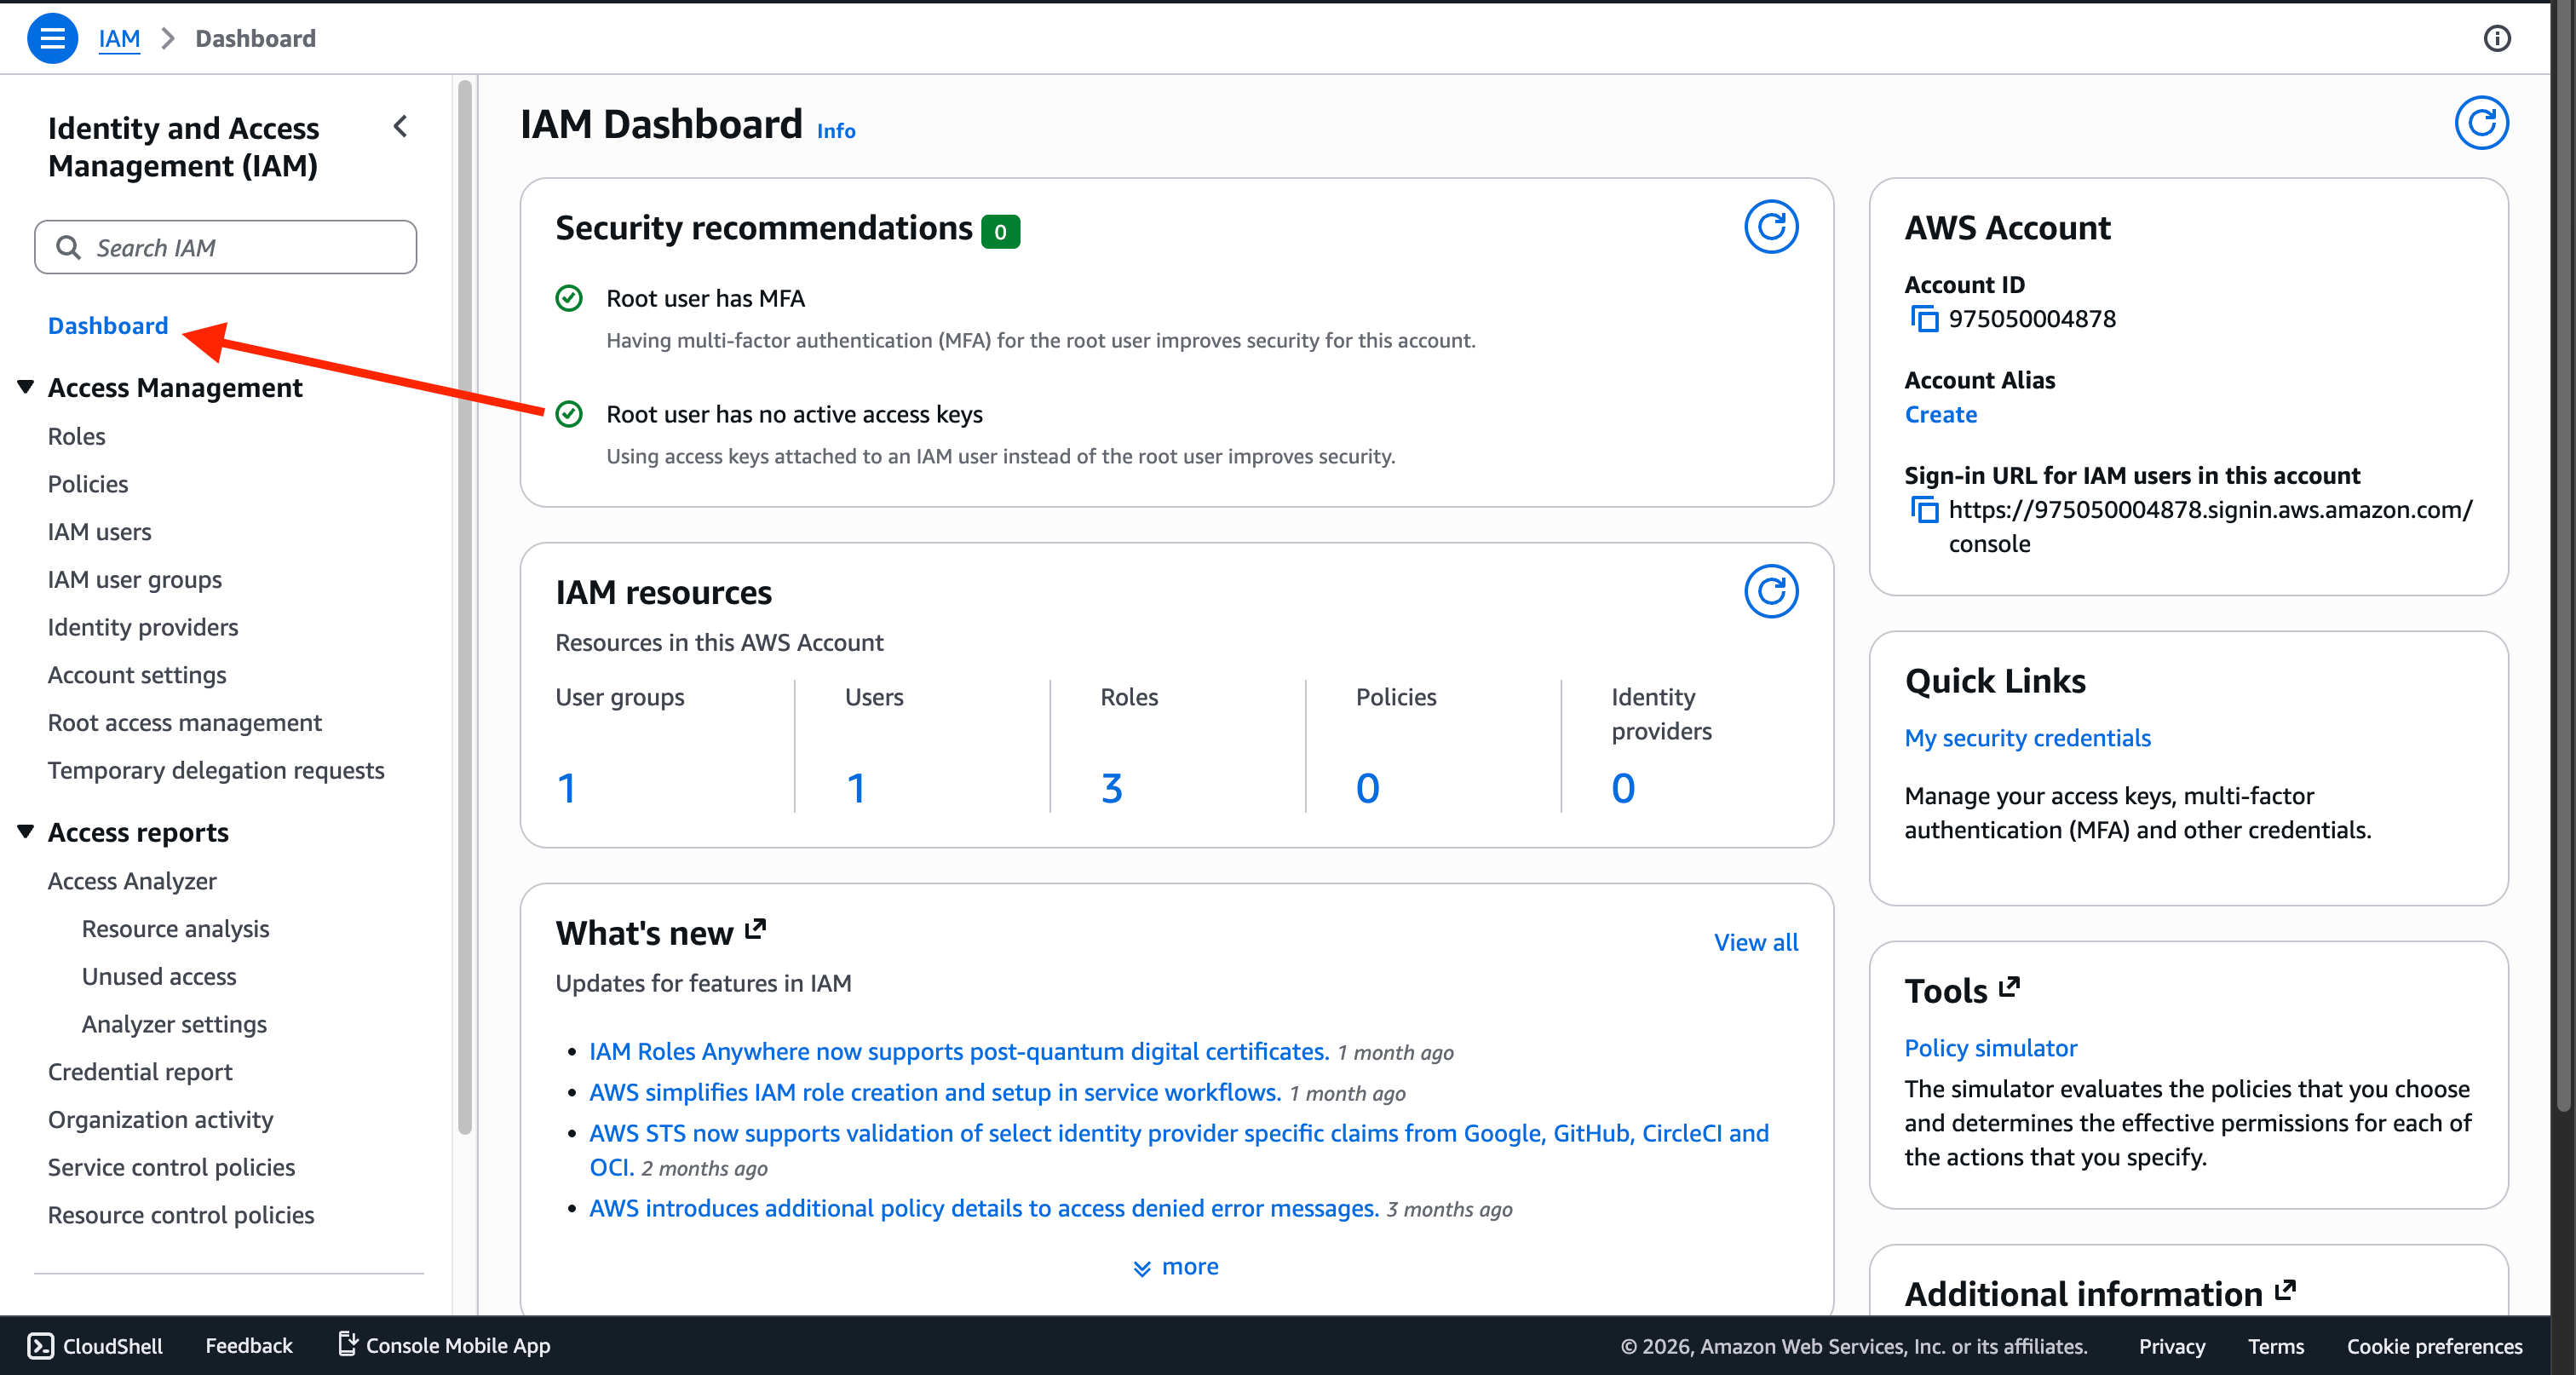
Your IAM Dashboard
Creating an Account Alias
You can customize the sign-in URL by creating an account alias.
It must be unique globally.
💡 This URL can be used by all IAM users for quick and easy login, so they don’t need to remember the account ID or account alias.
🖥 Using Two Browser Windows
Recommended approach:
Left window → Root user (normal browser)
Right window → IAM user (private/incognito mode)
👉 This allows you to:
Compare permissions
Use two identities simultaneously
If you log into both in the same browser session, one session will replace the other.
Check the top-right corner:
You should now see IAM user →
codevedaAccount ID displayed
No longer logged in as root
⚠️ Critical Security Note
👉 Do NOT lose:
Root account credentials
Admin IAM credentials
If you lose both, account recovery becomes very complex and requires contacting AWS Support.
🎓 Course Recommendation
For this course:
✅ Use your IAM user for daily work
❌ Avoid using root unless explicitly required
Sometimes I may demonstrate actions using root, but I will clearly mention when that is necessary.
For now:
Keep both windows open
Make sure you understand the difference between root and IAM user access