🖥️ Manipulating an SQLite3 Database Using the Terminal
In this session, we will learn how to manipulate an SQLite3 database directly from the terminal after successfully installing SQLite3 on your machine.
🚀 Navigating to the Project Directory
Once we are inside our FastAPI project, open up the terminal and navigate to the Todo application directory.
<aside> 💡
Make sure you active the virtual environment
</aside>
cd TodoAppAfter navigating into the TodoApp folder, we will start SQLite3 and connect to our database file.
🗄️ Opening the SQLite3 Database
Run the following command in your terminal:
sqlite3 todos.dbThe todos.db file represents the database that we previously created inside our project directory.
🧩 Viewing the Database Schema
The first command we will run inside SQLite3 is:
.schemaThis command displays all tables and their structures within the SQLite3 database.
From the schema output, we can confirm that:
Our table exists
The primary key is the
idcolumn
➕ Inserting a Record Into the Todos Table
Now let’s insert a record into the todos table.
insert into todos (title, description, priority, complete) values ('Go to store', 'To pickup eggs', 4, False);This successfully inserts a new record into the database.
If you see ...> in the SQLite terminal, it means the SQL statement is incomplete.
👉 Finish the remaining part of the command (usually ending with a ;) to execute it.
🔍 Viewing All Records
To verify that the record was added, run:
SELECT * FROM todos;You’ll notice that:
The ID column is automatically generated
SQLite handles auto-incrementing the primary key for us
In the video above, you may have noticed the ; was missing, which caused the ...> prompt to appear.
👉 Do not retype the entire command. Simply add ; to complete the statement and continue execution — which is what was done in this case.
➕ Adding Multiple Records
Let’s now add three more records to the table.
insert into todos (title, description, priority, complete)
values ('Cut the lawn', 'Grass is getting long', 3, False);

insert into todos (title, description, priority, complete)
values ('Feed the dog', 'He is getting hungry', 5, False);

insert into todos (title, description, priority, complete)
values ('Test the Element', 'He is getting hungry', 5, False);
Now, retrieve all records again:
SELECT * FROM todos;At this point, four records should be returned.
🎨 Improving Terminal Output Formatting
You may notice that the default output format is not very readable.
SQLite allows us to change how query results are displayed using display modes.
📊 Column Mode
.mode columnThen run:
SELECT * FROM todos;
This displays the results in aligned columns.
🧾 Markdown Mode
.mode markdownThen run:
SELECT * FROM todos;
This formats the output using Markdown-style tables.
📦 Box Mode
.mode boxThen run:
SELECT * FROM todos;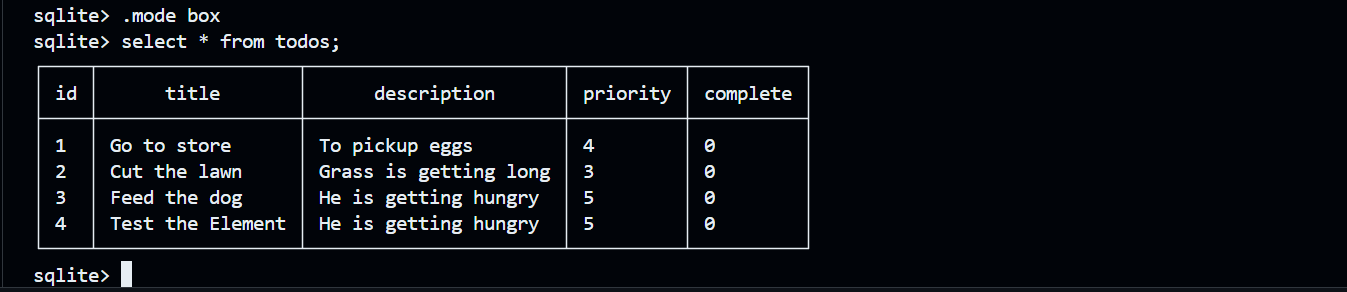
This displays the data inside a sealed box layout.
📋 Table Mode
.mode tableThen run:
SELECT * FROM todos;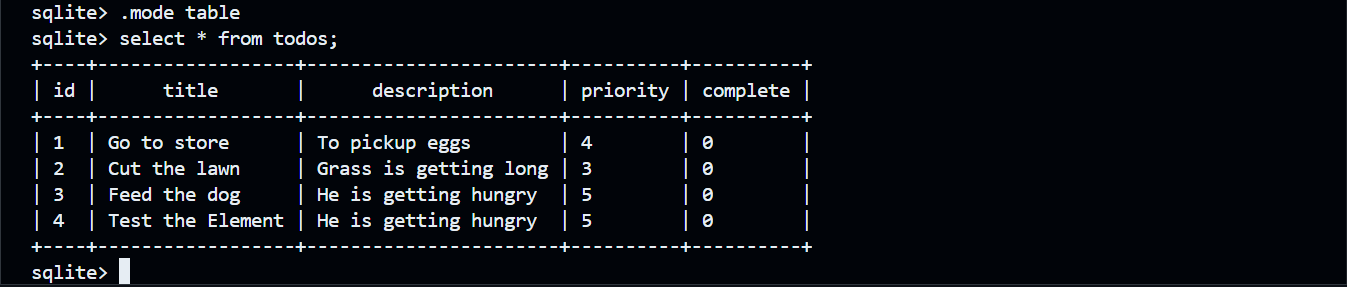
This mode is similar to box mode but uses dashed lines instead of solid borders.
🆔 Deleting by ID (Best Practice)
Because the primary key is unique, it is the safest way to delete a record.
DELETE FROM todos WHERE id = 4;Now check the table again:
SELECT * FROM todos;You’ll see that the record with ID 4 has been removed.
Using the primary key ensures that:
Only one record is affected
No accidental deletions occur
🔁 Reusing Deleted IDs
When we add a new record after deleting one, SQLite may reuse the previously deleted ID.
insert into todos (title, description, priority, complete)
values ('A new test element', 'He is getting hungry', 5, False);
Verify the result:
SELECT * FROM todos;You’ll notice that the new record uses the ID value that was previously deleted.
use the exit command to exit from SQLite3.
.exit #to exit from sqlite🗄️ Other SQLite3 Commands (Terminal)
Below are some commonly used SQLite3 commands you can run directly in the terminal when working with a SQLite database.
Command | Description |
|---|---|
| Displays all available SQLite3 commands. |
| Lists all databases currently attached to the SQLite session. |
| Shows all tables in the current database. |
| Displays the schema (structure) of all tables. |
| Shows the schema for a specific table. |
| Turns column headers on when displaying query results. |
| Turns column headers off. |
| Formats query output into aligned columns. |
| Displays query results in a table format. |
| Outputs results in CSV format. |
| Adjusts the width of columns in column mode. |
| Outputs the entire database schema and data as SQL statements. |
| Dumps only a specific table. |
| Executes SQL commands from a file. |
| Sends query output to a file. |
| Resets output back to the terminal. |
| Imports CSV data into a table. |
| Lists all indexes in the database. |
| Turns on query execution timing. |
| Turns off query timing. |
| Exits the SQLite3 shell. |
✅ Summary
In this session, we learned how to interact with and manipulate an SQLite3 database directly from the terminal. We connected to the database, inspected the schema, inserted records, retrieved data, deleted records using the primary key, and explored several output formatting options to improve readability.
Additionally, we reviewed a number of useful SQLite3 terminal commands that can help manage and inspect your database more efficiently while working within the command-line interface.