In this lecture, we are going to:
Launch our first EC2 instance (virtual server)
Review the important configuration settings
Use User Data to create a web server
Learn how to start, stop, and terminate an instance
🔹 Step 1: Navigate to EC2
Search EC2
Click Launch Instance from Dashboard or Instance Page
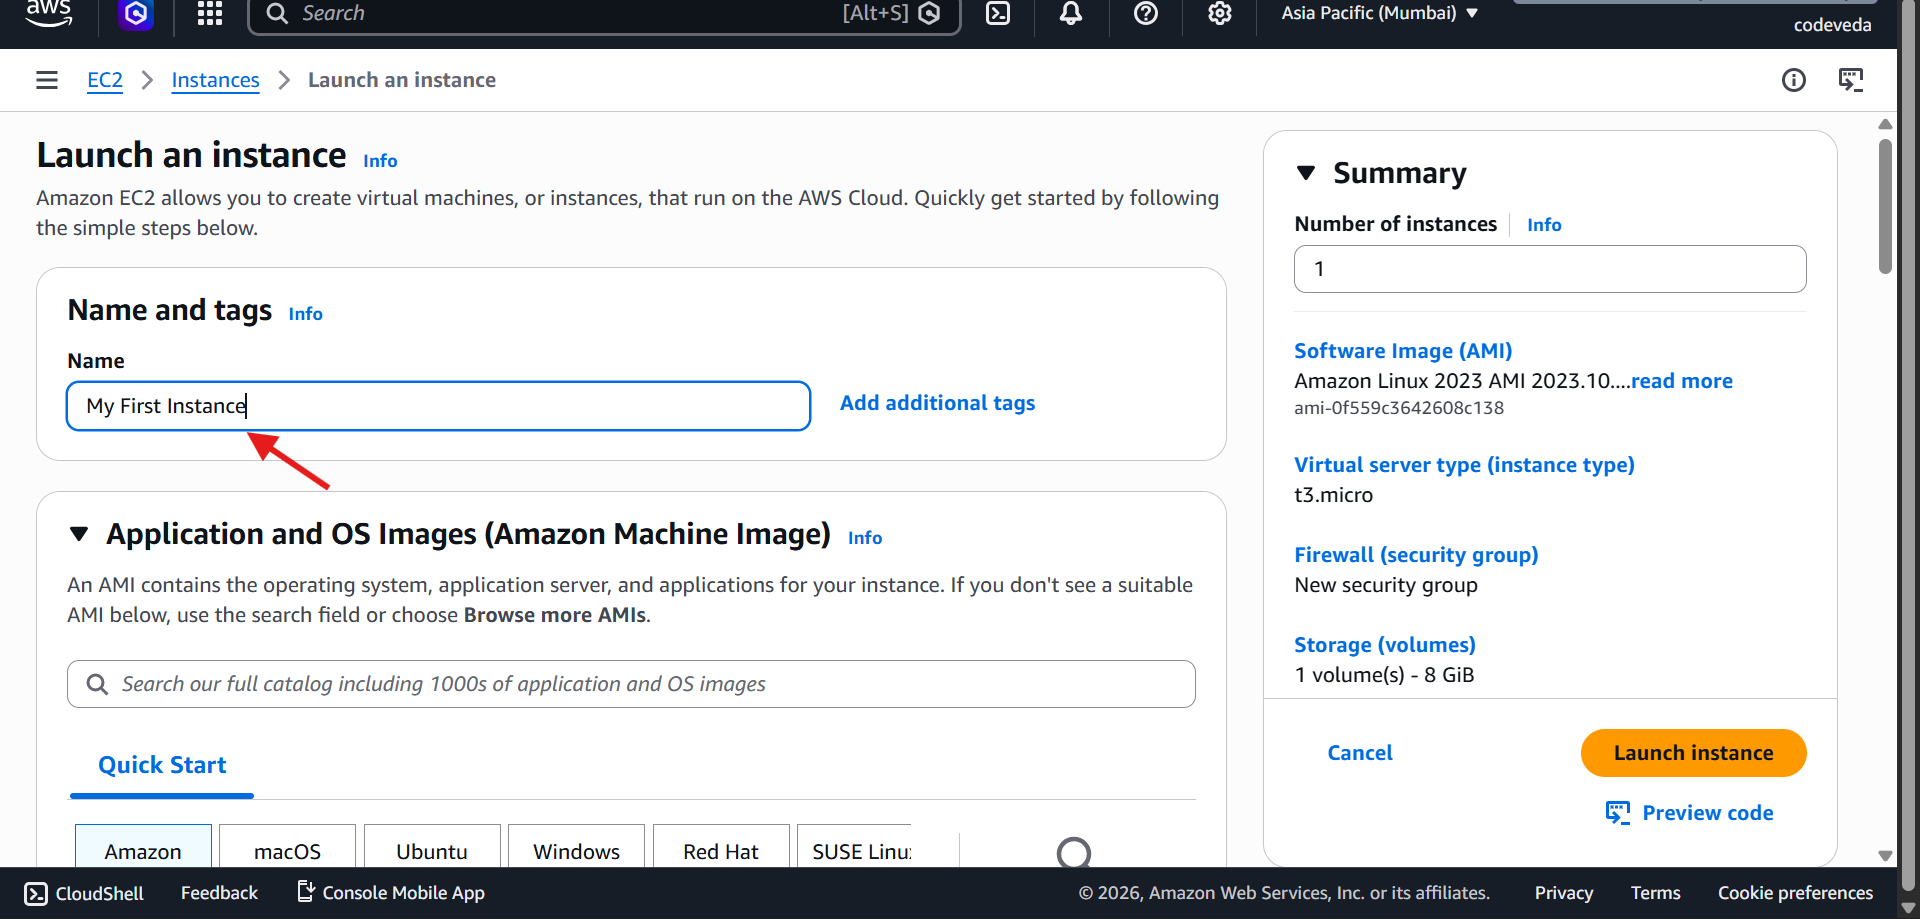
🔹 Step 2: Name Your Instance
Name: My First Instance
This creates a tag for your instance
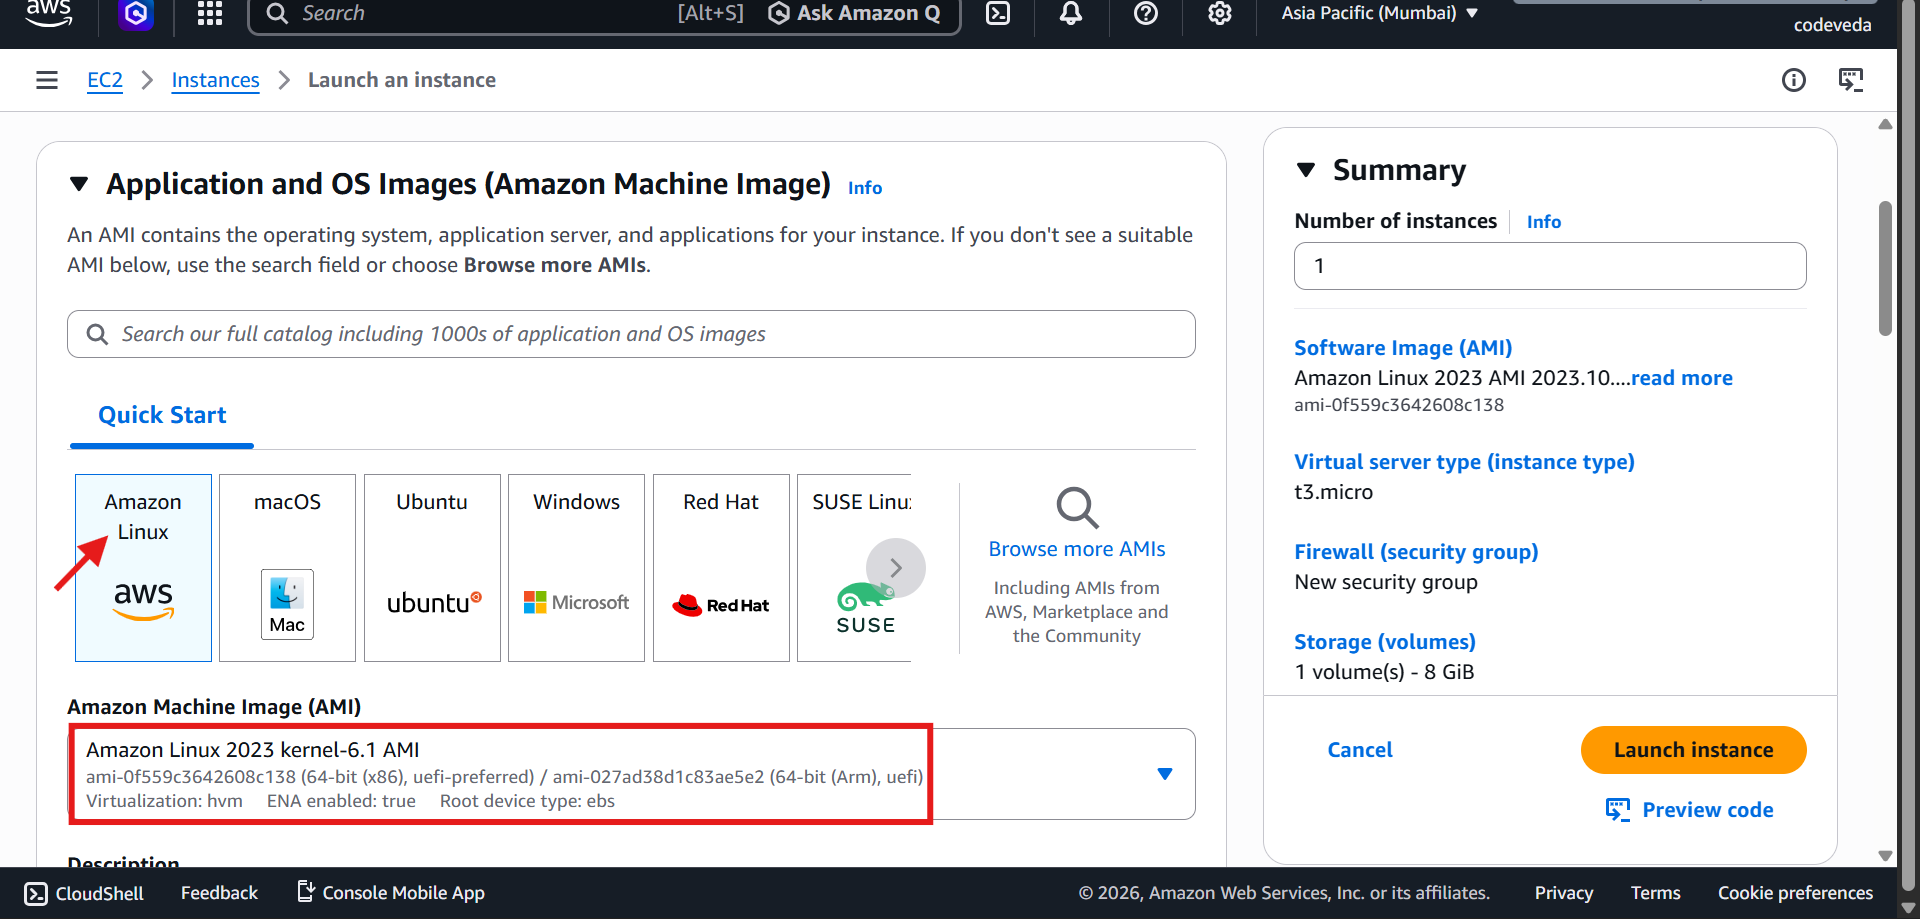
🔹 Step 3: Choose an AMI (Operating System)
Select: Amazon Linux 2023 (kernel-6.1) AMI
✔ Free tier eligible
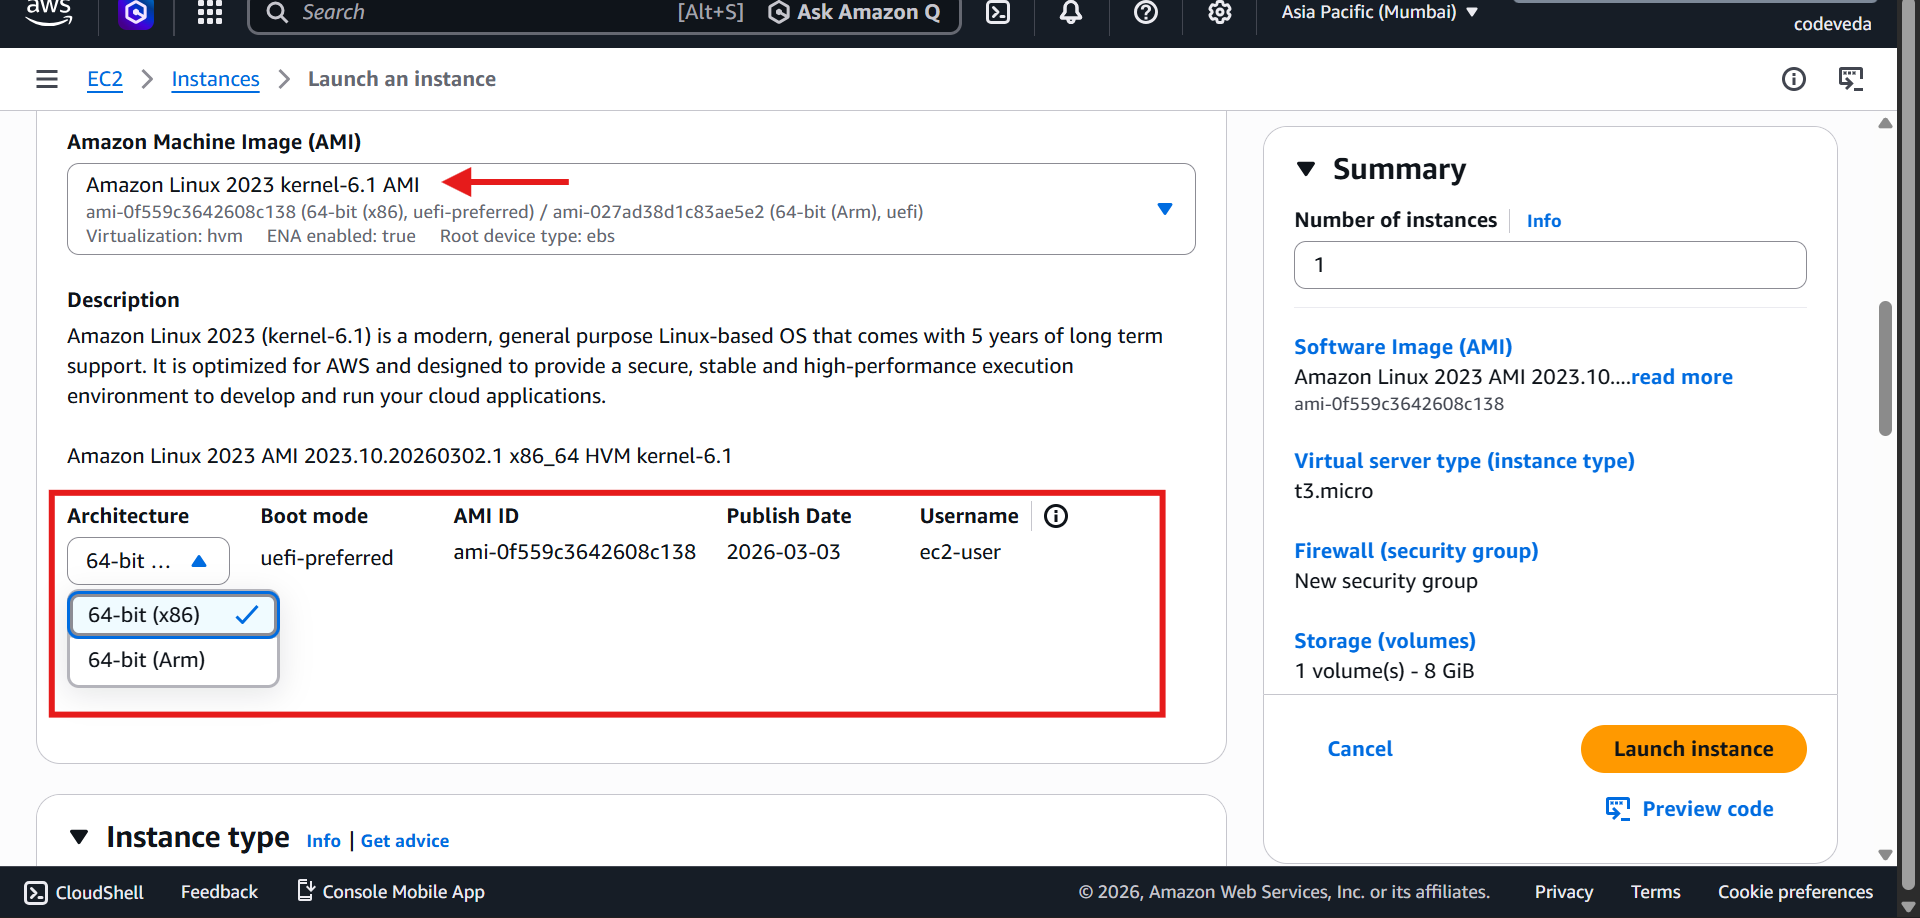
Architecture: 64-bit (x86)
🔹 Step 4: Choose Instance Type
Scroll down and select: t3.micro or t2.micro (default)
✔ Free tier eligible
Includes:
Basic CPU
Small RAM
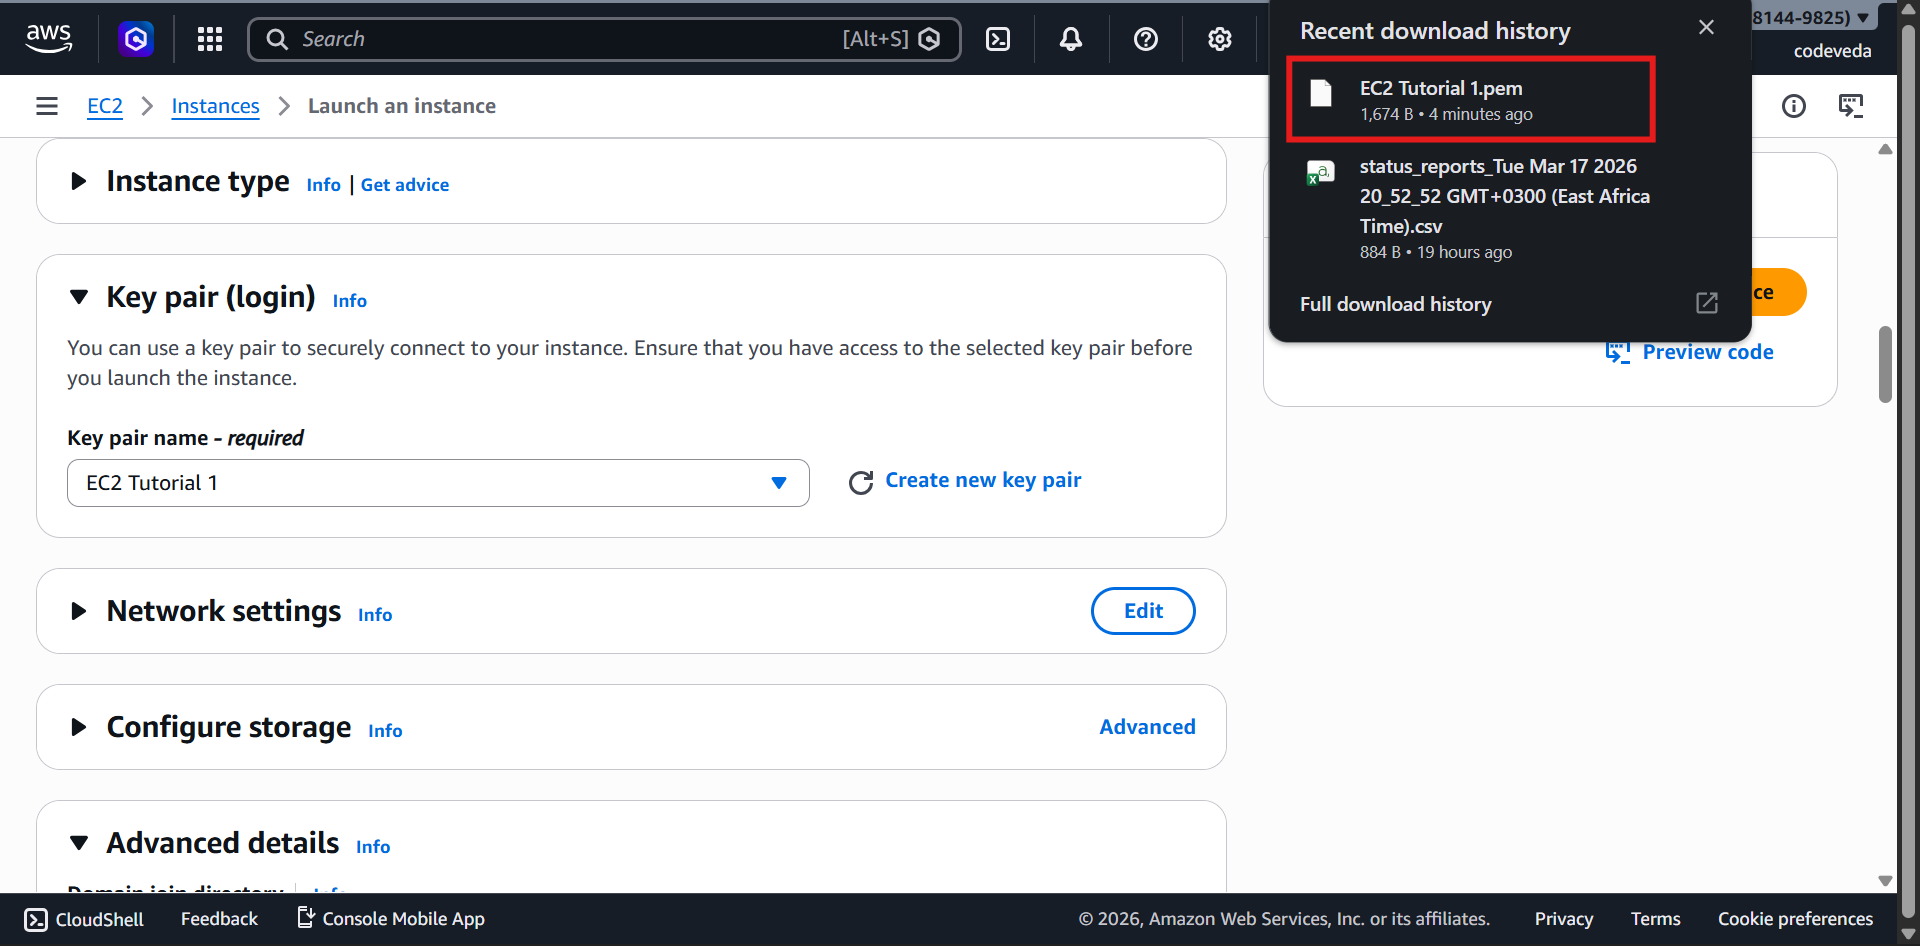
🔹 Step 5: Create Key Pair
Name: EC2 Tutorial
Type: RSA
📌 Format:
.pem→ Mac, Linux, Windows 10+.ppk→ Windows 7/8 (PuTTY)
👉 This is used for SSH access.
‼️ Make sure to save it locally. You'll use it in later chapters.
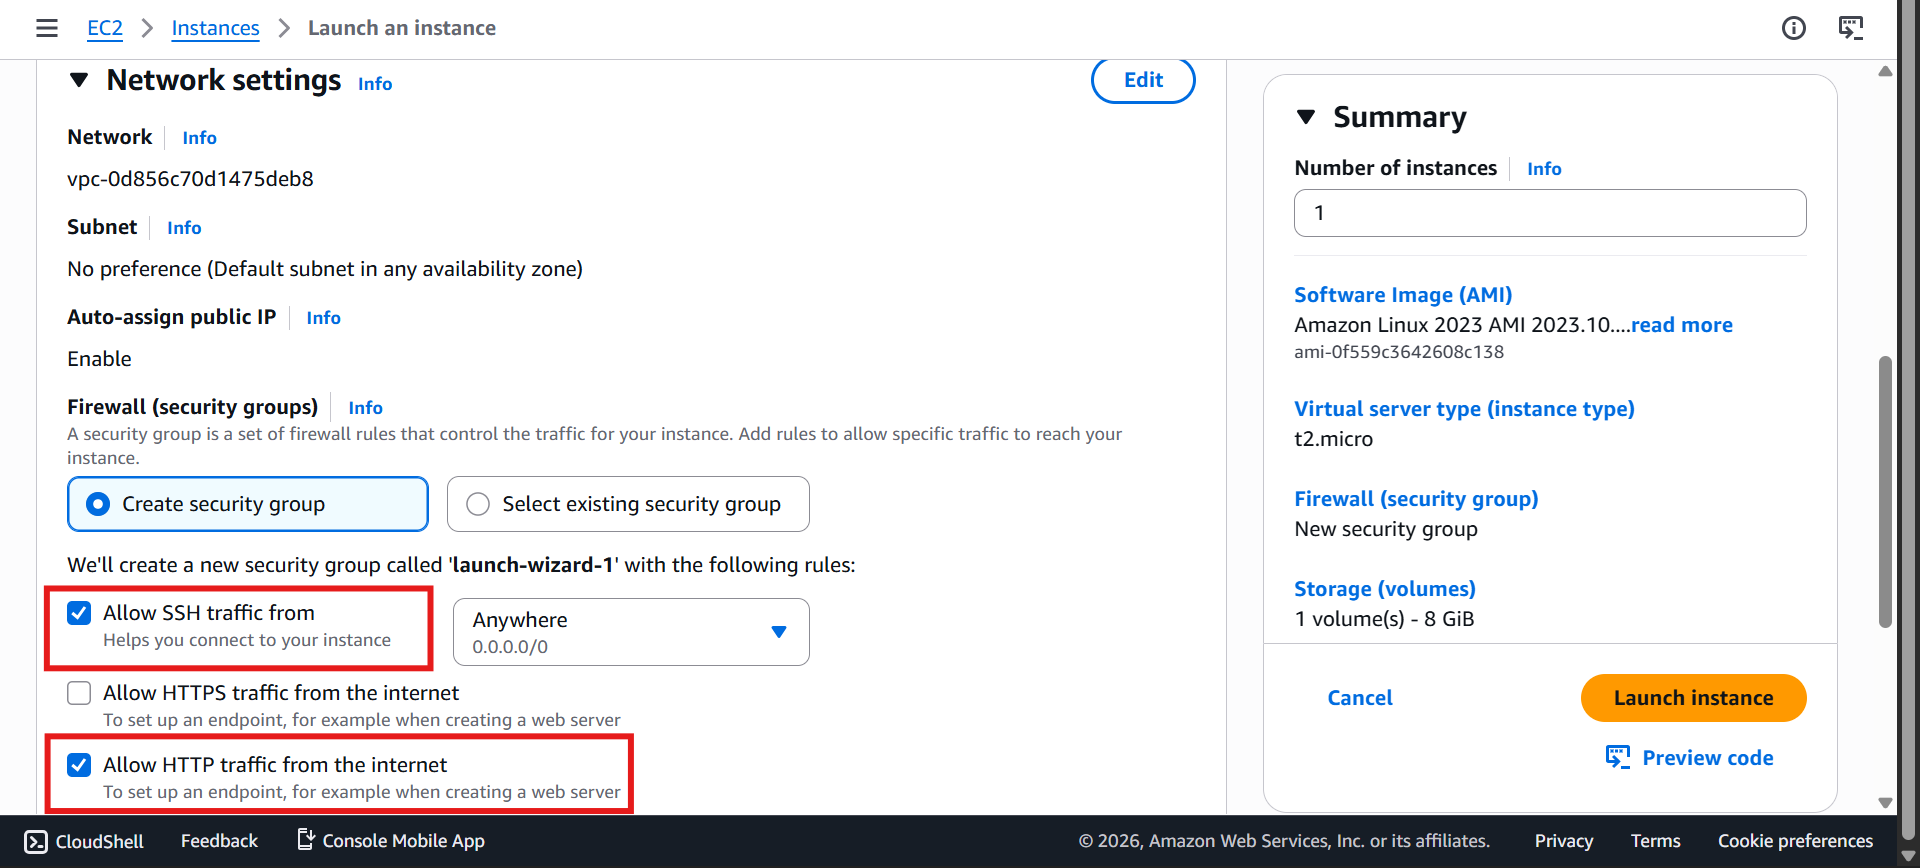
🔹 Step 6: Configure Network & Security
Keep default network settings
Instance gets a public IP
🔐 Security Group Rules:
Allow SSH (port 22) from anywhere
Allow HTTP (port 80) from anywhere
👉 Required for:
SSH access
Web server access
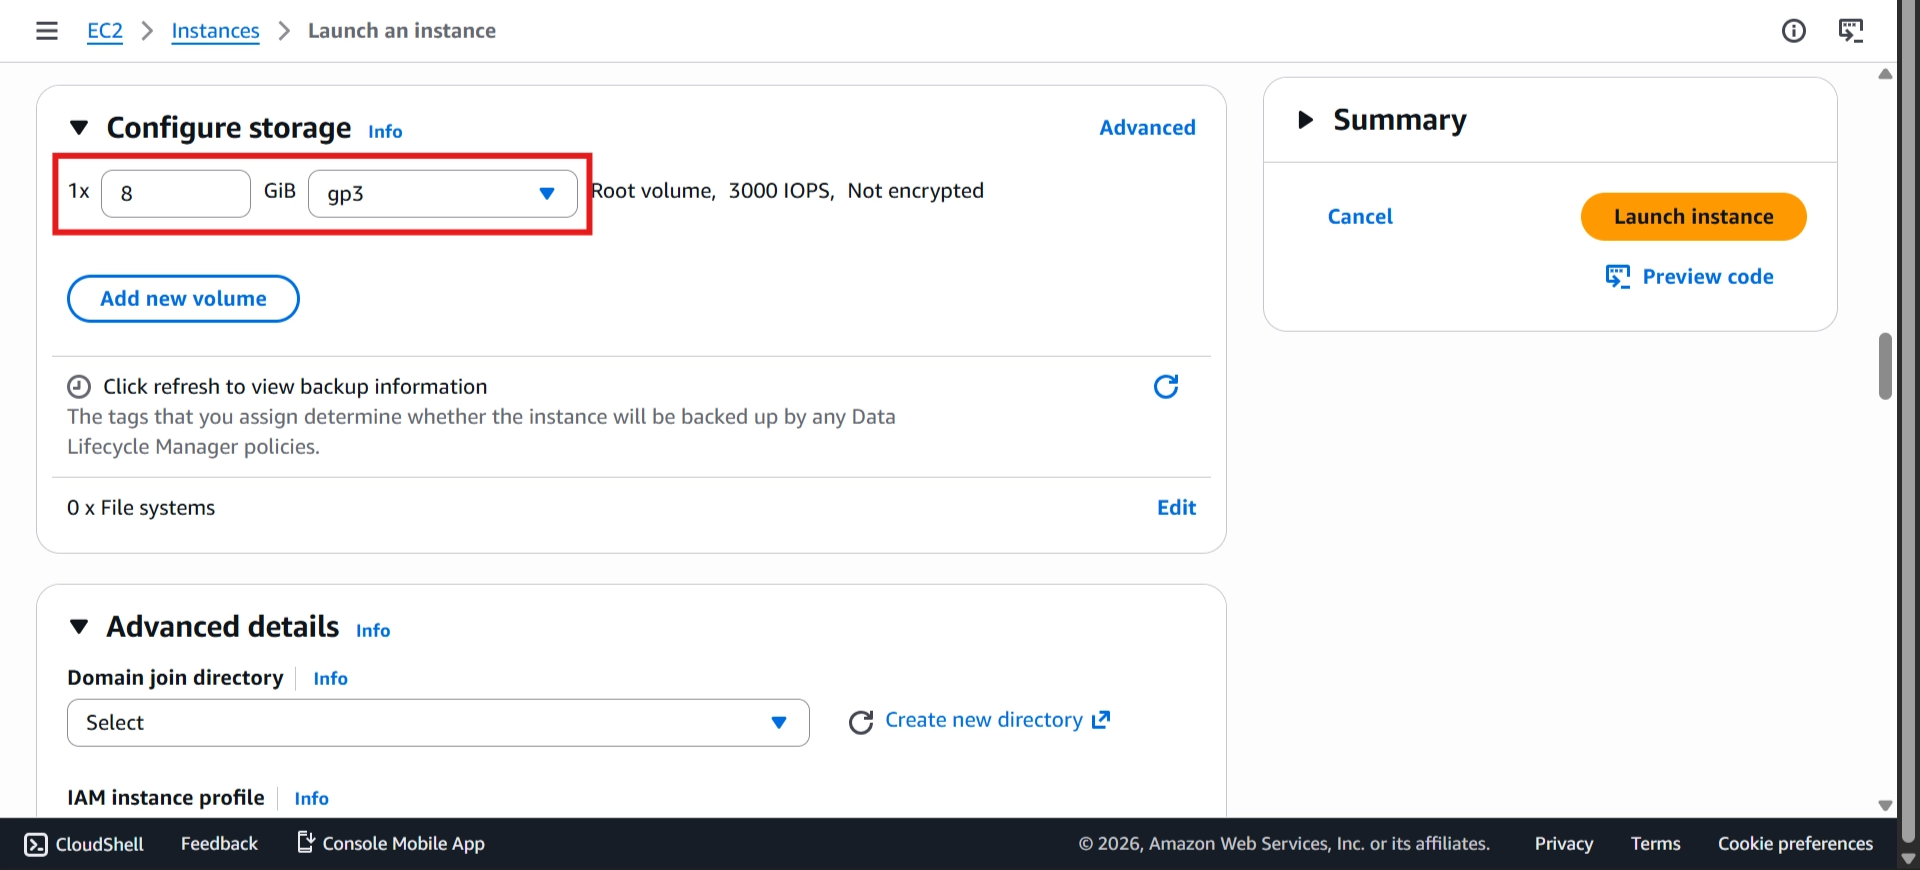
🔹 Step 7: Configure Storage
Default: 8 GB EBS (gp2)
✔ Free tier allows up to 30 GB
⚠️ Important:
Delete on termination = Enabled
👉 Storage is deleted when instance is terminated
🔹 Step 8: Add User Data (Bootstrap Script)
Scroll to Advanced Details → User Data
Paste the provided script.
#!/bin/bash
# Use this for your user data (script from top to bottom)
# install httpd (Linux 2 version)
yum update -y
yum install -y httpd
systemctl start httpd
systemctl enable httpd
echo "<h1>Hello World from $(hostname -f)</h1>" > /var/www/html/index.html
👉 This script will:
Install updates
Install Apache (httpd)
Create a web server (HTML page)
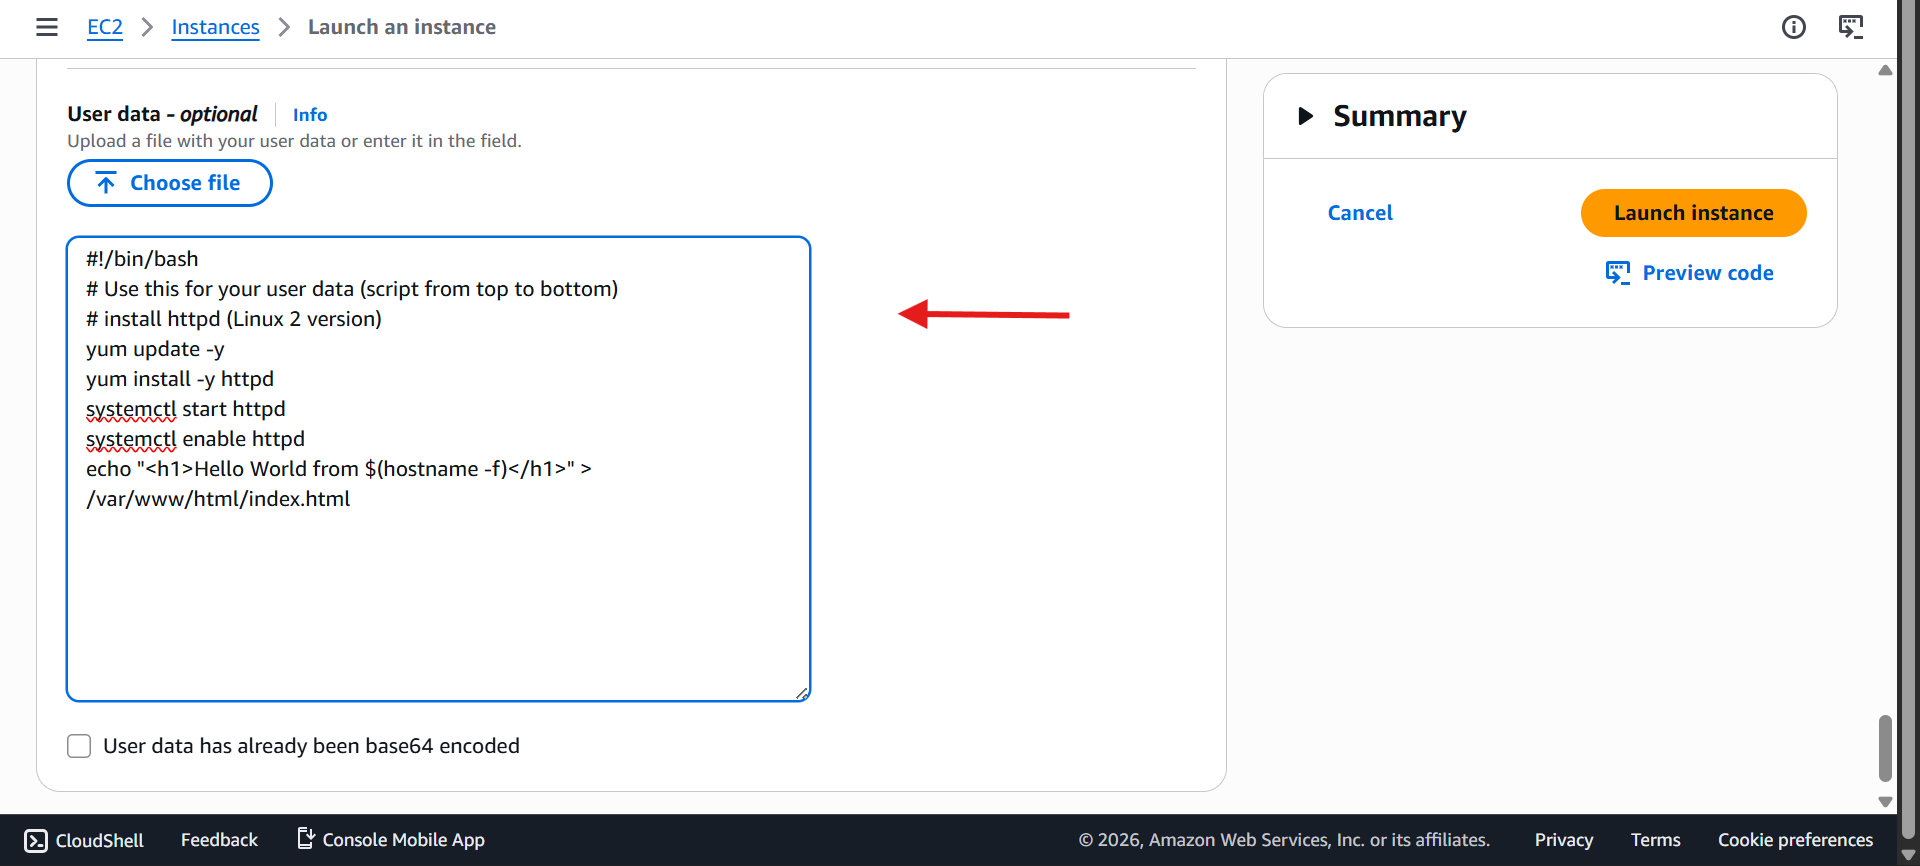
📌 Runs only once at launch
🔹 Step 9: Launch Instance
Review configuration
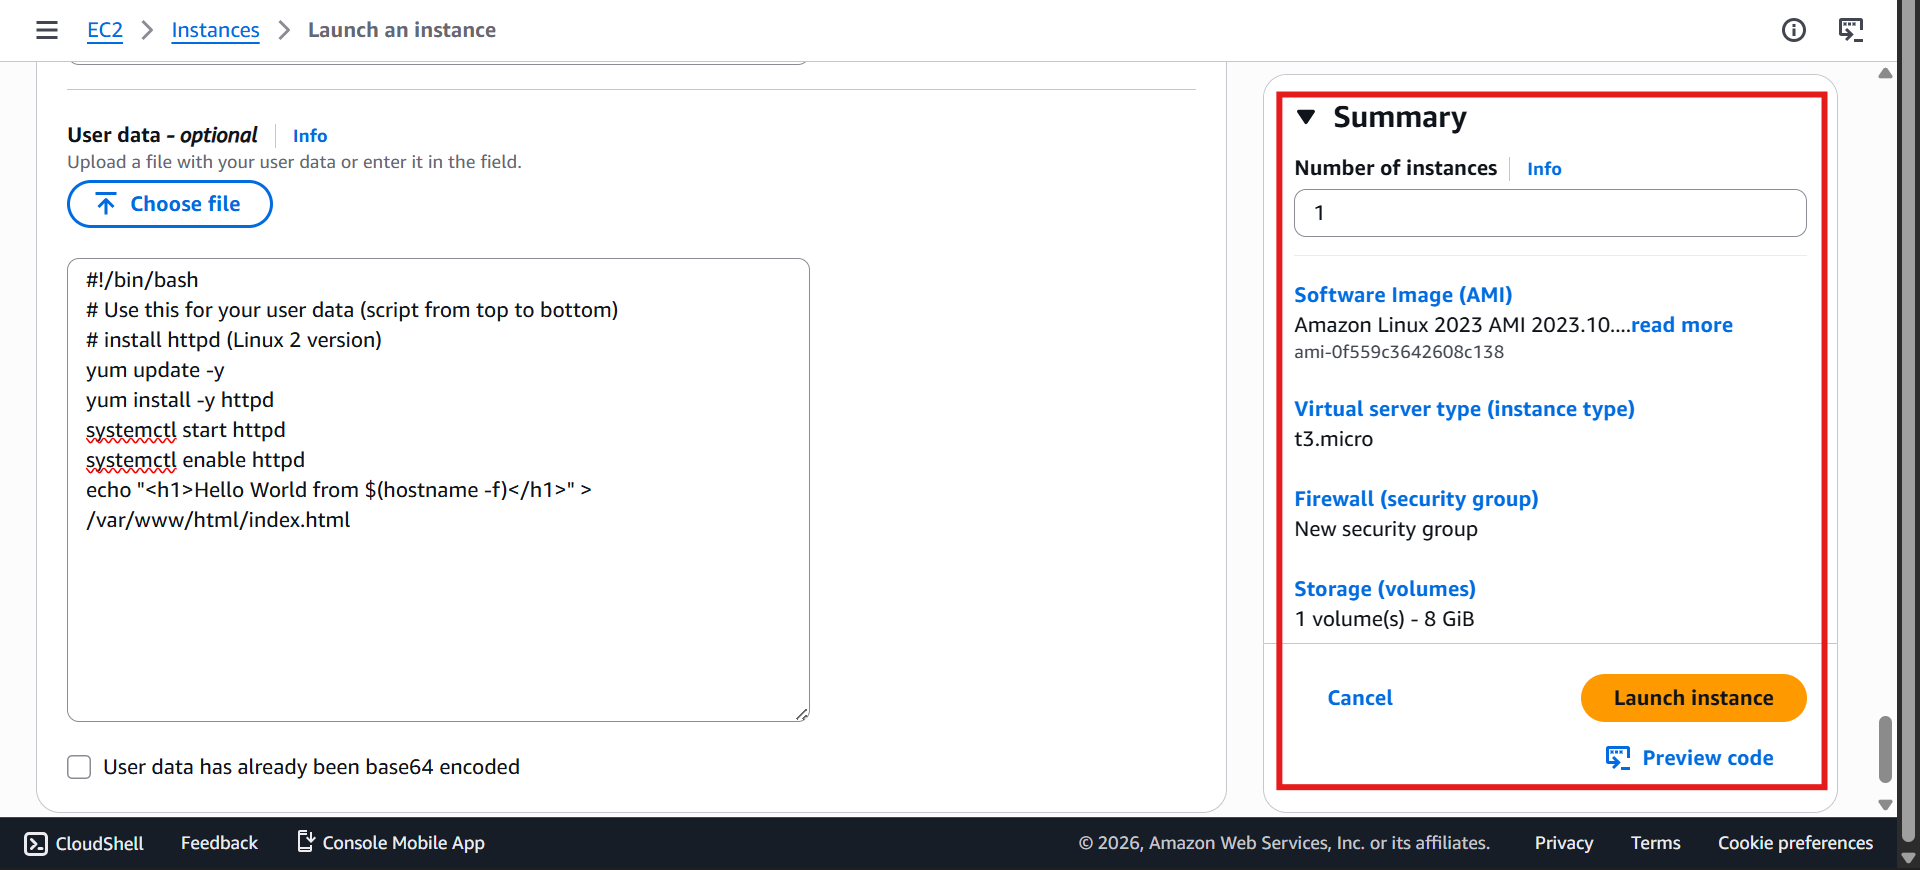
Click Launch Instance
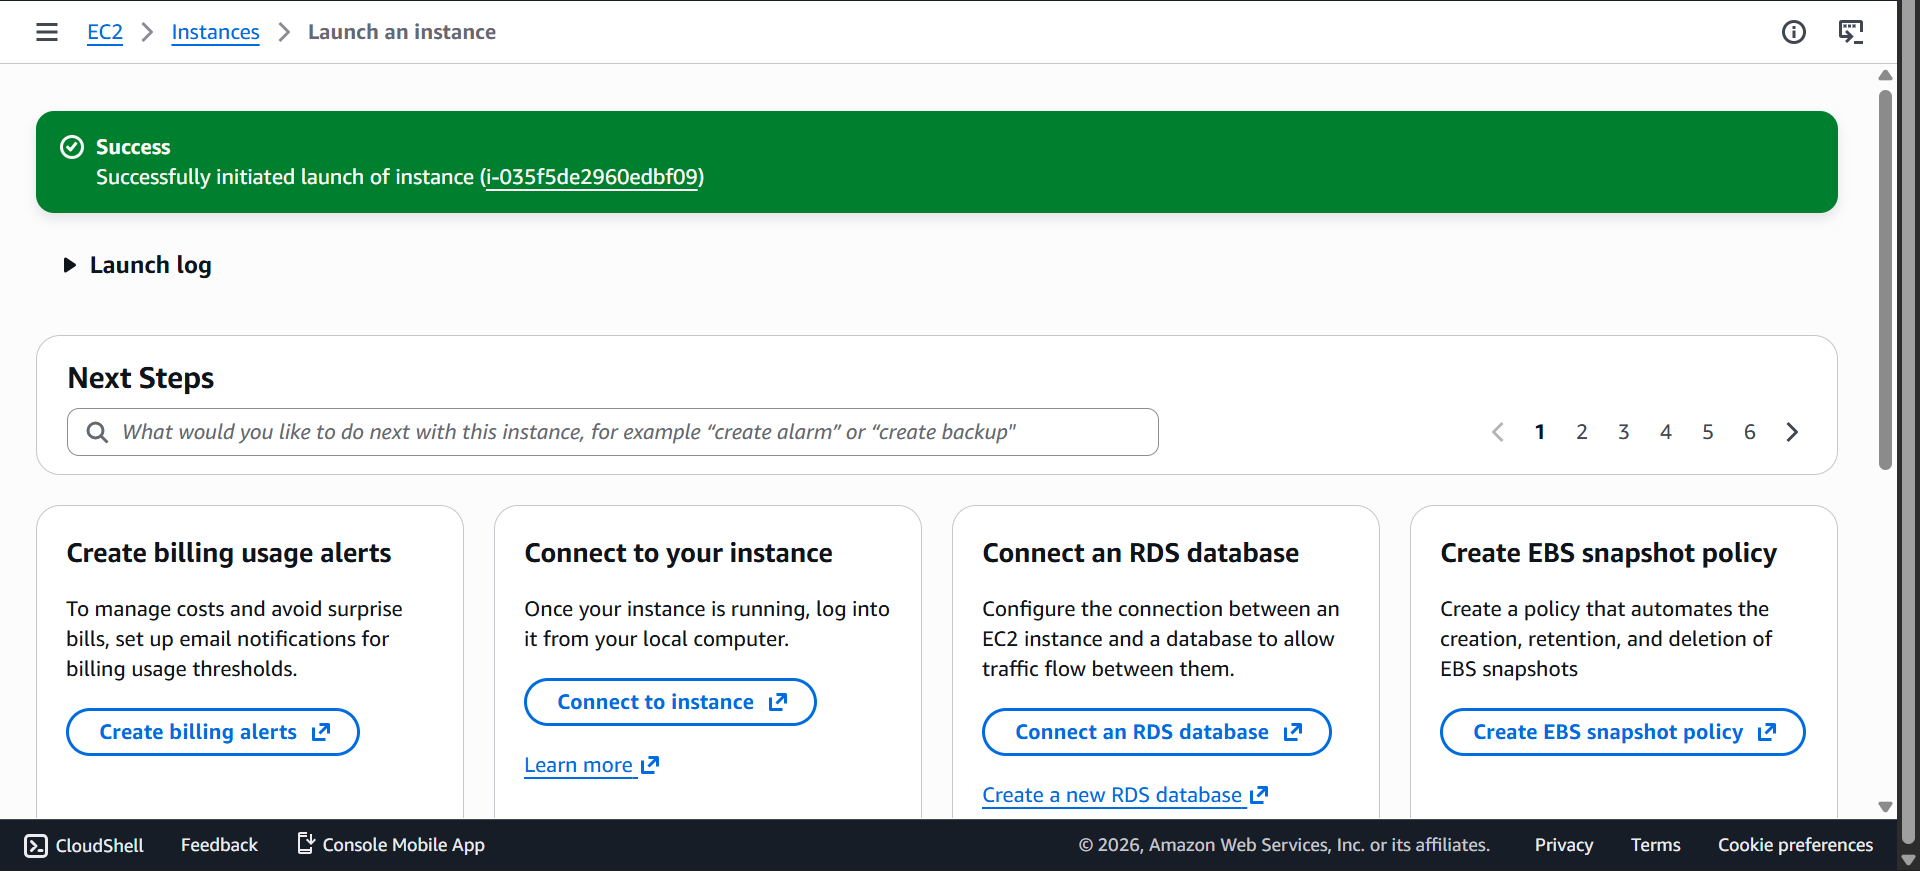
Go to View All Instances
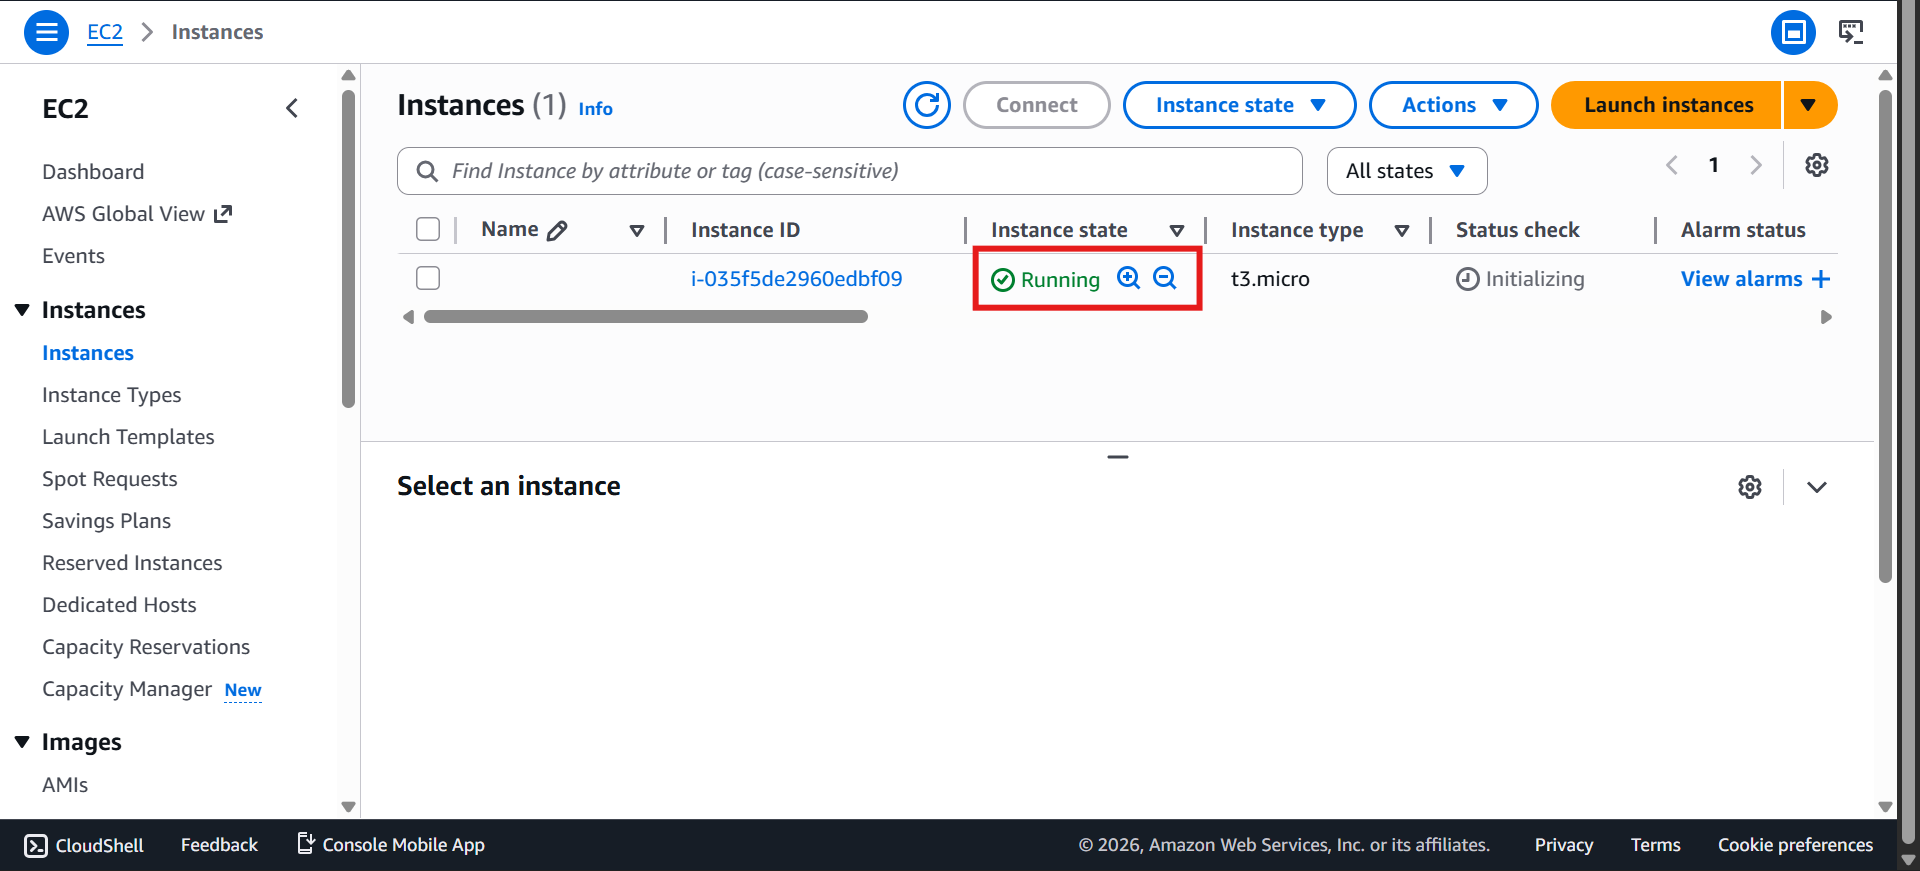
⏱️ Instance will move:
Pending → Running
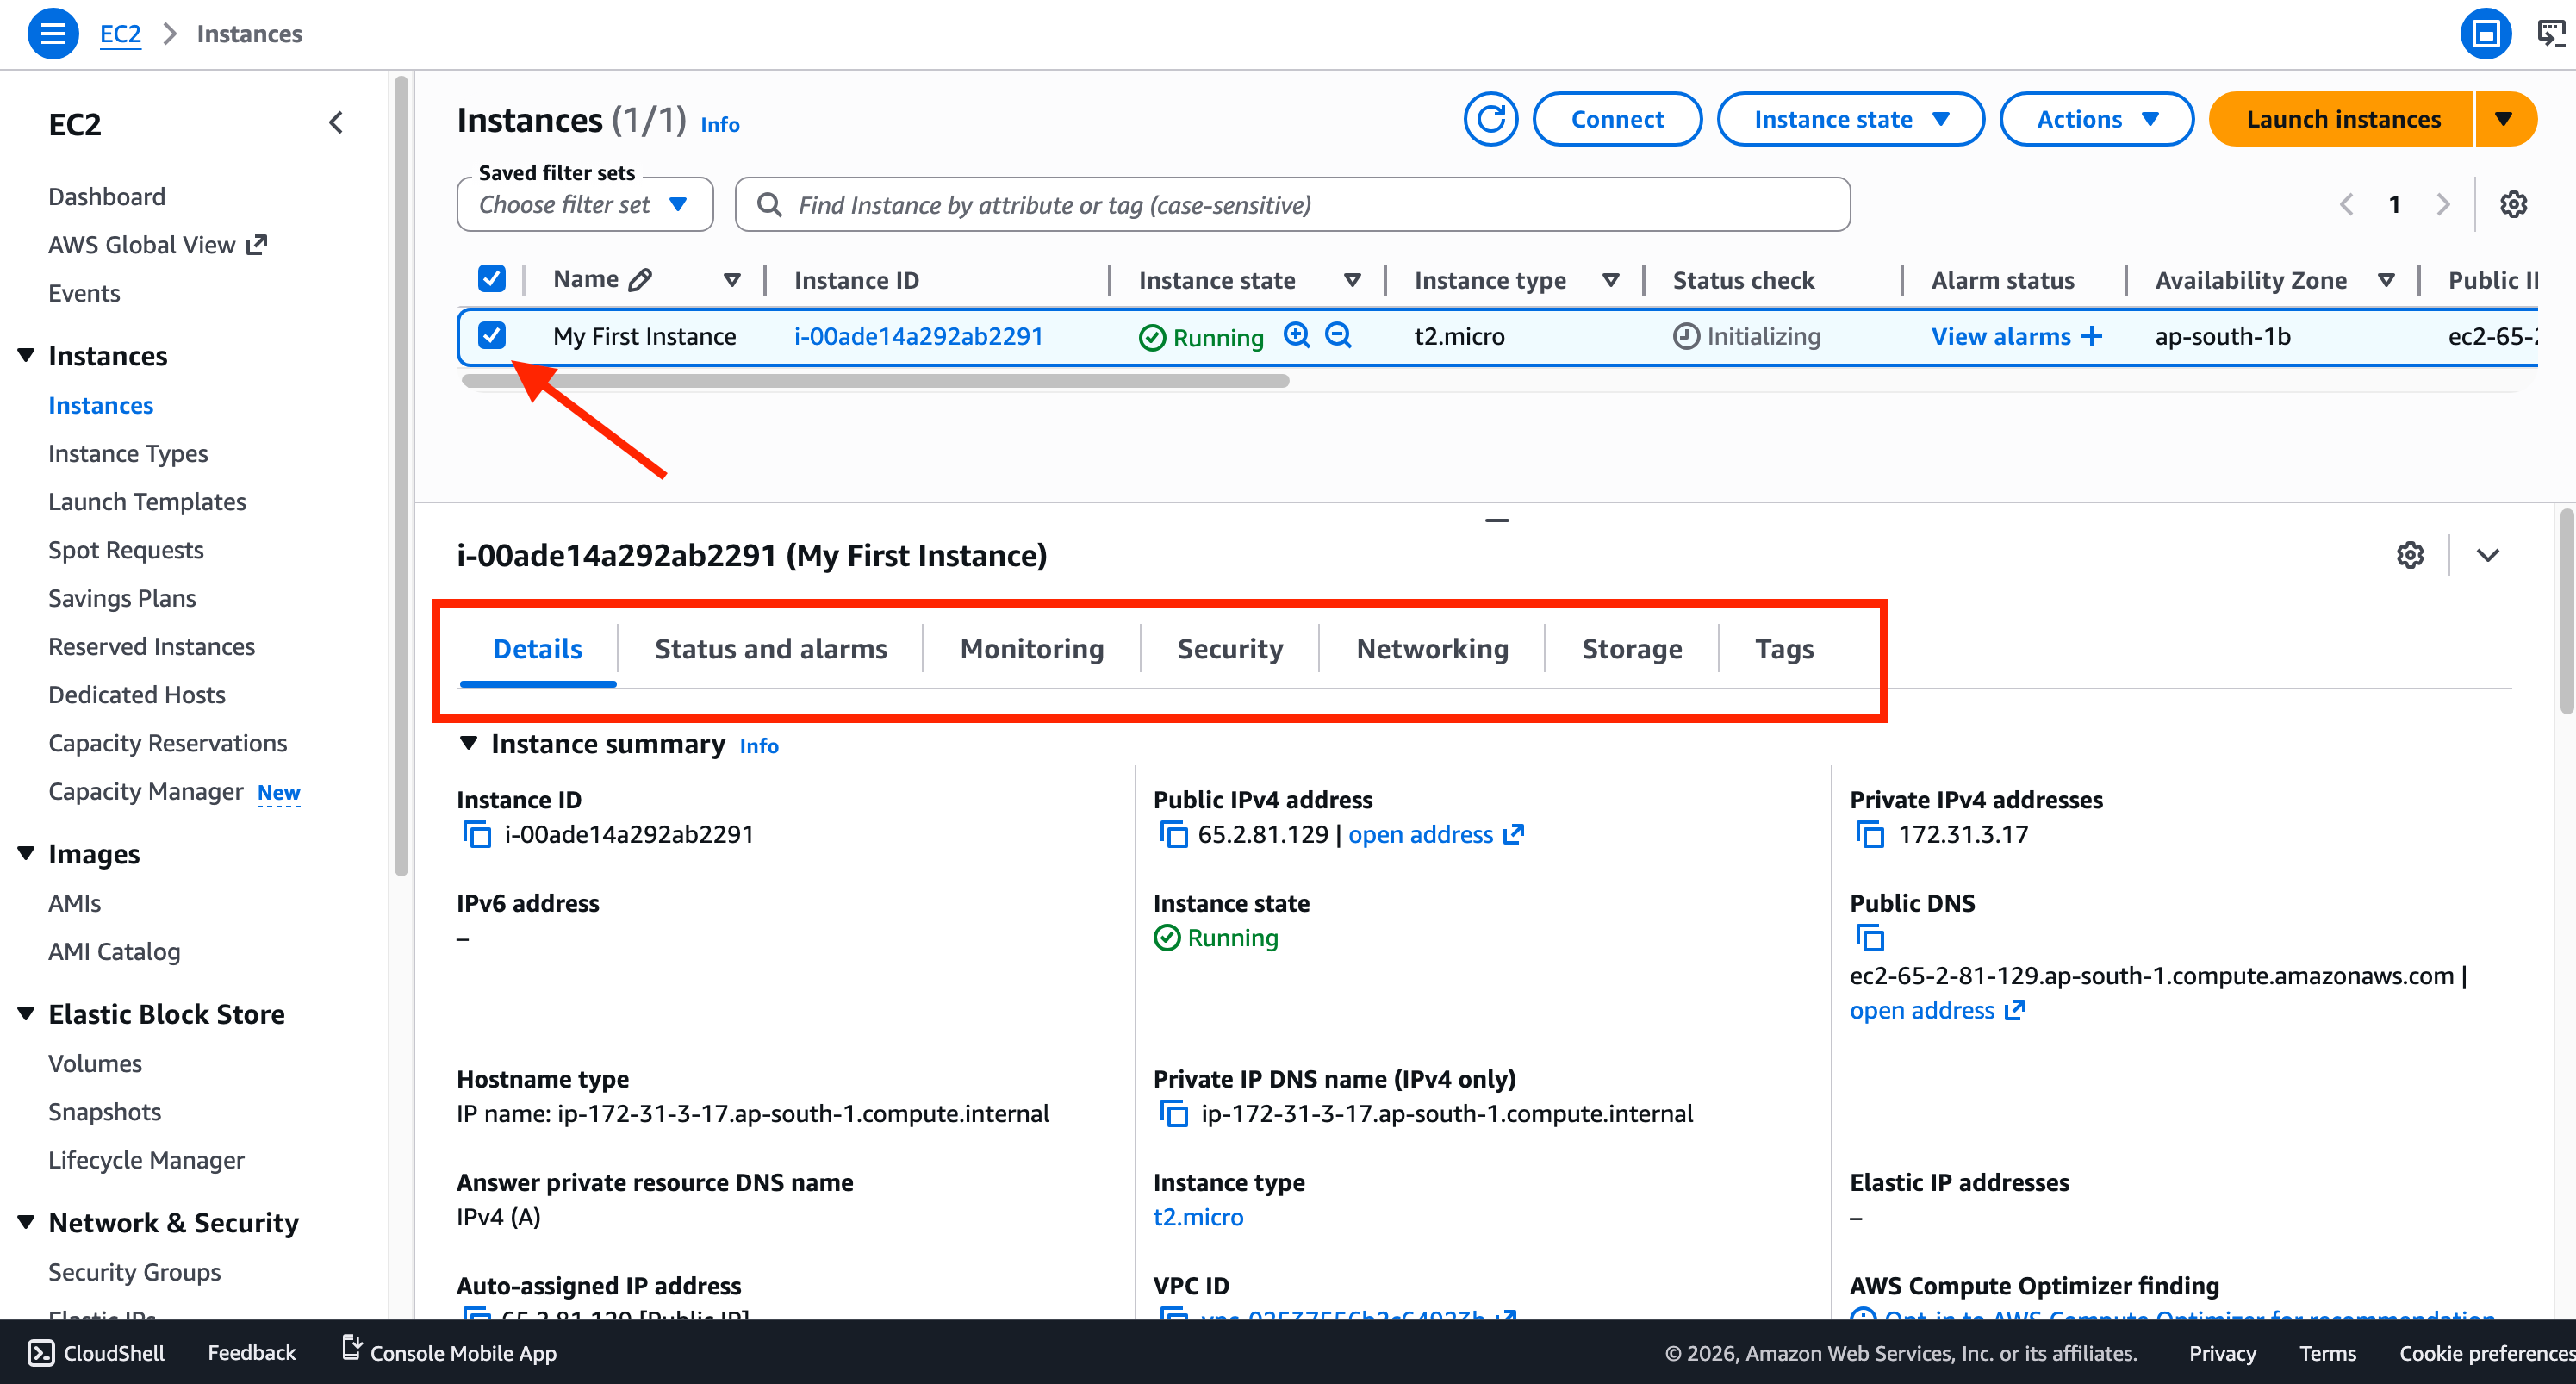
🔹 Step 10: Explore Instance Details
You will see: Instance ID
Public IPv4 address
Private IPv4 address
Instance type (t2.micro)
AMI (Amazon Linux 2)
Security group (launch-wizard-1)
Click the
checkboxnext to instance and you be able to see details, status and security and storage info
🔹 Step 11: Access Web Server
Copy Public IPv4 address
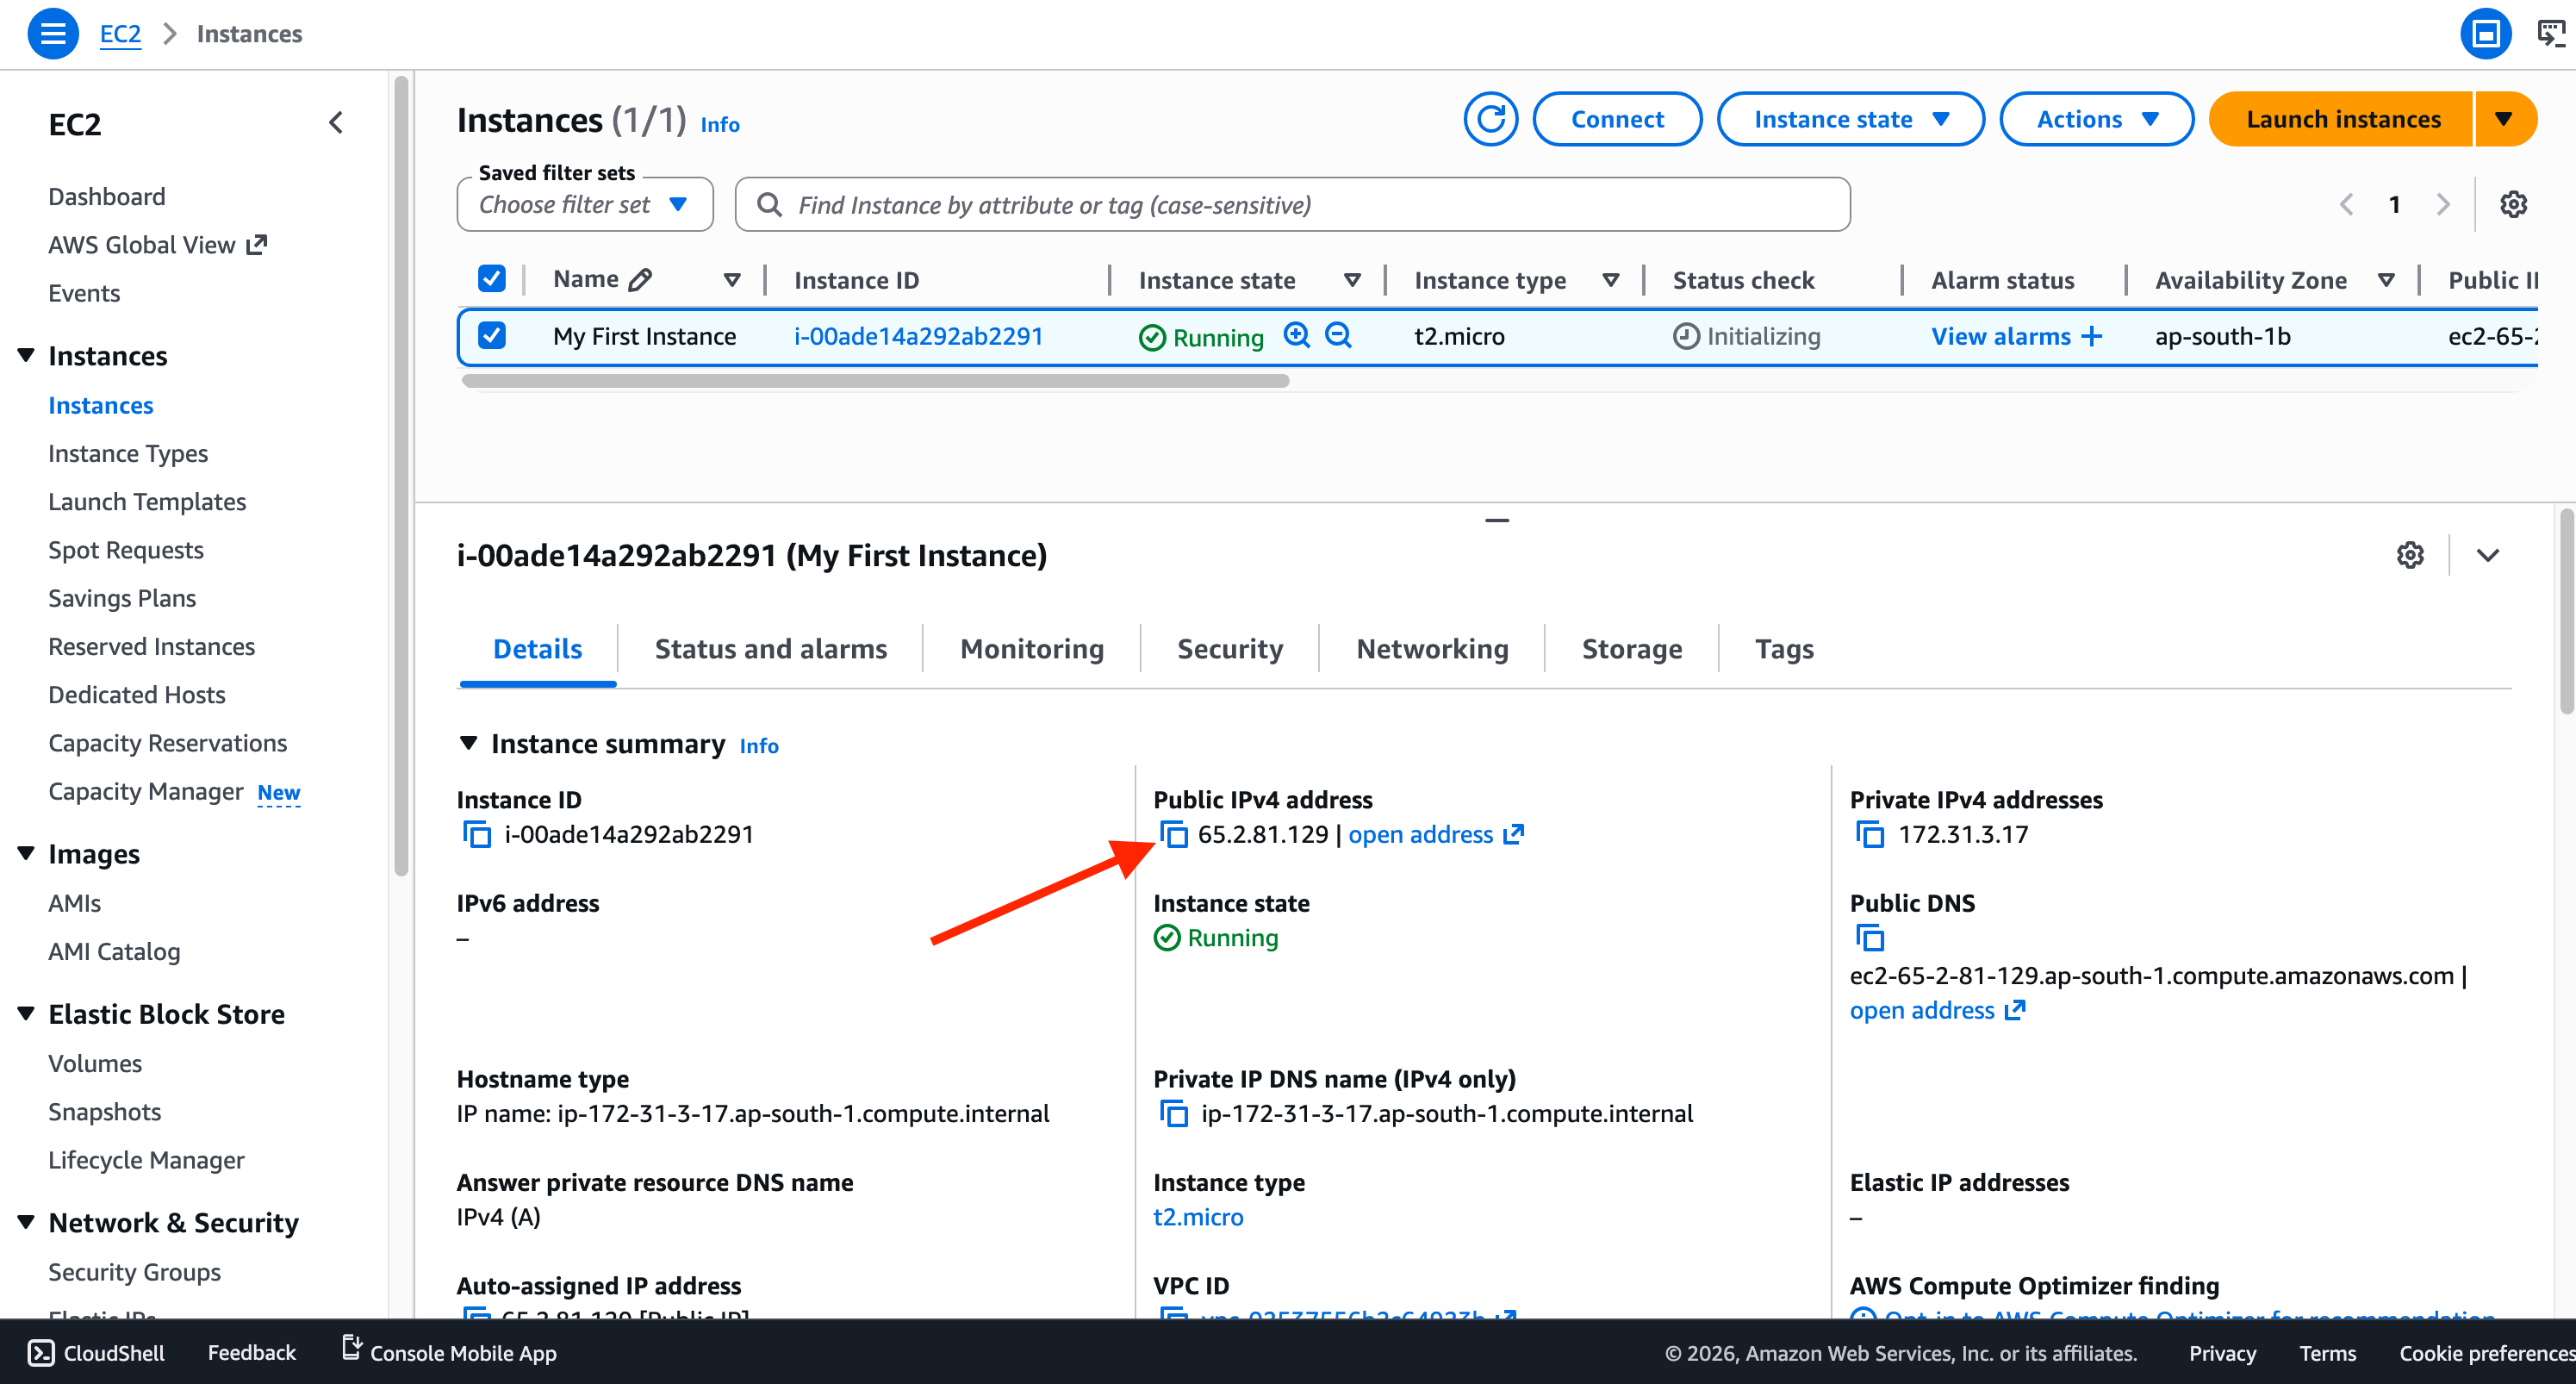
Open browser and Enter Ipv4 address in browser search bar
http://<your-public-ip>⚠️ Important: Use HTTP, not HTTPS
👉 You should see:
“Hello World” webpage
If you click
open addressfrom aws it will stuck in loop due to https://<your-public-ip>
❓ Understand IP Behavior
Public IP → Can change after stop/start instance
Private IP → Stays the same
🤑 Manage Instance State
Stops server
You are not billed
Restarts server
May assign a new public IP
Permanently deletes instance
Deletes attached storage
💡 Key Takeaways
EC2 allows you to create servers in seconds
You only pay for what you use
Public IP can change, private IP stays
User Data automates setup
This is the foundation of cloud computing