🧪 Hands-On: Amazon RDS MySQL Database
In this lab, you'll create your first RDS MySQL database and learn to:
🗄️ Create and configure an RDS database
🔐 Set up authentication and networking
📸 Create and restore a database snapshot
🗑️ Clean up your AWS resources
By the end, you'll know the basics of deploying and managing a relational database on RDS.
🌍 The Scenario
You're deploying a web app that needs a database for customer and application data.
Instead of installing and managing MySQL on EC2 yourself, you use Amazon RDS — AWS handles the infrastructure, backups, patching, and maintenance for you.
Let's build it! 🚀
⚠️ Cost Warning
Running an RDS database can incur charges if your Free Tier has expired or you leave it running after the lab.
💡 Delete all resources when you're done to avoid unnecessary costs.
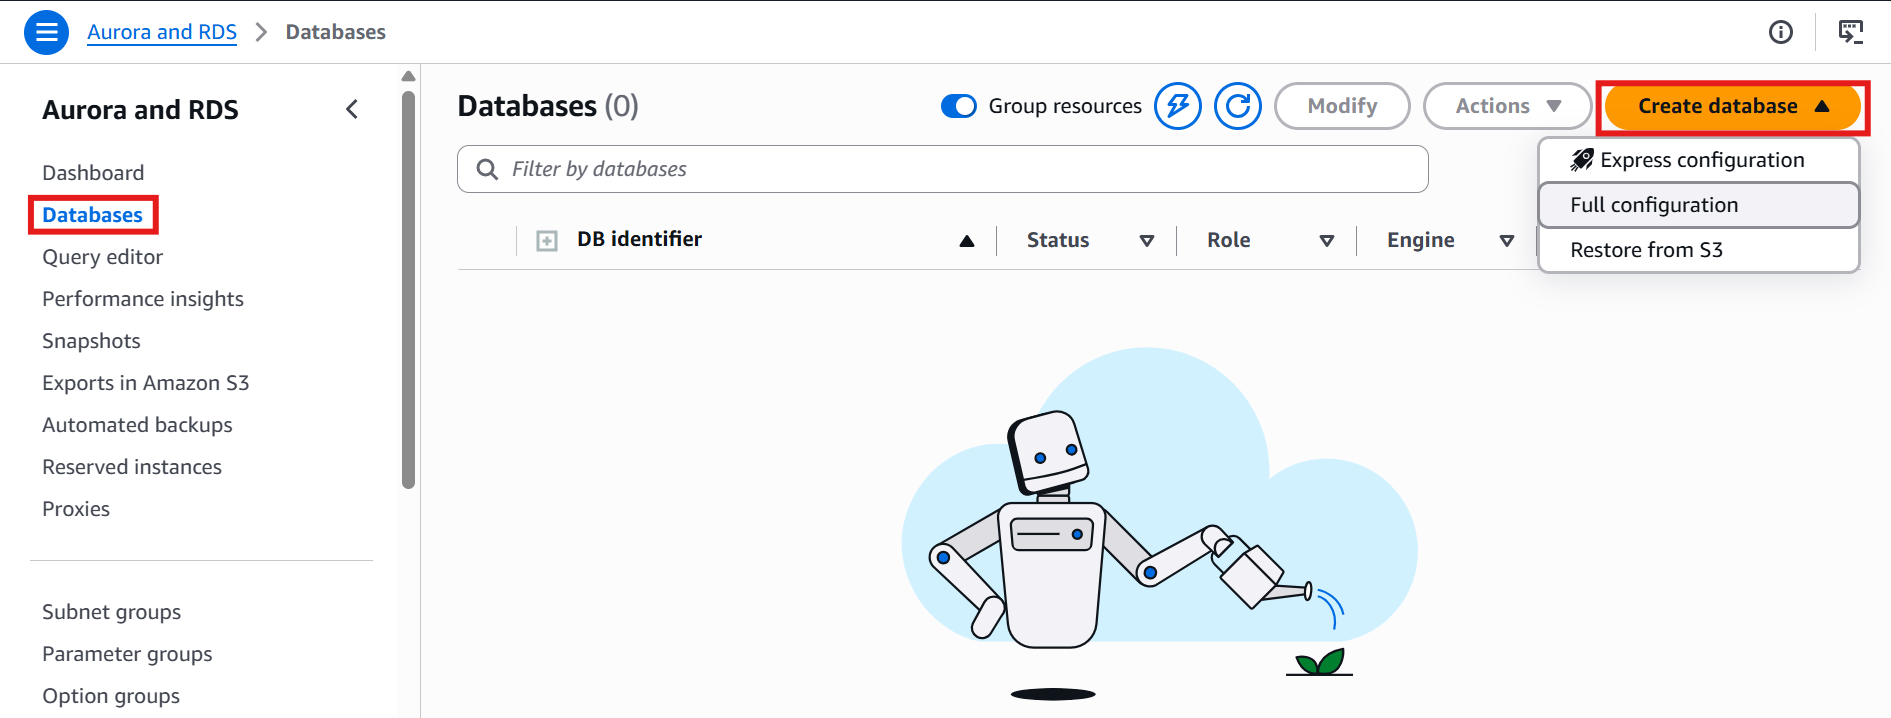
🚀 Step 1: Open the Amazon RDS Console
From the AWS Management Console:
Search for RDS.
Open the Amazon RDS Console.
From the navigation pane on the left, click Databases.
Click Create database.
🚀 Step 2: Choose the Database Creation Method
You'll see two options:
⚡Express configuration - Easy Create
⚙️ Full Configuration - Standard Create
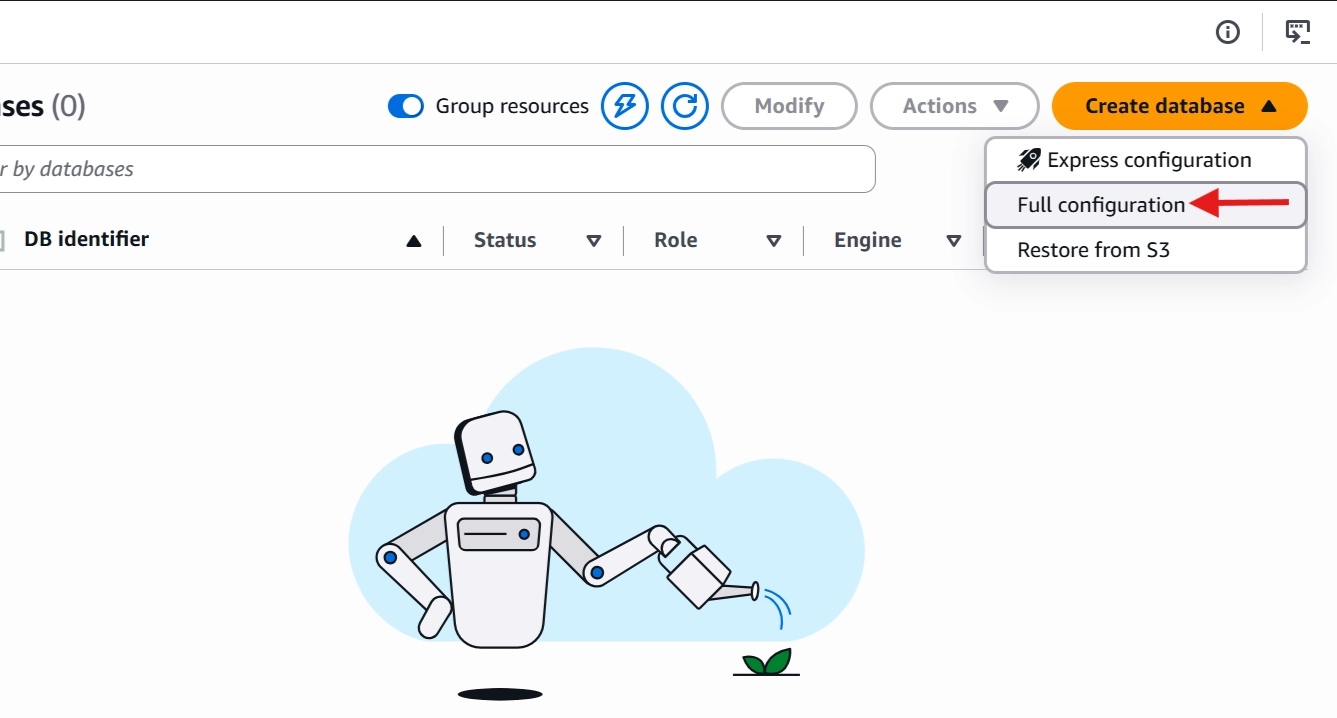
✅ Choose Full Configuration — it exposes the real-world settings you'll use in production.
🚀 Step 3: Select the Database Engine
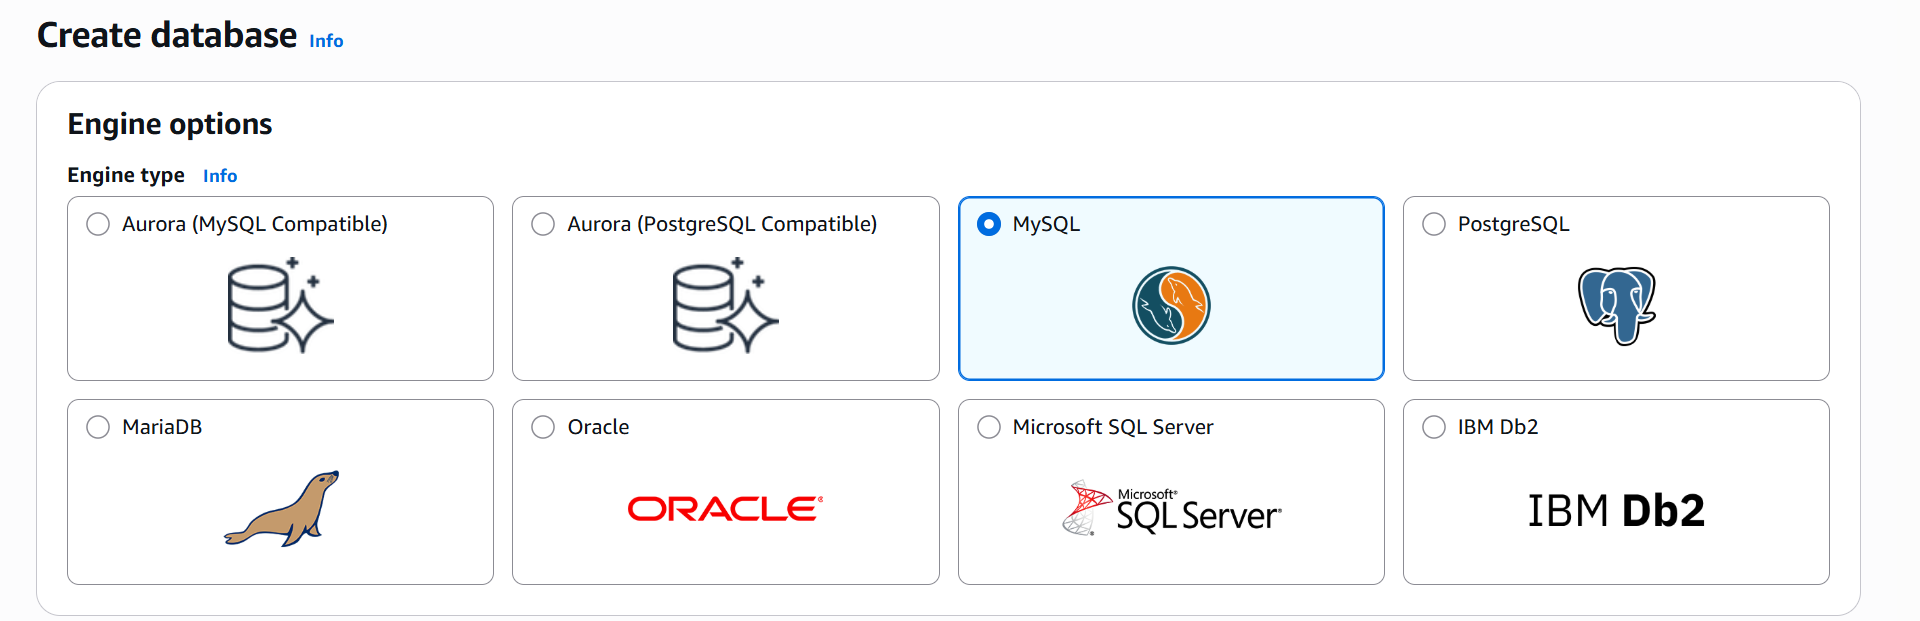
RDS supports several engines:
⚡ Aurora (MySQL compatible)
⚡ Aurora (PostgreSQL compatible)
🐬 MySQL
🐘 PostgreSQL
🦭 MariaDB
🔶 Oracle
🪟 SQL Server
🟦 IBM Db2
✅ Select MySQL — popular, beginner-friendly, fully supported.
🚀 Step 4: Choose the Database Template

🏢 Production — Multi-AZ for high availability, fault tolerance, disaster recovery
🧪 Dev/Test
🆓 Free Tier / Sandbox — single instance, single AZ, low cost
✅ Select Free Tier or sandbox for this lab.
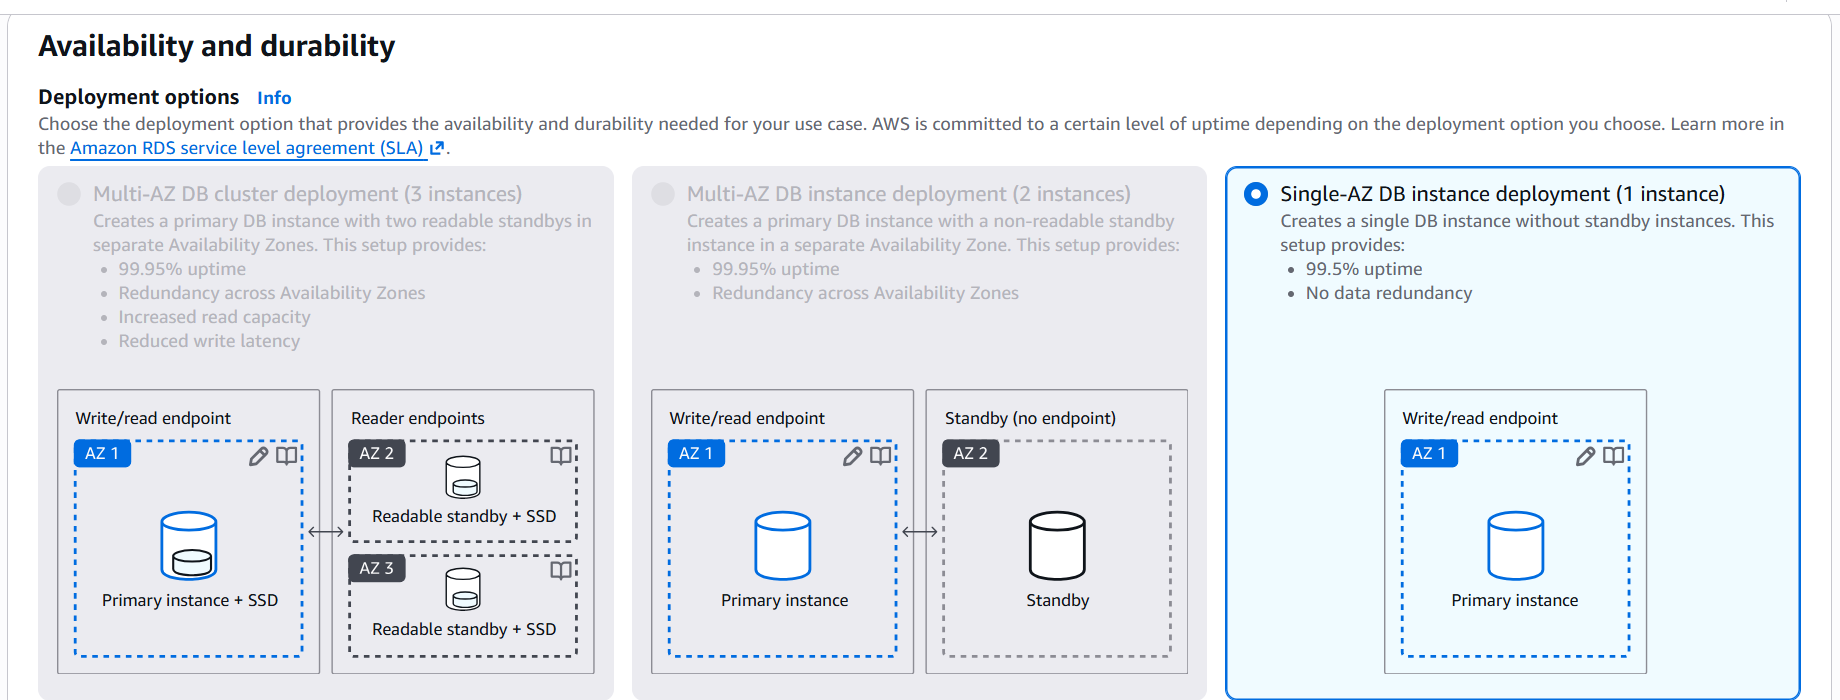
🚀 Step 6: Configure Settings
Engine Version: leave default (AWS recommends a stable version)
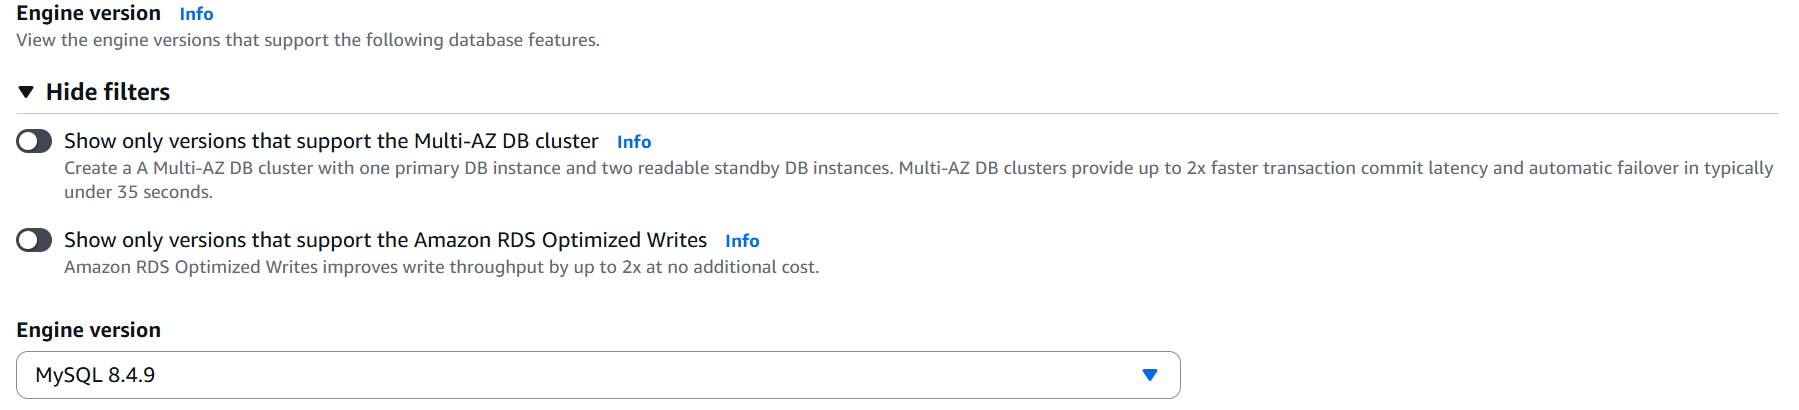
DB Instance Identifier: leave default
Master Username: leave default
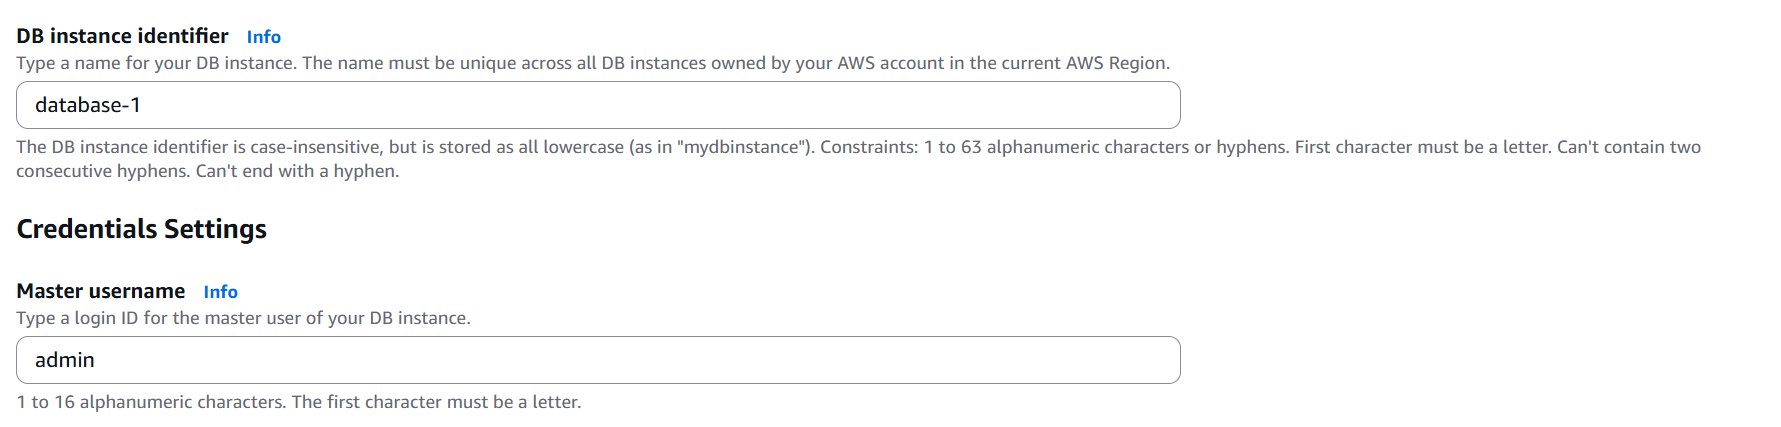
Credential Management — two options:
🔐 Self-managed password
🔑 AWS Secrets Manager (auto-stores and rotates passwords)
✅ Choose Self-managed for simplicity in this lab.

Enter and confirm a strong password, e.g. T8!mK#92Lp%X. ⚠️ Never use weak passwords.
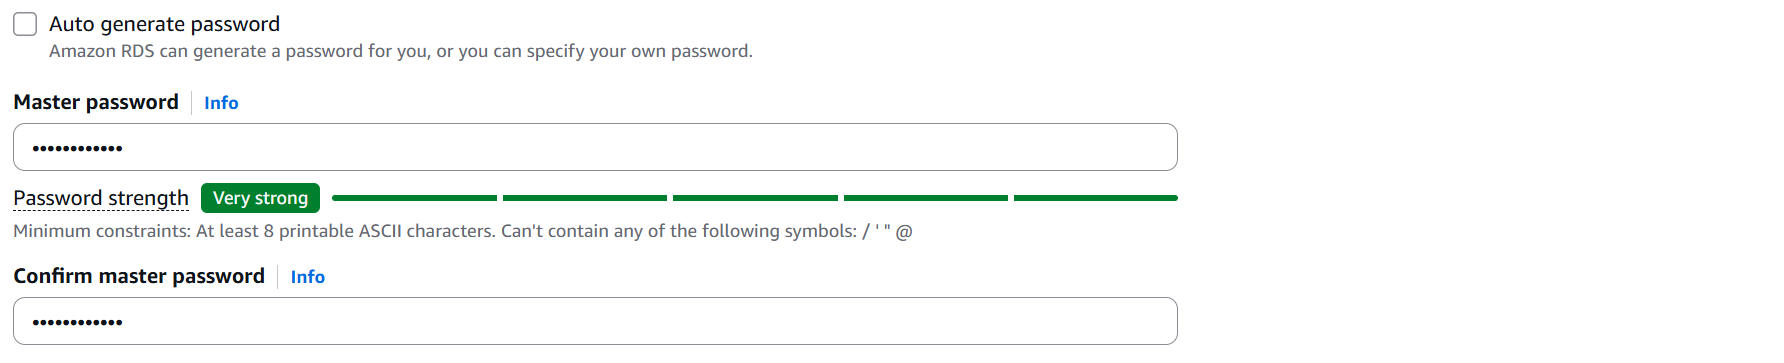
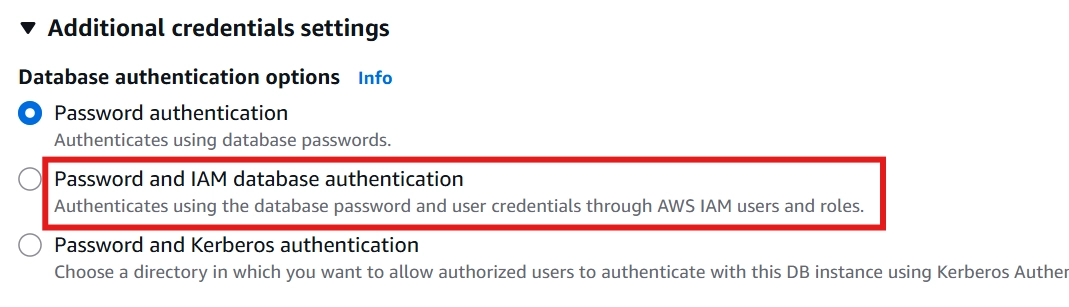
Leave Password Authentication enabled.
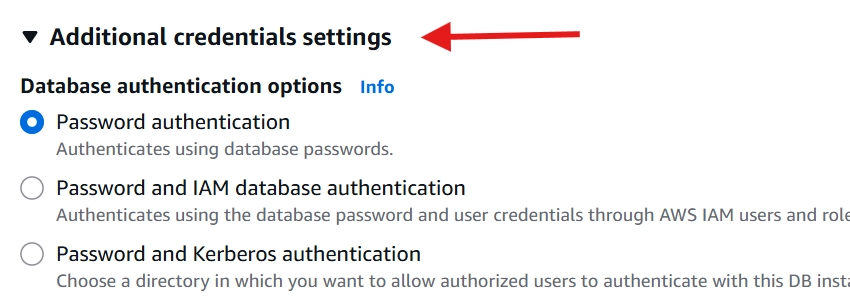
RDS also supports IAM Database Authentication for IAM users/roles to connect directly.
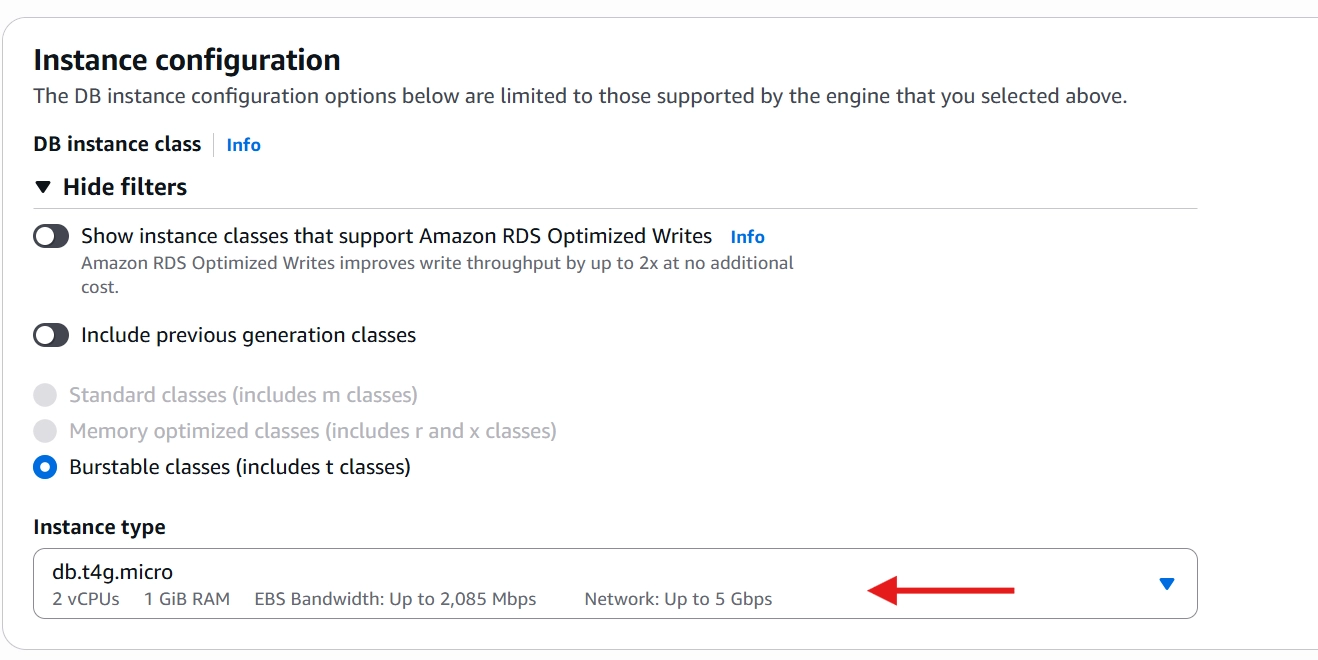
🚀 Step 7: Choose the Instance Configuration
Under DB Instance Class, keep the default Free Tier option
(db.t4g.micro or db.t3.micro — either works).
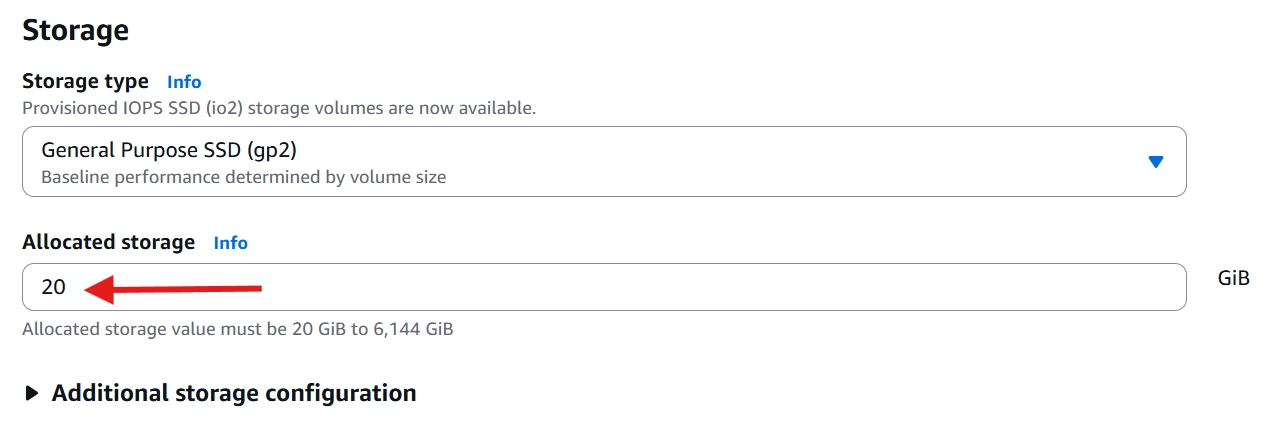
🚀 Step 8: Configure Storage
Leave the default storage size: ✅ 20 GB
Expand Additional Storage Configuration.
You'll notice an option called: ✅ Storage Autoscaling
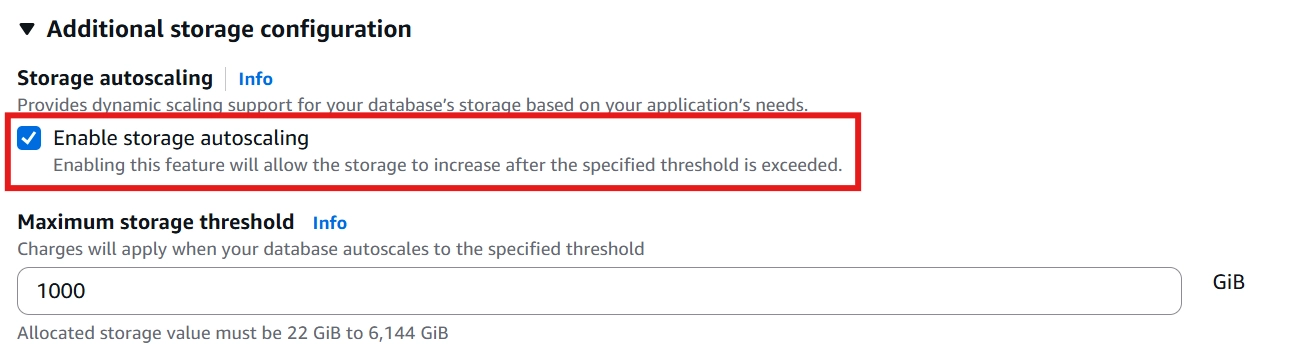
💡 Storage Autoscaling grows capacity automatically as your database fills up — e.g. 20 GB → 50 GB → 100 GB → up to 1,000 GB — so your app never fails from running out of space.
🚀 Step 9: Configure Connectivity
Under Connectivity, configure the following:
Don't connect to an EC2 compute resource
VPC: Default
Subnet Group: Default
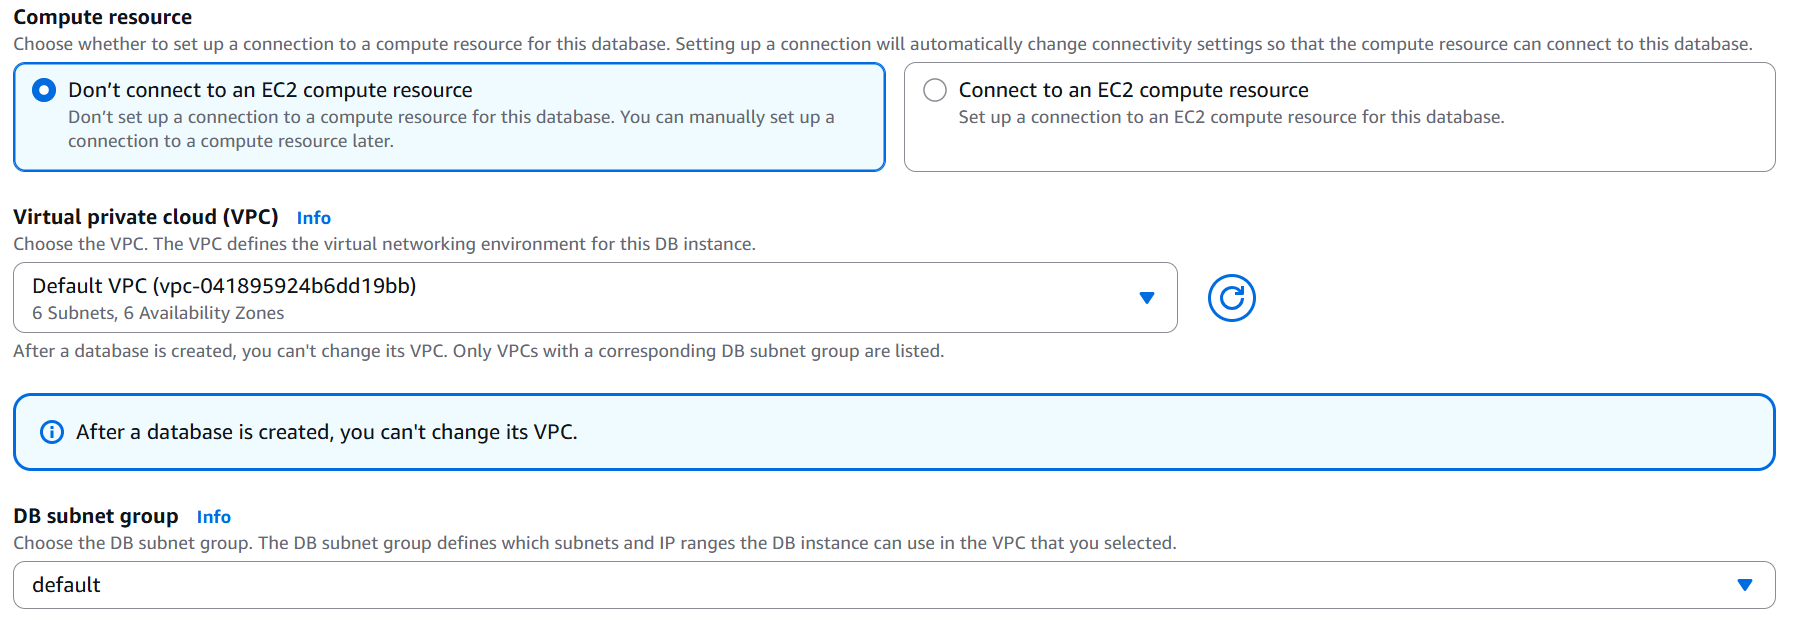
For Public Access, choose: ✅ Yes

💡 Why Public Access?
Selecting Yes gives the database a public endpoint, making it easier to connect to during this lab.
🚀 Step 10: Create a Security Group
VPC Security Group: Create New
Name it:
demo-rdsLeave the rest default

🚀 Step 11: Database Port
Leave the default port: 3306 — MySQL's standard port.

💡 Why Port 3306?
3306 is the default port used by MySQL for database connections.
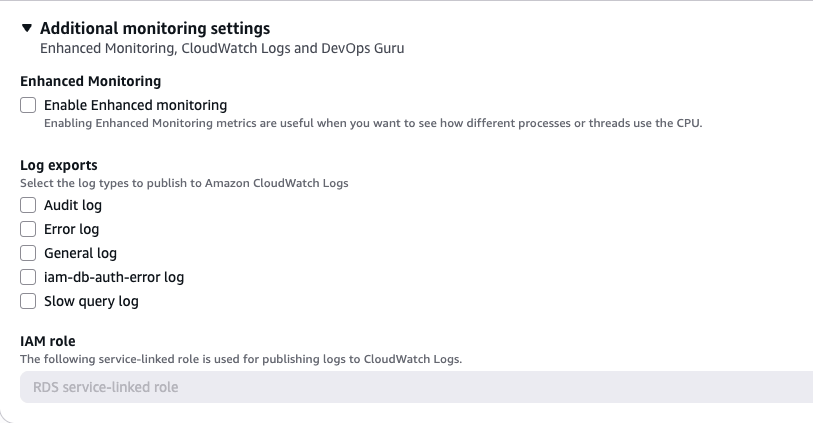
🚀 Step 12: Monitoring
Leave: ✅ Standard Monitoring

RDS also offers Enhanced Monitoring, CloudWatch Metrics, and Log Exports if you need more.
🚀 Step 13: Create Database
Review your settings, then click ✅ Create Database
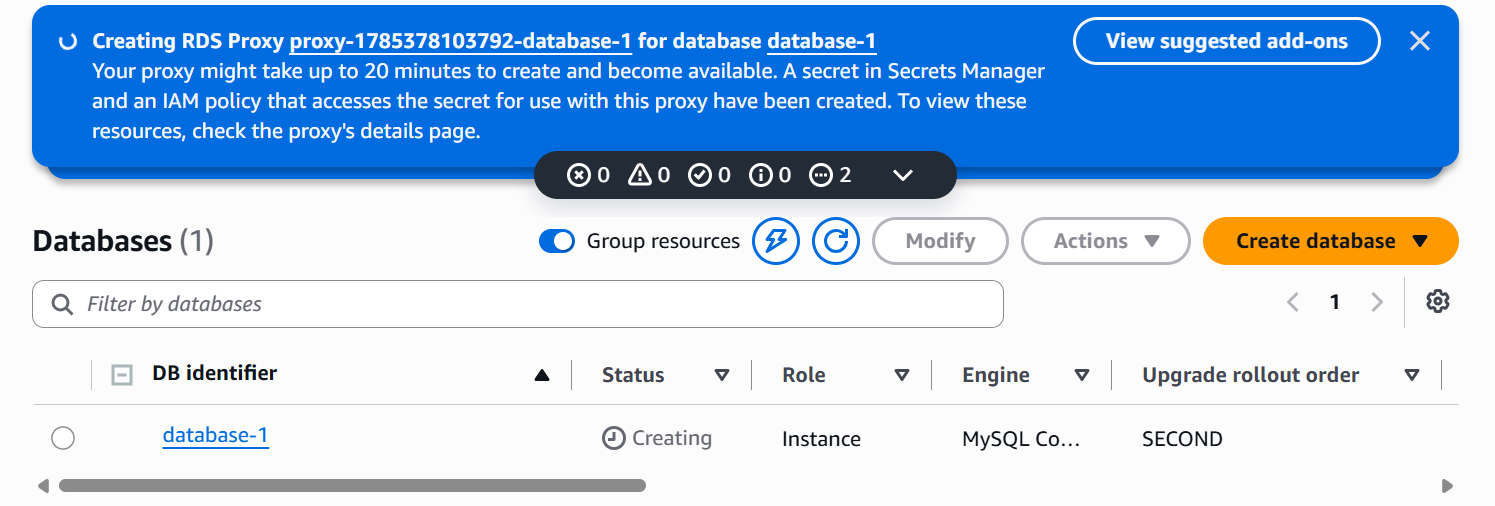
⏳ Step 14: Wait for the Database to be Created
RDS takes a few minutes to provision the database. AWS is setting up all the required infrastructure behind the scenes.

Be patient while AWS prepares all of the required infrastructure.
🎉 Step 15: Explore Your Database
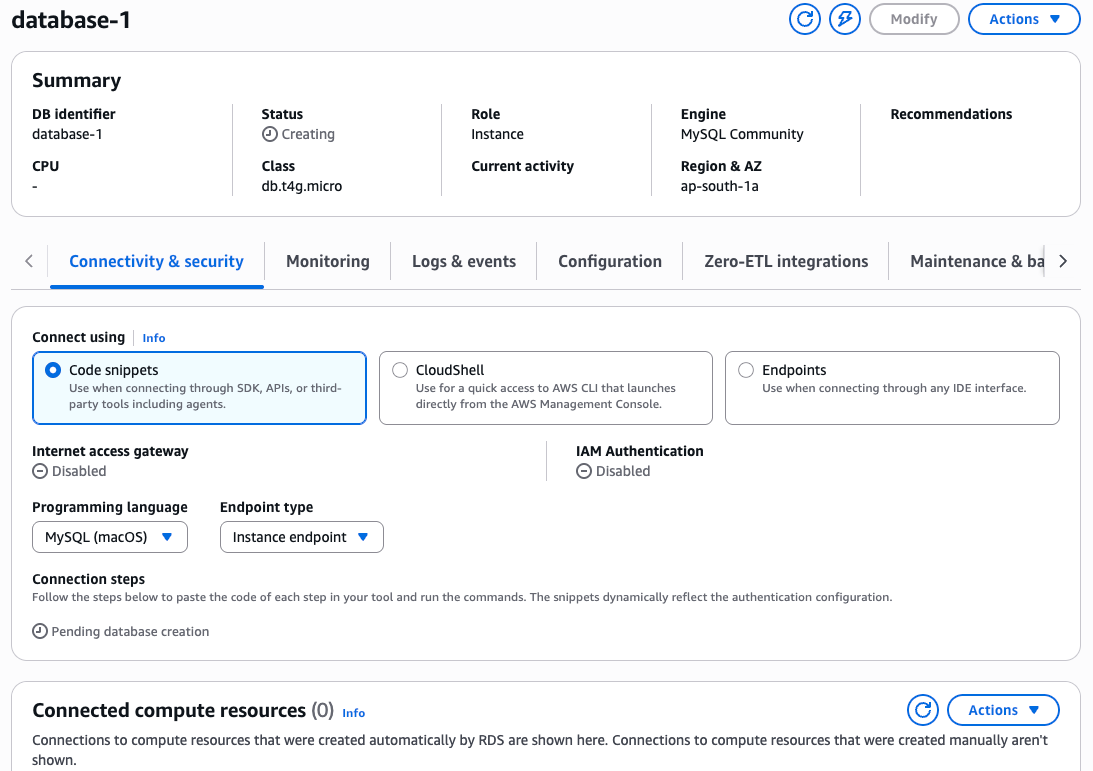
Once status shows Available, click the database name to see:
📍 Availability Zone
🌐 Endpoint
🔌 Port Number
⚙️ Configuration
💾 Storage
🔒 Security Settings
💡 The Endpoint + Port (3306) are what your application uses to connect.
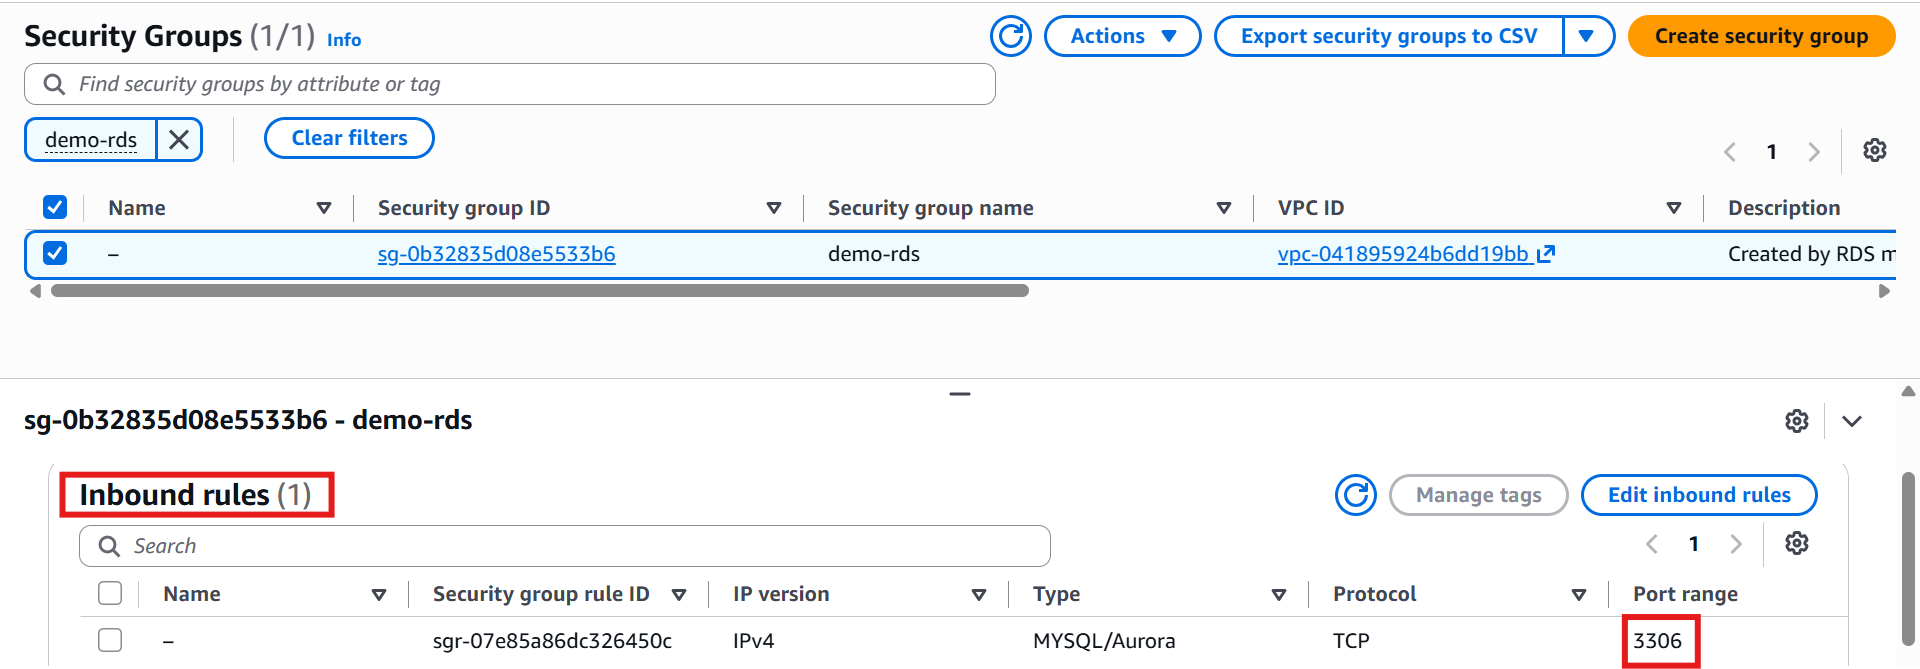
🔒 Review the Security Group
Open the attached Security Group → Inbound Rules tab. You'll see traffic allowed on port 3306
👀 Explore Monitoring
Open the Monitoring tab to see built-in metrics: 📈 CPU Utilization, 💾 Storage, 📊 Database Activity, 🔑 Login Events and more.
💡 Without RDS, you'd have to install and configure all this monitoring yourself — one of the biggest wins of a managed service.
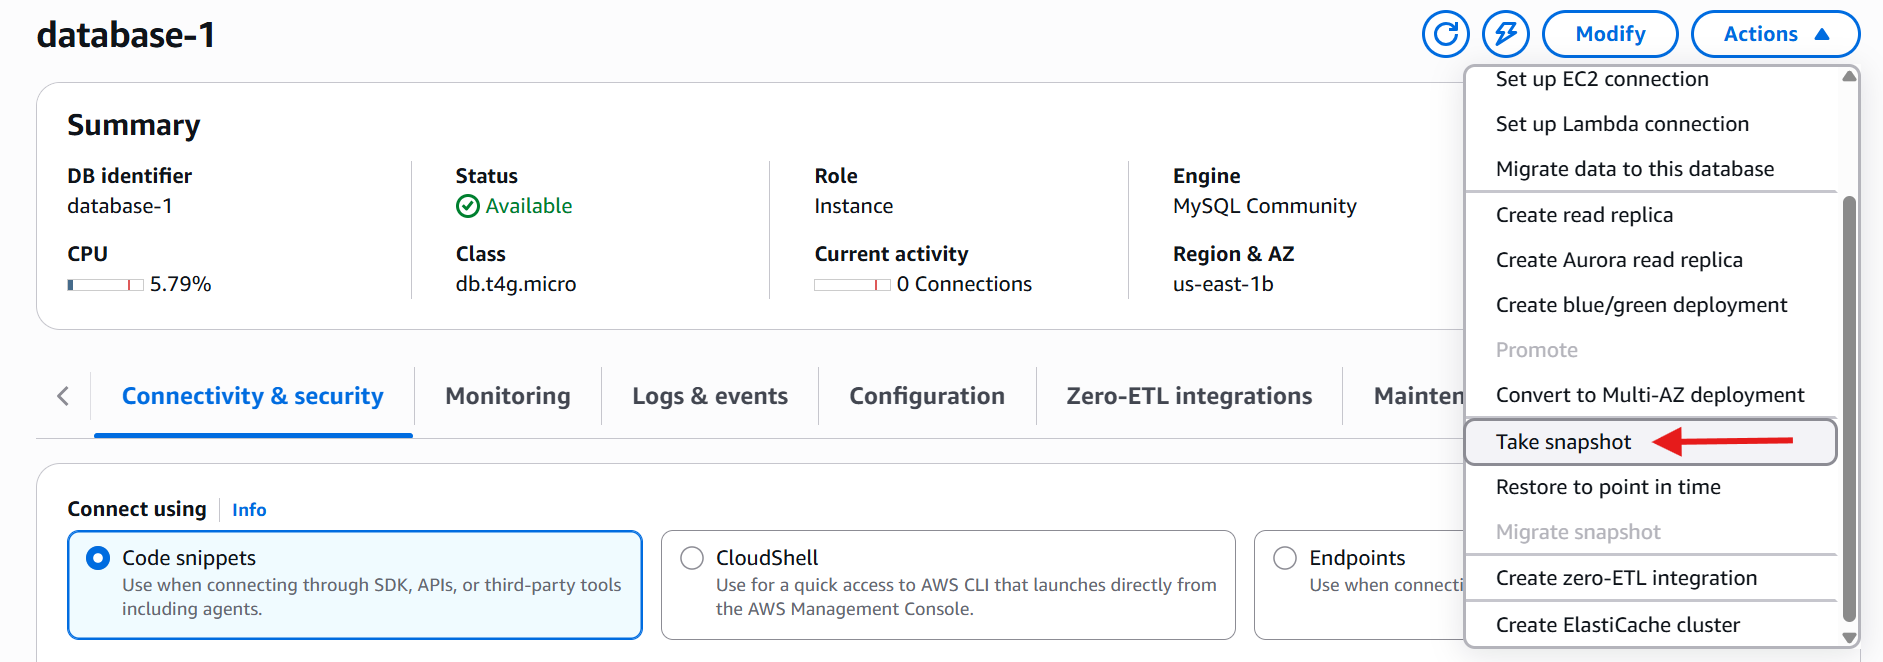
📸 Step 16: Create a Database Snapshot
Database snapshots allow you to create a backup of your database at a specific point in time.
From the Actions menu, select: Take Snapshot
Give the snapshot a name, for example:
demo-snapshot
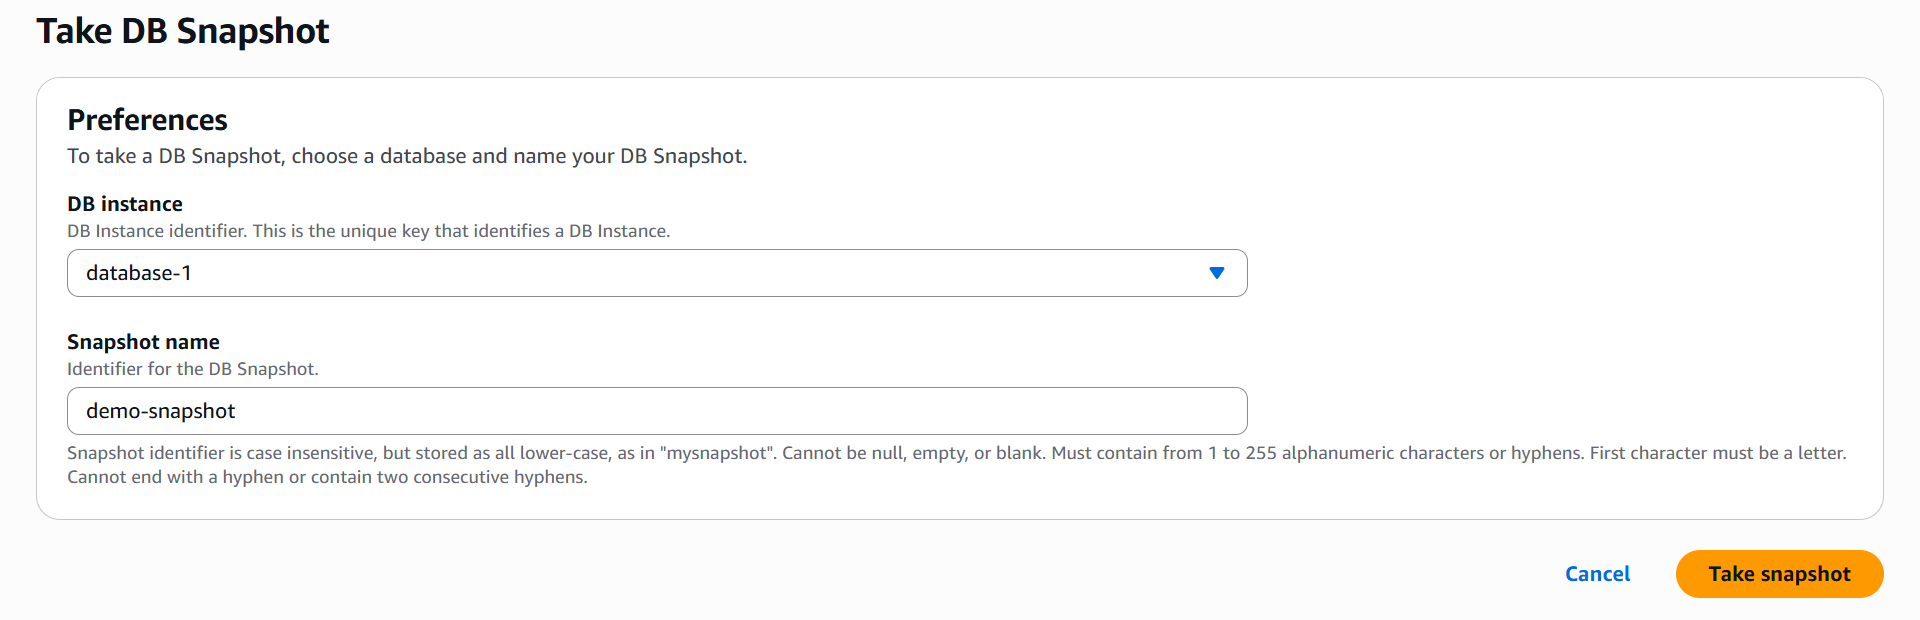
Click: Take Snapshot
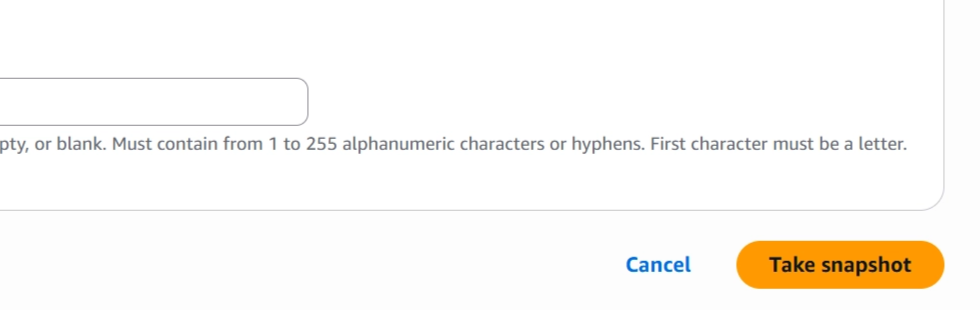
⚠️ If AWS says the database is still backing up, wait for status Available and try again.
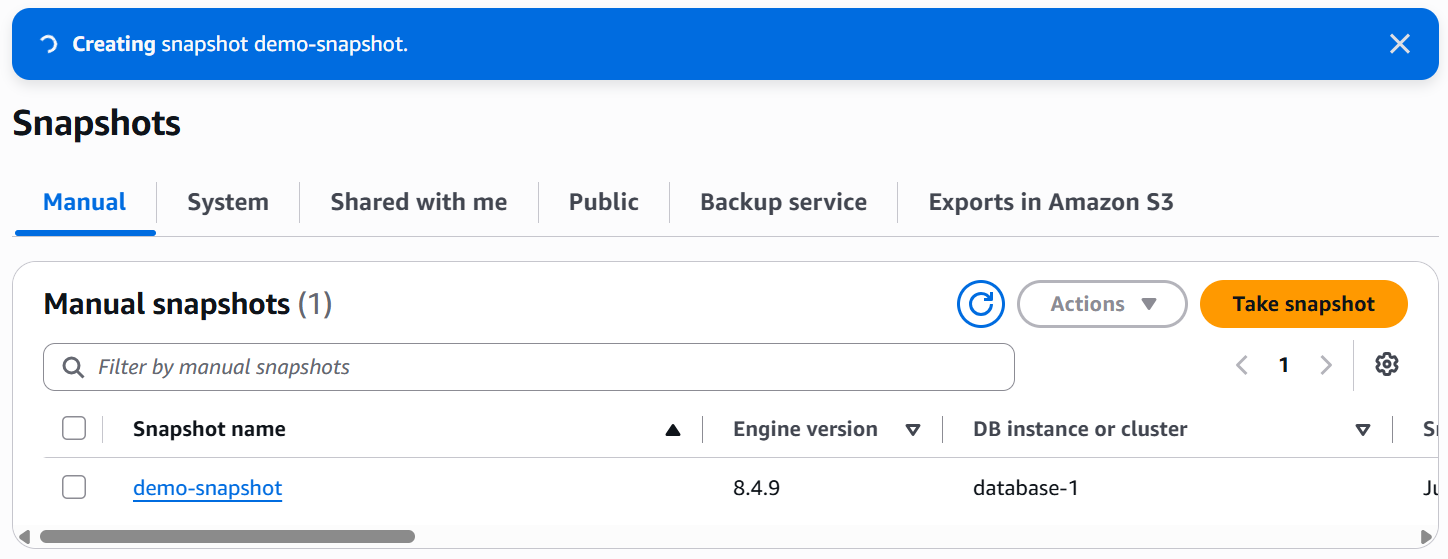
🚀 Step 17: Restore from a Snapshot
Once the snapshot is Available:
Select it → Actions → Restore Snapshot
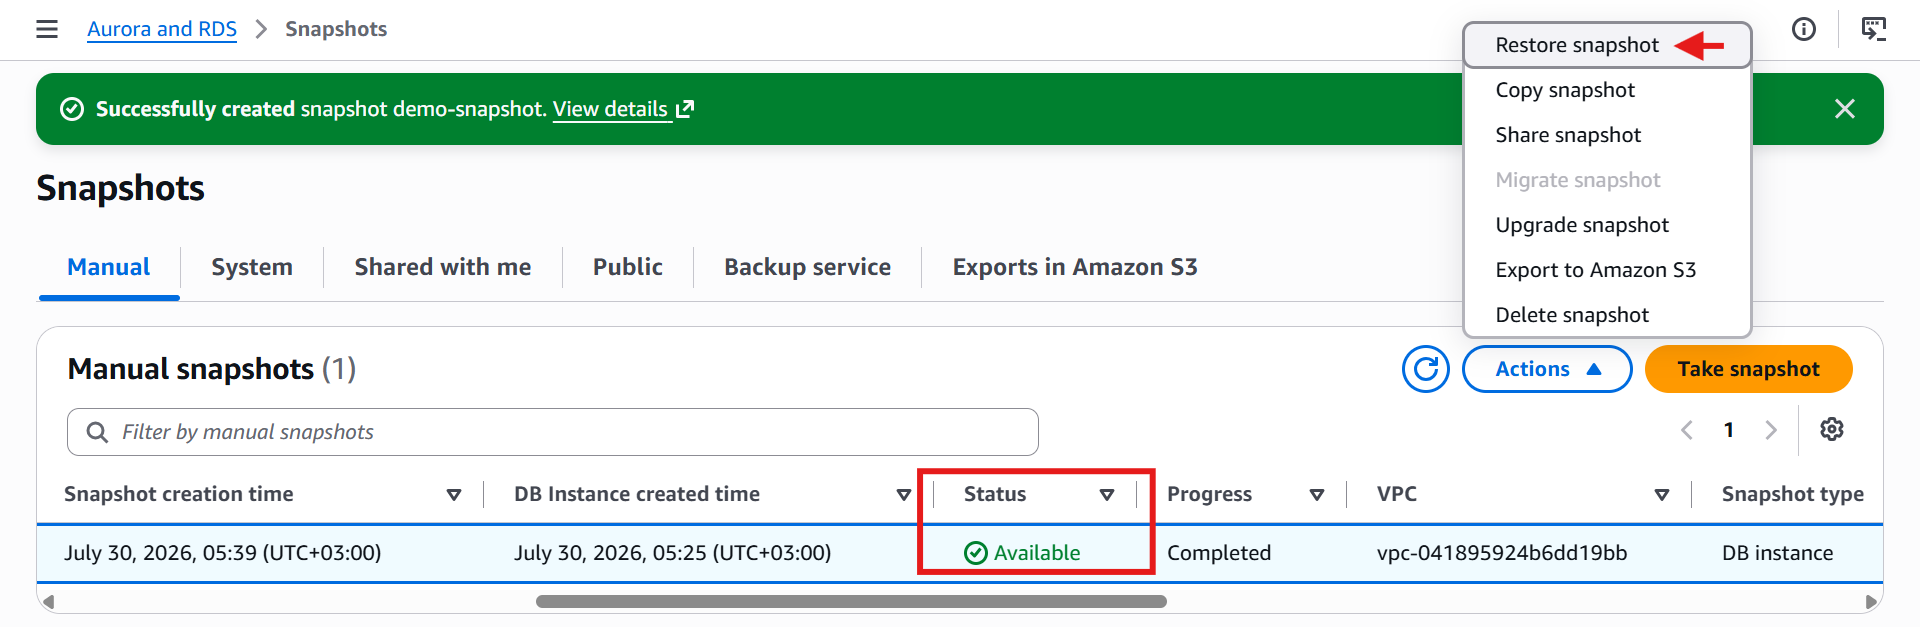
💡 Restoring creates a new database from the backup. For this lab, review the options, then cancel the restore.
🌍 Step 18: Copy a Snapshot
Copy Snapshot lets you back up a snapshot to another AWS Region — useful for disaster recovery and business continuity.
🤝 Step 19: Share a Snapshot
Share Snapshot lets another AWS account restore a database from your backup — handy for collaboration and migration.
🎉 Congratulations!
You've:
✅ Created an RDS database
✅ Explored its configuration
✅ Reviewed monitoring
✅ Created, restored, copied, and shared a snapshot
You've now seen the core value of a managed database service: monitoring, backups, snapshots, and maintenance — all handled for you.
🧹 Clean Up Your Resources
To avoid unexpected charges, let's delete the resources we created.
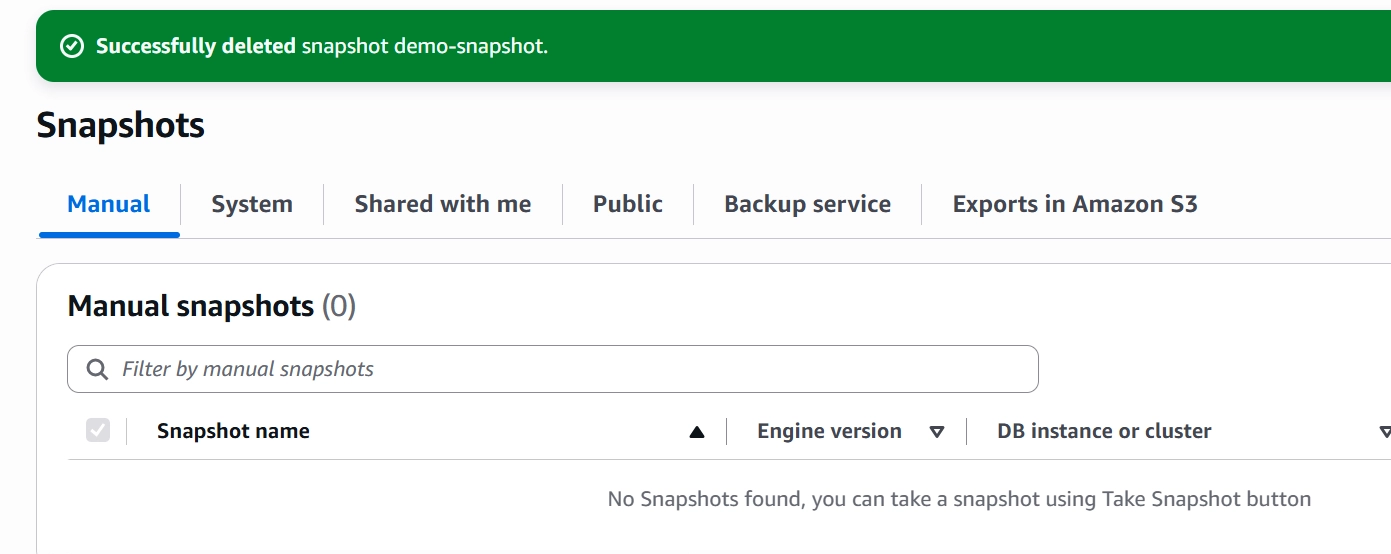
🗑️ Delete the Snapshot
Snapshots → select yours → Actions → Delete → confirm
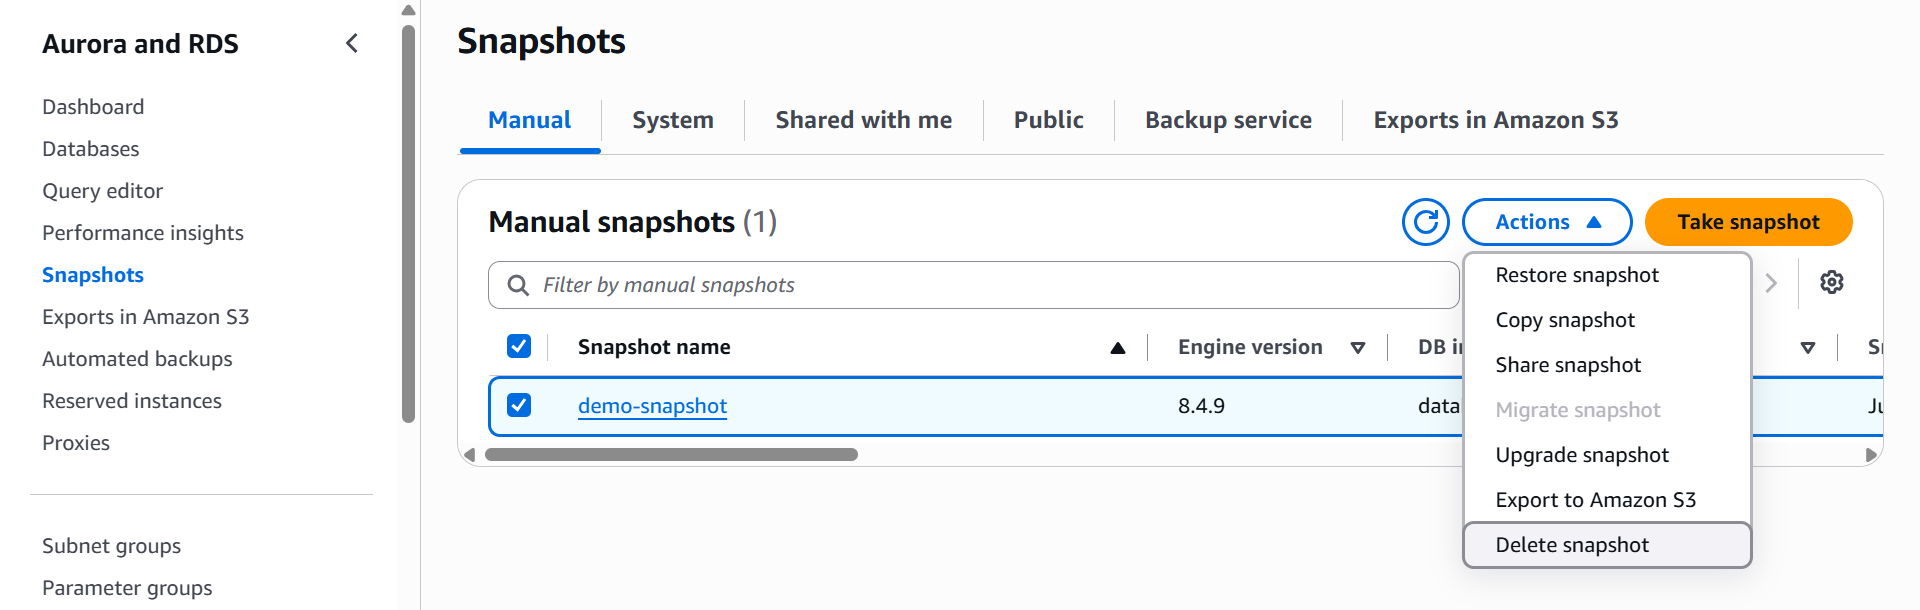
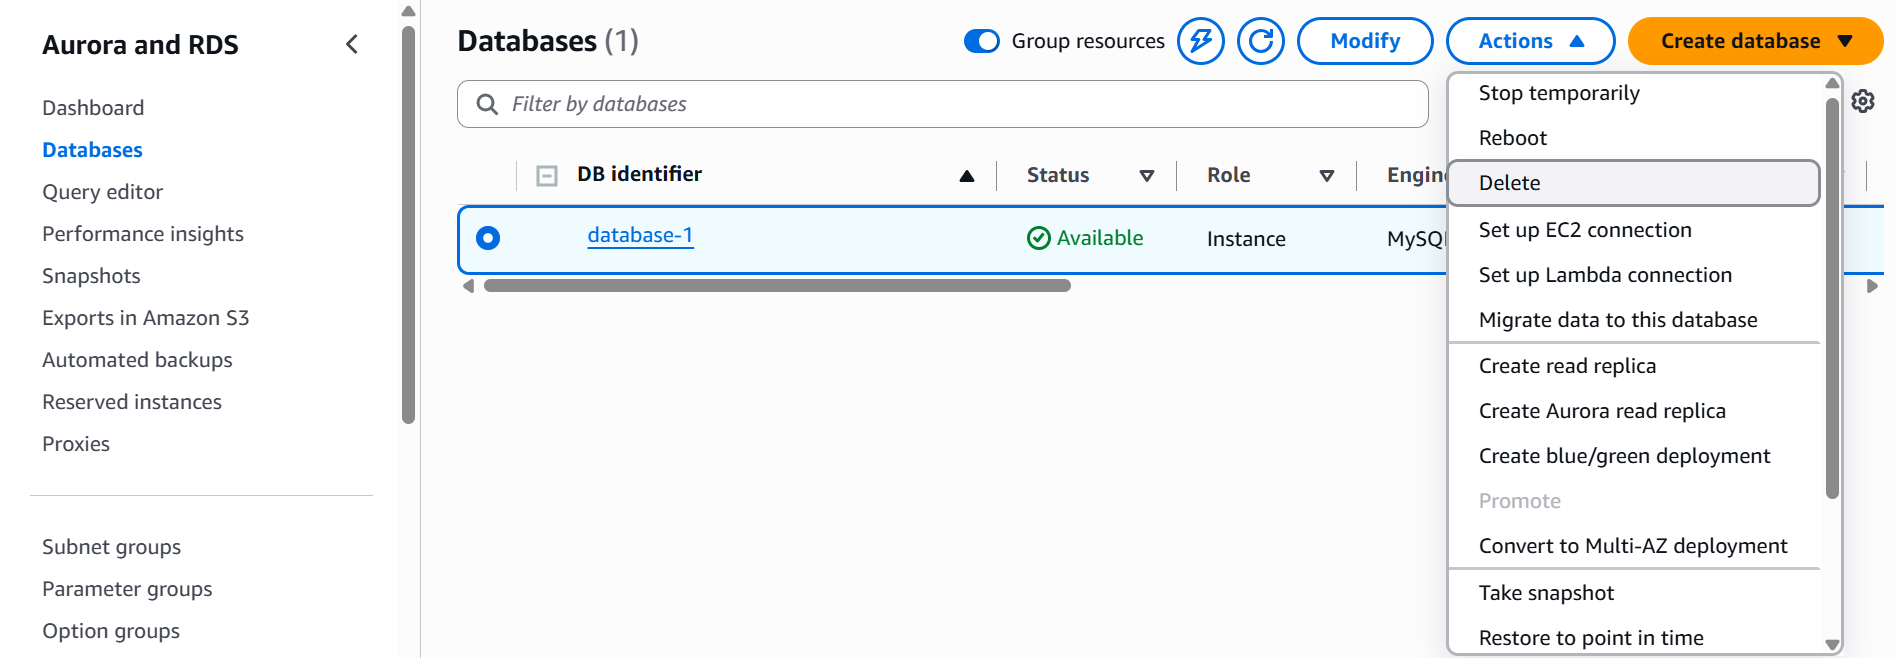
🗑️ Delete the Database
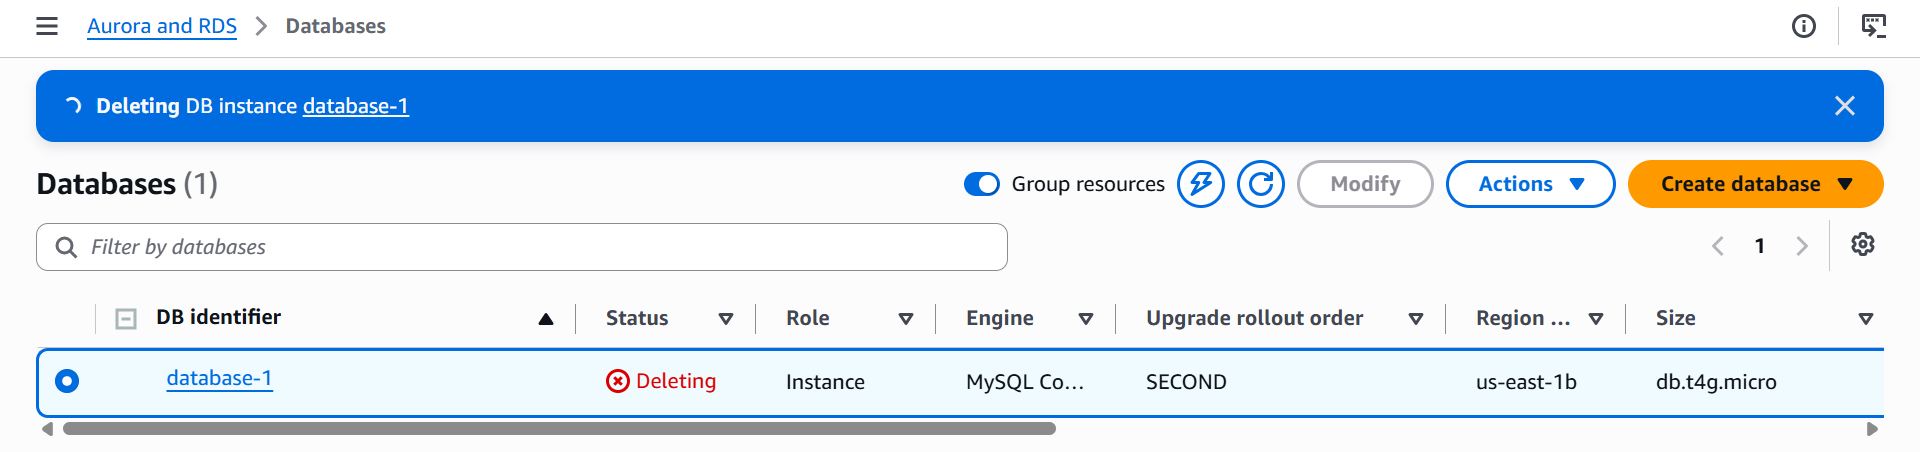
Databases → select yours → Actions → Delete
Before deleting:
❌ Do not create a final snapshot.
❌ Do not retain automated backups.
Check the confirmation box acknowledging that the database and backups will be permanently deleted.
Finally, type: delete me
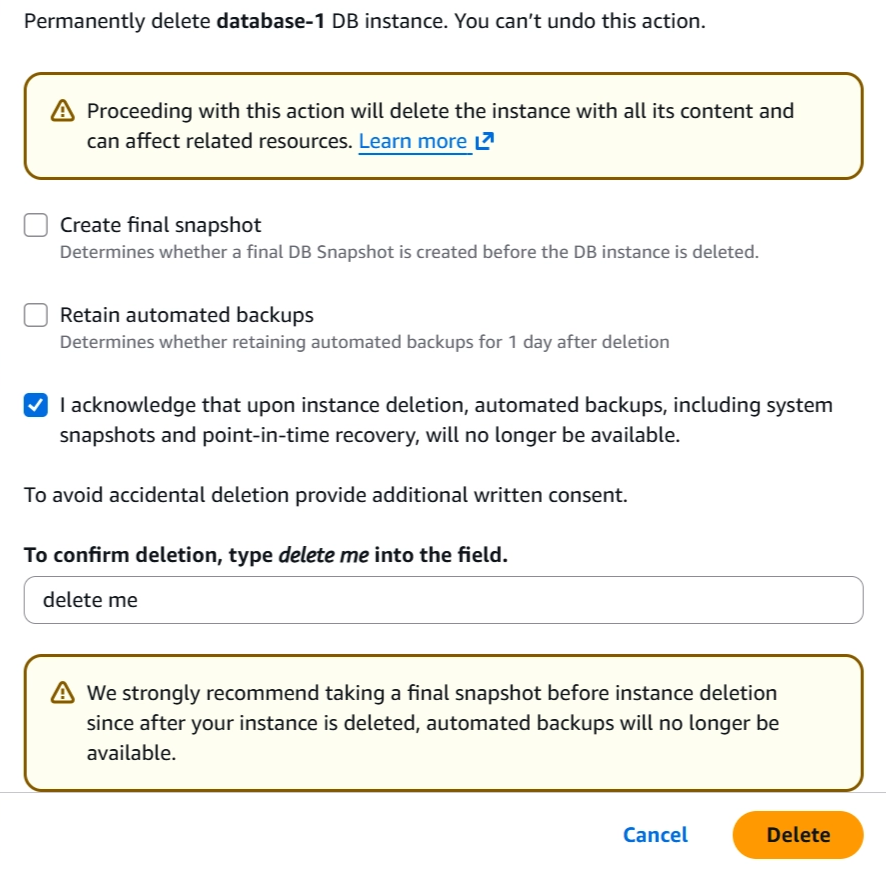
Click: ✅ Delete