🧪 Hands-On: Your First DynamoDB Table
Create a DynamoDB table, add data, and see how it differs from a relational database.
You'll learn to:
🚀 Create a DynamoDB table
🔑 Set a partition key
📝 Add items
⚡ Experience DynamoDB's flexible NoSQL model
🗑️ Delete the table to avoid charges
🌍 The Scenario
You've joined a startup building a high-traffic mobile app gaining thousands of signups a minute. Instead of managing servers, you choose DynamoDB — AWS's serverless NoSQL database.
Your task: create a table, store some user data, and see how simple a serverless database is to use.
Let's go! 🚀
🧠 Before You Begin
Unlike RDS, there's no server to set up:
✅ Just create a table
✅ AWS manages the infrastructure
✅ Nothing to provision or manage
✅ Scaling happens automatically
That's the serverless advantage — you focus on your data, AWS handles the rest.
⚠️ Cost Warning
DynamoDB has a generous Free Tier, but charges can still apply if your Free Tier has expired, you exceed limits, or you leave resources running.
💡 Delete your table when done to avoid charges.
🚀 Step 1: Open the DynamoDB Console
From the AWS Management Console:
Search for DynamoDB.
Open the Amazon DynamoDB Console.
From the navigation pane, click Tables.
Click Create table.
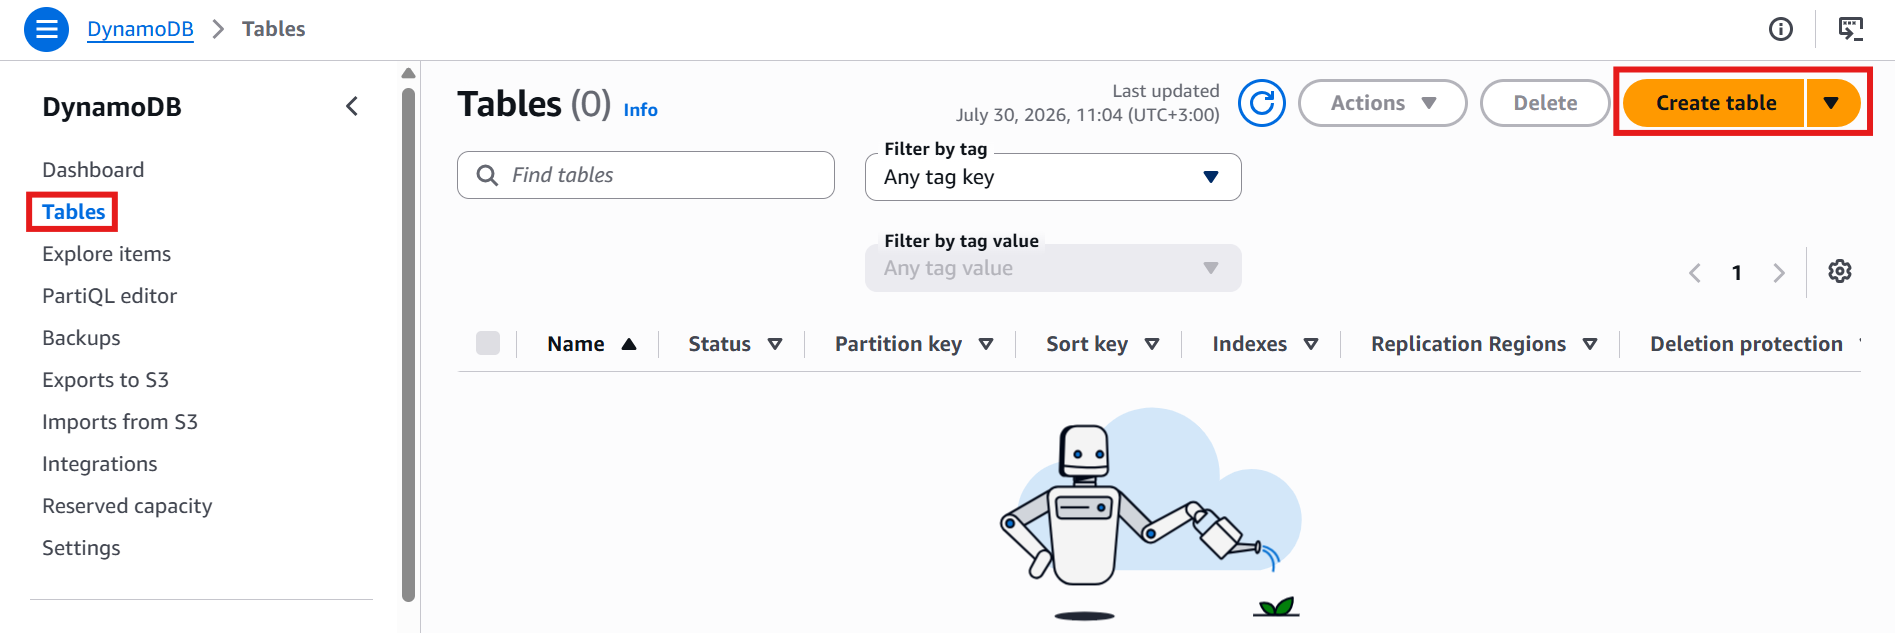
Everything in DynamoDB lives inside a table — no server setup first, you just create what you need.
🚀 Step 2: Name and Partition Key
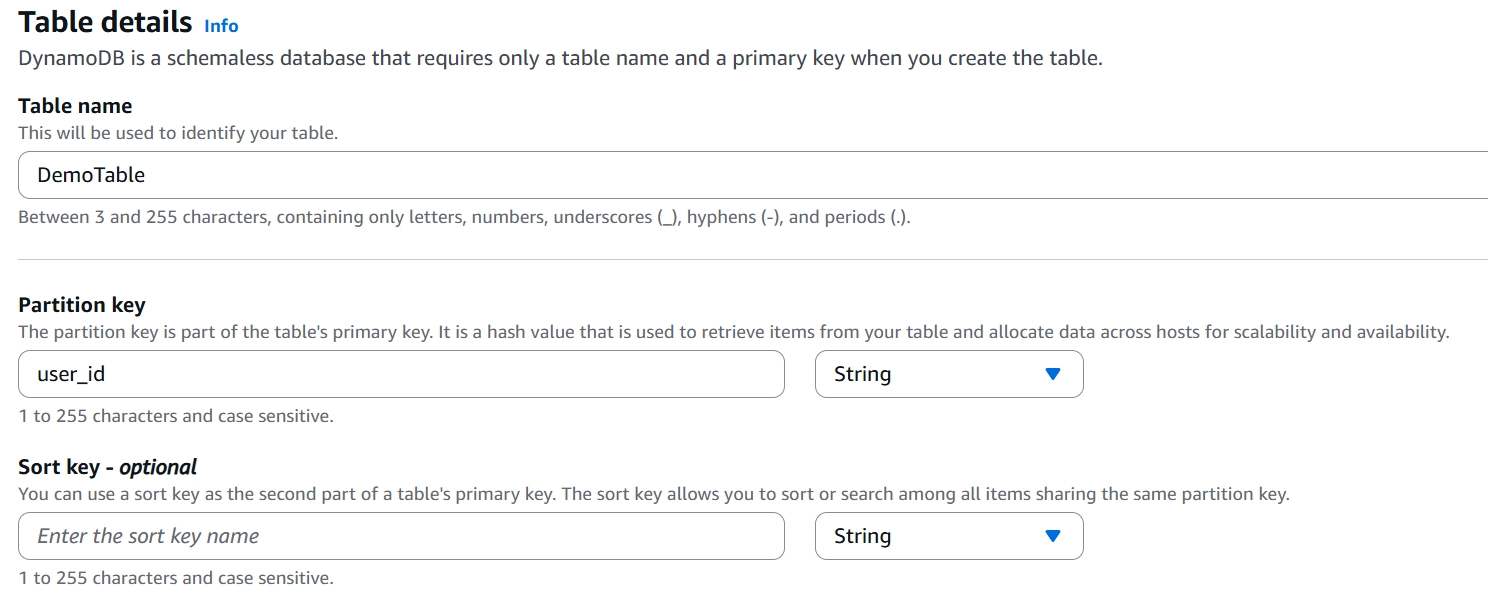
Table name: DemoTable
Every table needs a Partition Key. Enter: user_id — keep type String
💡 The Partition Key uniquely identifies each item and is what DynamoDB uses to locate your data fast.
💡 DynamoDB also supports Sort Keys, but they're outside the Cloud Practitioner exam scope — Partition Key only here.
🚀 Step 3: Leave the Default Settings
Leave the rest of the settings as default — plenty of advanced options exist, but the goal here is understanding the core concept, not every setting.
✅ Leave all settings as their defaults.
Click Create Table
⏳ Step 4: Wait for the Table to Be Created
Once status shows Active, click the table name.
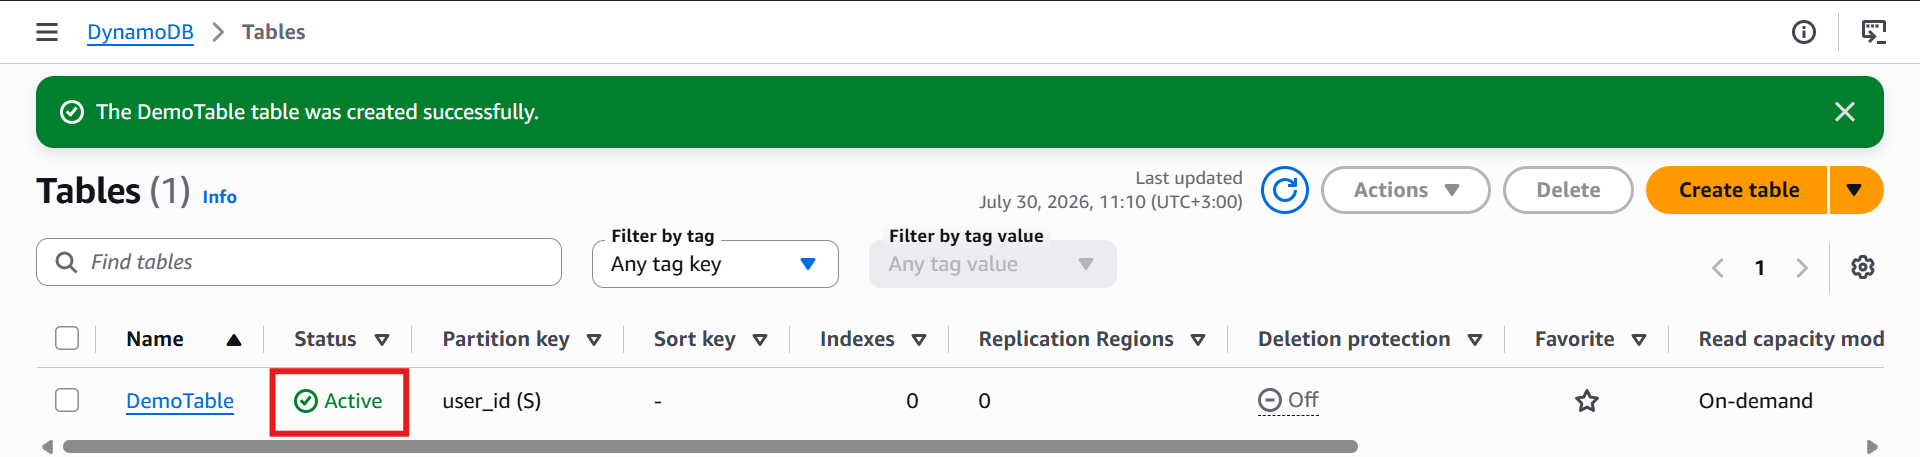
💡 Notice: no server, instance, or storage volume to configure — just a table. That's serverless in action.
🚀 Step 5: View the Table Items
Click Explore table items (or View items) — you'll see 0 items returned, since the table is empty.
That's expected, Let's add some data.
🚀 Step 6: Create Your First Item
Click Create item and enter:
user_id = 1234(Partition Key)first_name = codevedalast_name = e-learningfavorite_number = 1(Number type)
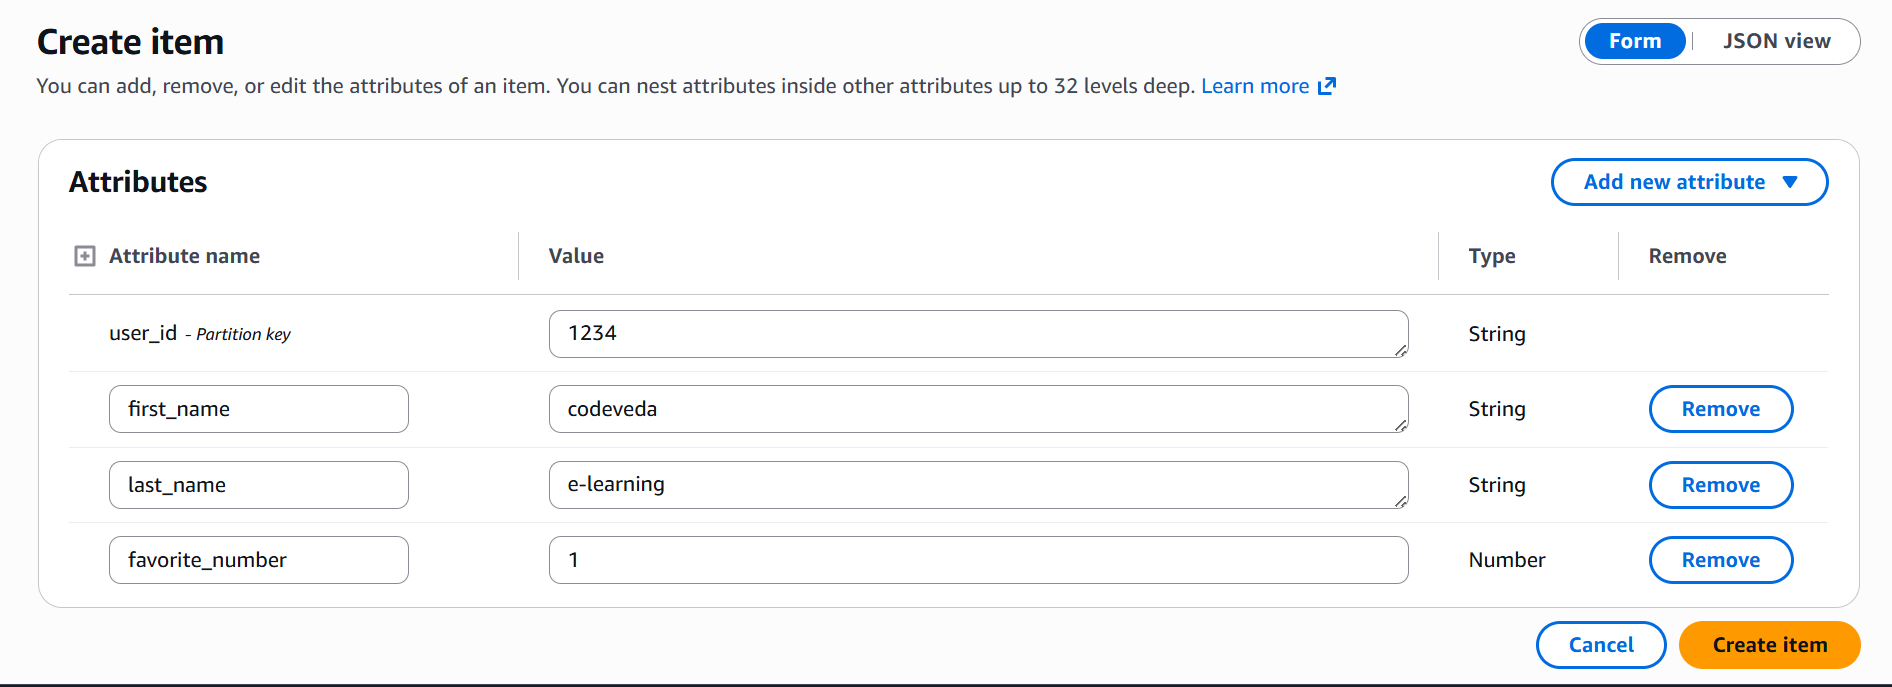
Click Create Item.
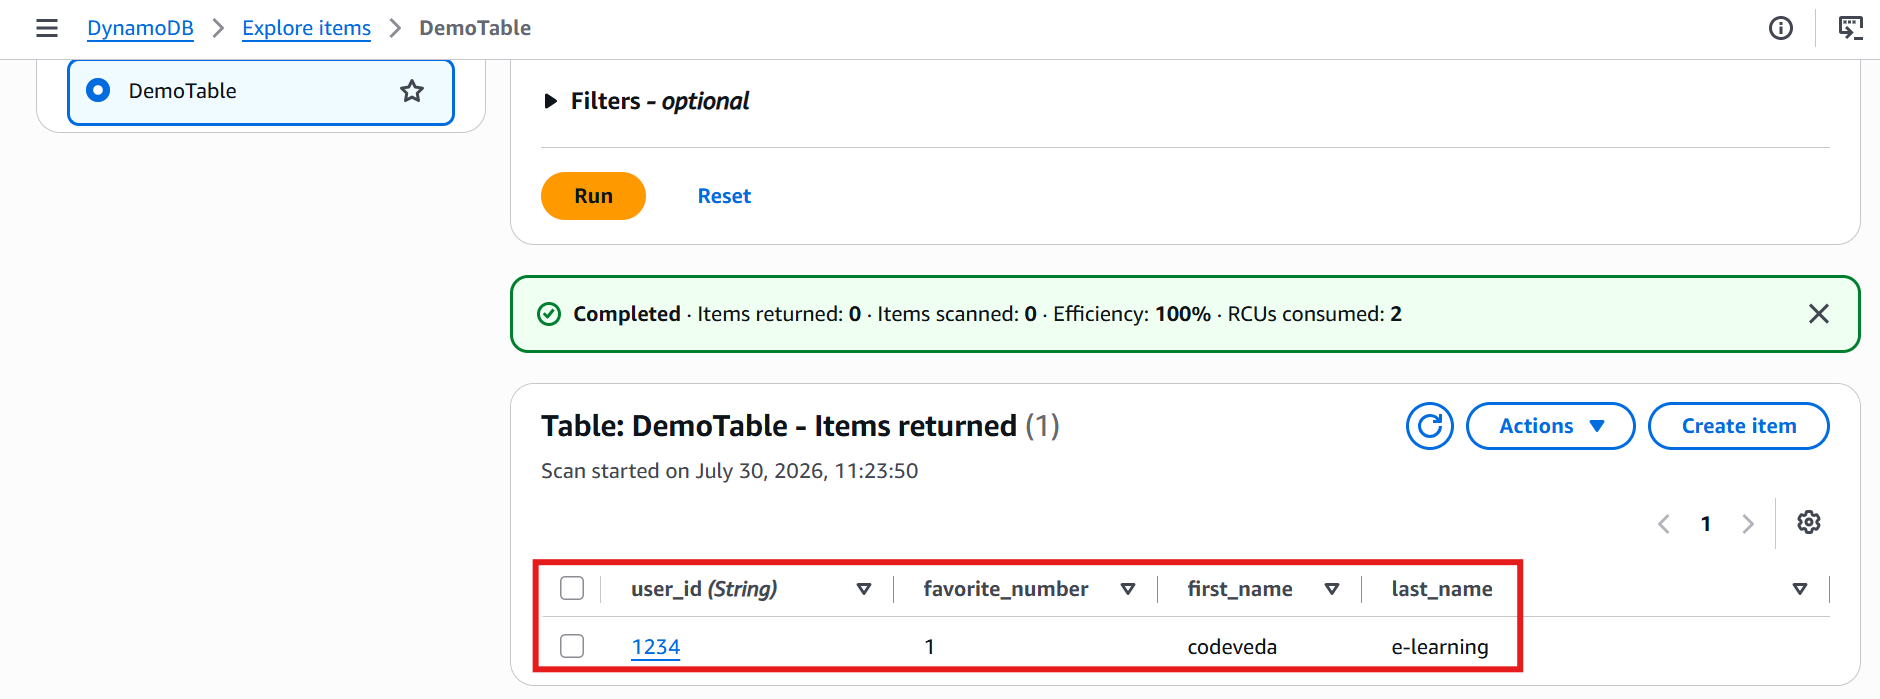
🎉 No database server, no storage config, no software install, no rigid schema — just a table and your data.
🚀 Step 7: Create a Second Item
Click Create Item and enter:
user_id = 45678first_name = diya
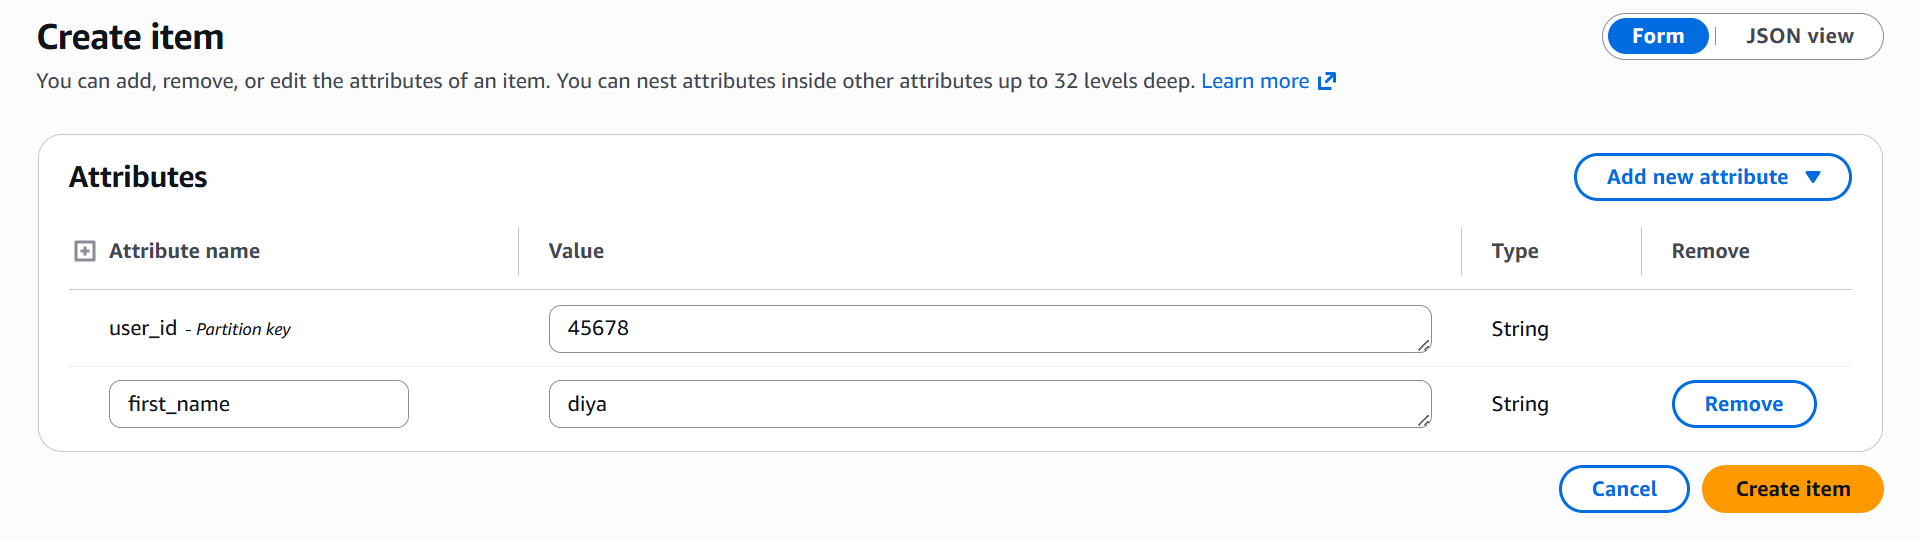
Click Create Item.
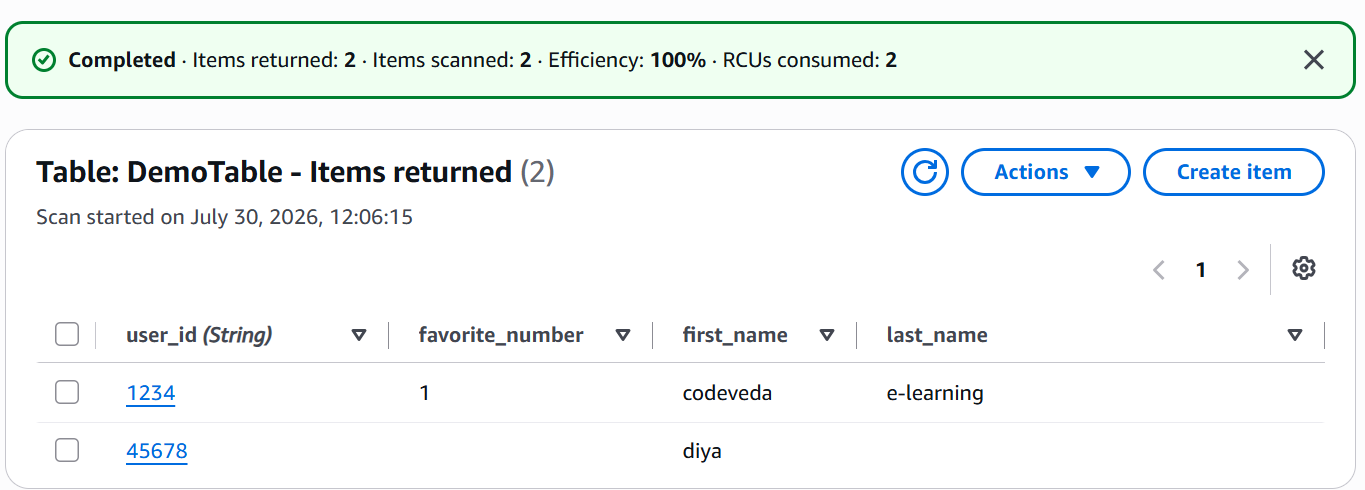
🤔 Notice the Difference
Item 1 has first name, last name, and favorite number. Item 2 has only a first name — same table, different attributes, no problem.
💡 DynamoDB doesn't require every item to share the same columns — each item's attributes can vary. That flexibility is a core NoSQL advantage.
📊 Comparing the Two Items
🔑 user_id | 👤 first_name | 👤 last_name | 🔢 favorite_number |
|---|---|---|---|
1234 | codeveda | e-learning | 1 |
45678 | diya | — | — |
With RDS, you'd create related tables (Customers, Orders, Products) and join them with SQL. DynamoDB has no joins — data is generally designed to live in a single table, structured so your app gets everything it needs in one place. That's a key SQL vs NoSQL difference.
🎯 Why It's Powerful
This flexibility lets DynamoDB scale automatically, handle massive workloads, deliver extremely low latency, and store flexible data structures — ideal for modern cloud-native apps.
🎉 Congratulations!
You've:
🚀 Created a DynamoDB table
🔑 Configured a Partition Key
📝 Added items with varying attributes
🧠 Seen how NoSQL differs from relational databases
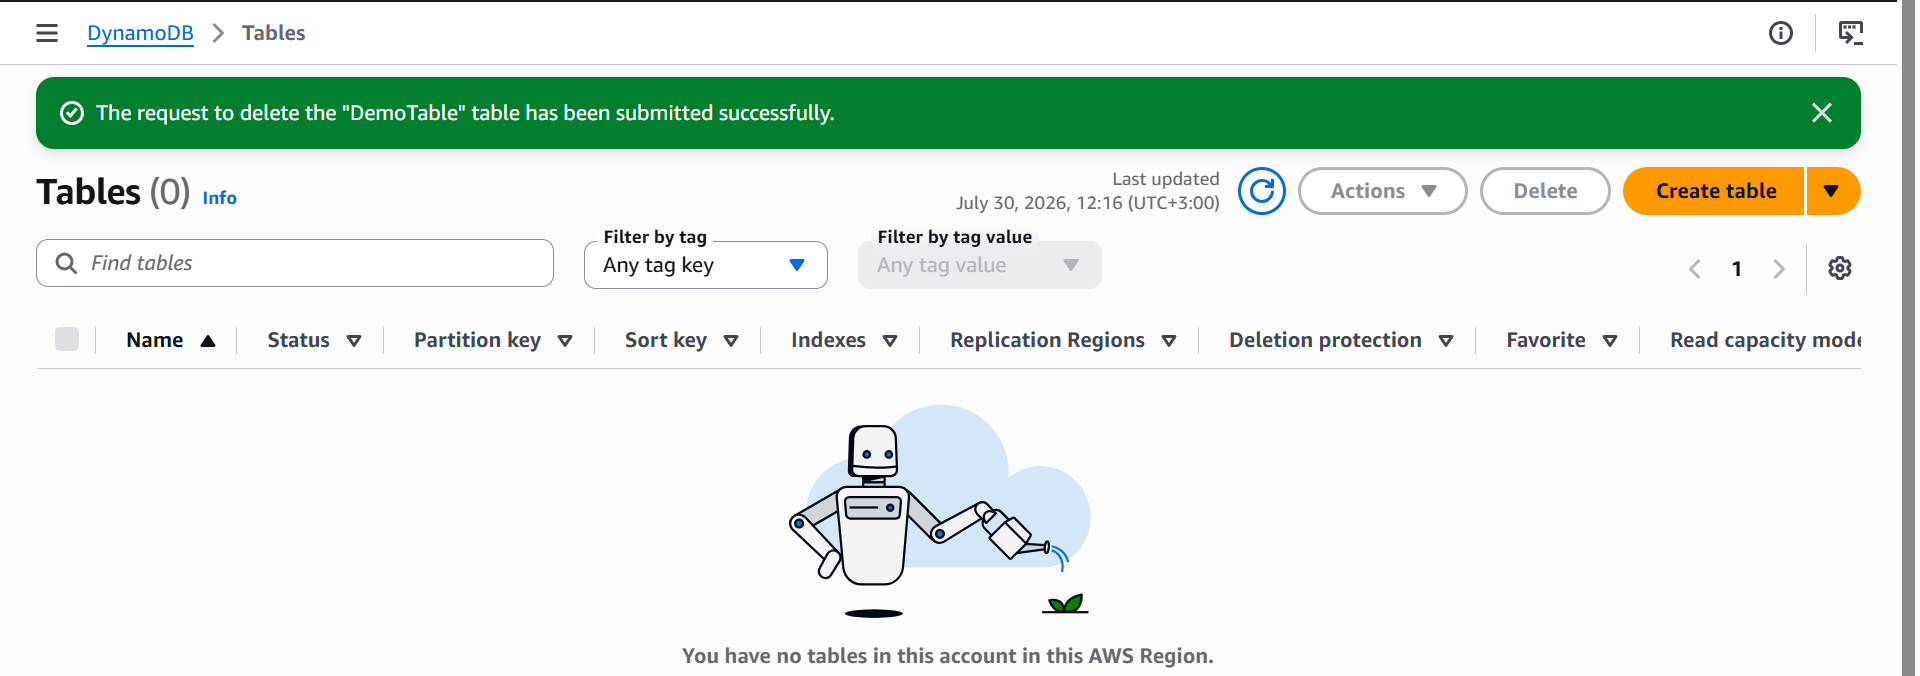
🧹 Clean Up Your Resources
To avoid unnecessary charges, delete the table after completing the lab.
Return to Tables → select your table → Delete
Optionally delete associated CloudWatch alarms. Type delete, then click Delete Table.
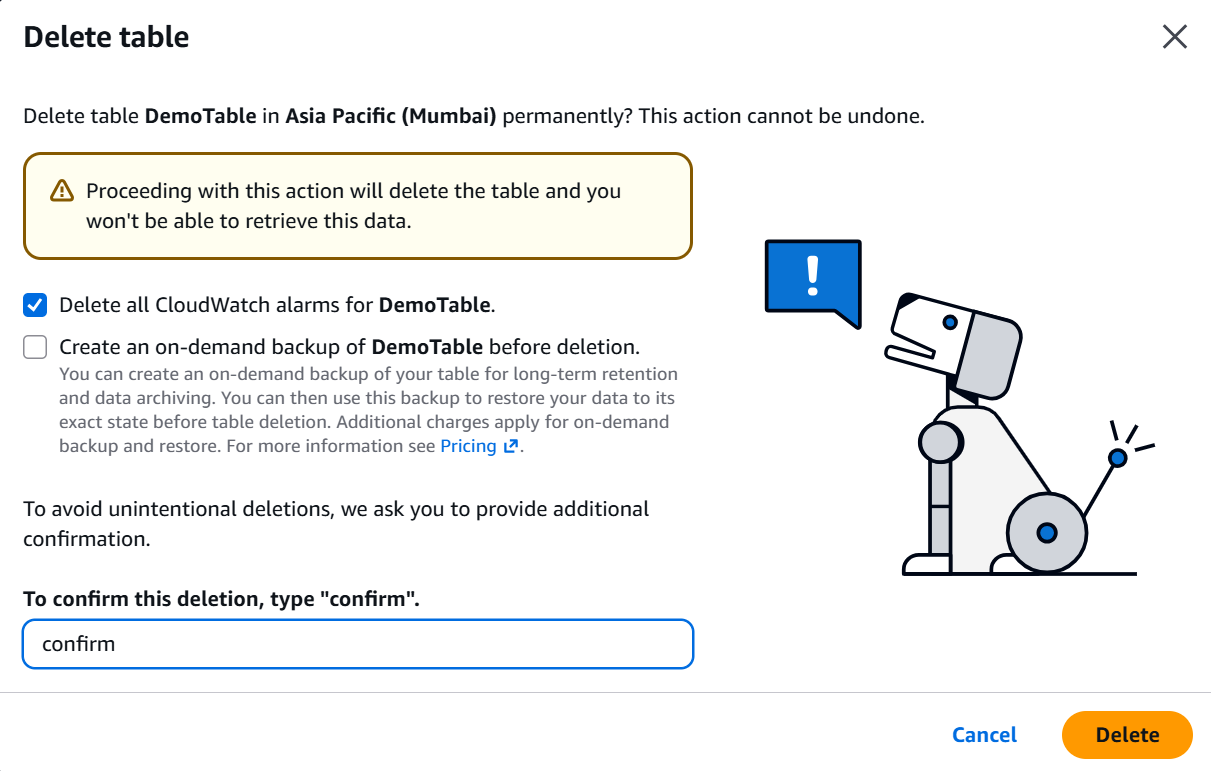
Click: Delete Table
🎓 Summary
You learned how to:
🚀 Create a DynamoDB table
🔑 Configure a Partition Key
📝 Insert items without a fixed schema
🧠 Compare DynamoDB to relational databases
🗑️ Clean up resources safely
🎯 Exam Tips
⚡ DynamoDB = serverless NoSQL database
🔑 Every table requires a Partition Key
📝 Items in the same table don't need identical attributes
🚫 No SQL joins between tables
🌍 You create tables only — AWS manages the infrastructure
💡 "Serverless NoSQL database, flexible schema, automatic scaling" → DynamoDB