☁️ S3 Cross-Region Replication (CRR)
Scenario: 🧑💻 You're a Cloud Engineer managing an S3 bucket in ap-south-1. Your manager asks: "Can we automatically keep a copy of every new file in another Region?"
Task: 🎯 Set up Cross-Region Replication so new uploads automatically copy to a bucket in a different AWS Region — no manual copying needed. 🔄🌍
💰 AWS Charges May Apply
This lab creates S3 buckets and enables replication between them — storage, request, and inter-region data transfer charges may apply depending on your account. Delete the resources when you're done. ⚠️
🧠 Core Idea
S3 Replication automatically copies objects from one bucket to another. Two options:
🌍 Cross-Region Replication (CRR) — copies to a bucket in a different Region
📍 Same-Region Replication (SRR) — copies to a bucket in the same Region
🛠️ Step 1: Create the Source Bucket
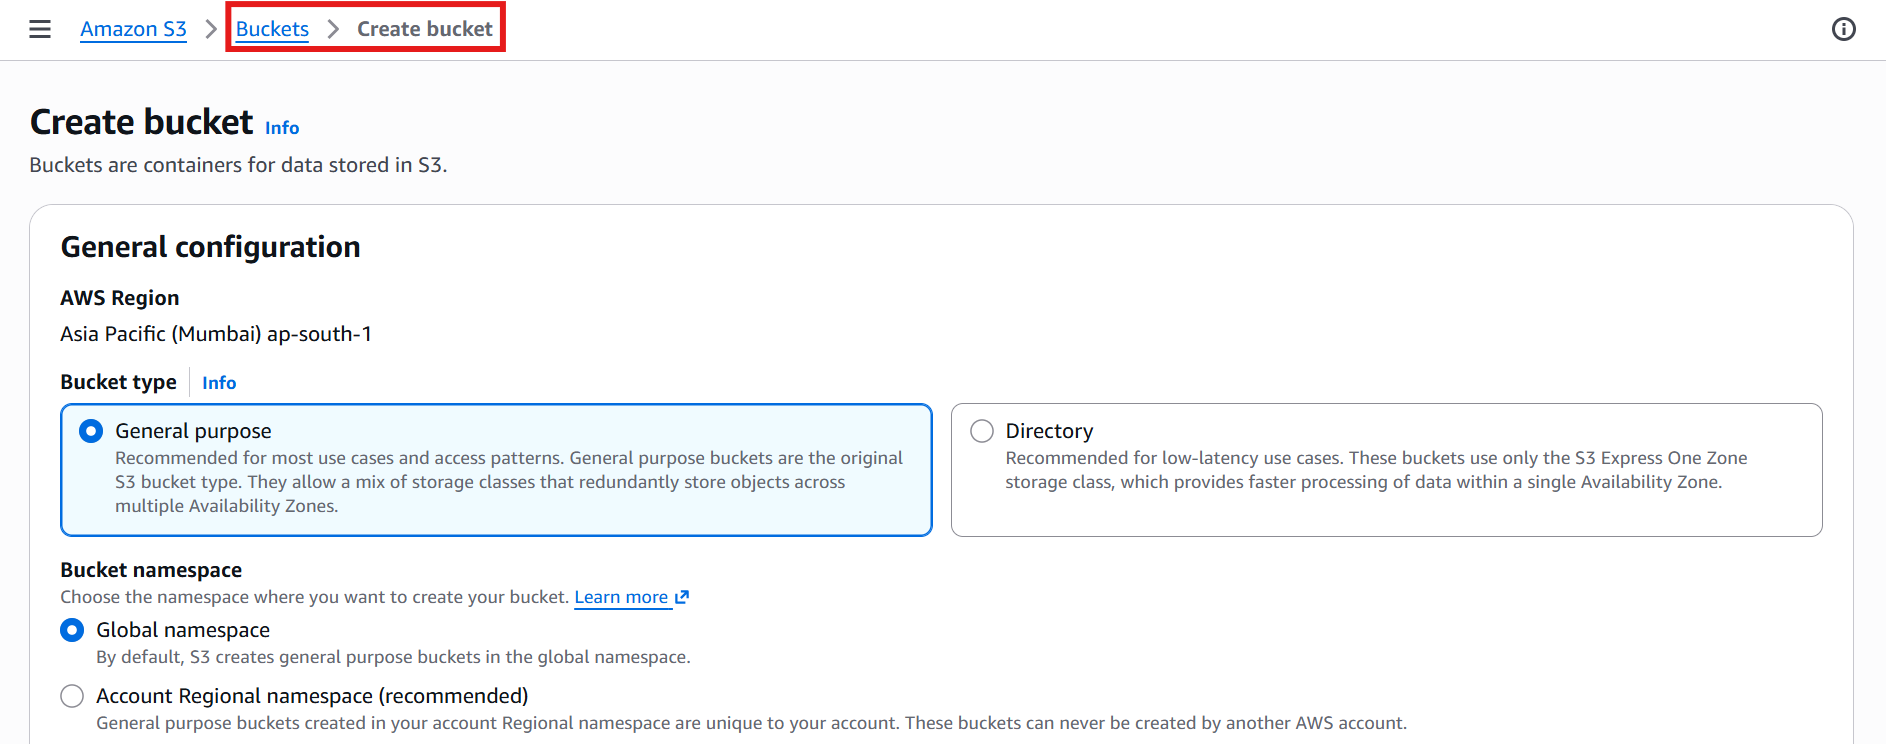
Open the AWS Management Console.
Go to S3 → Create bucket
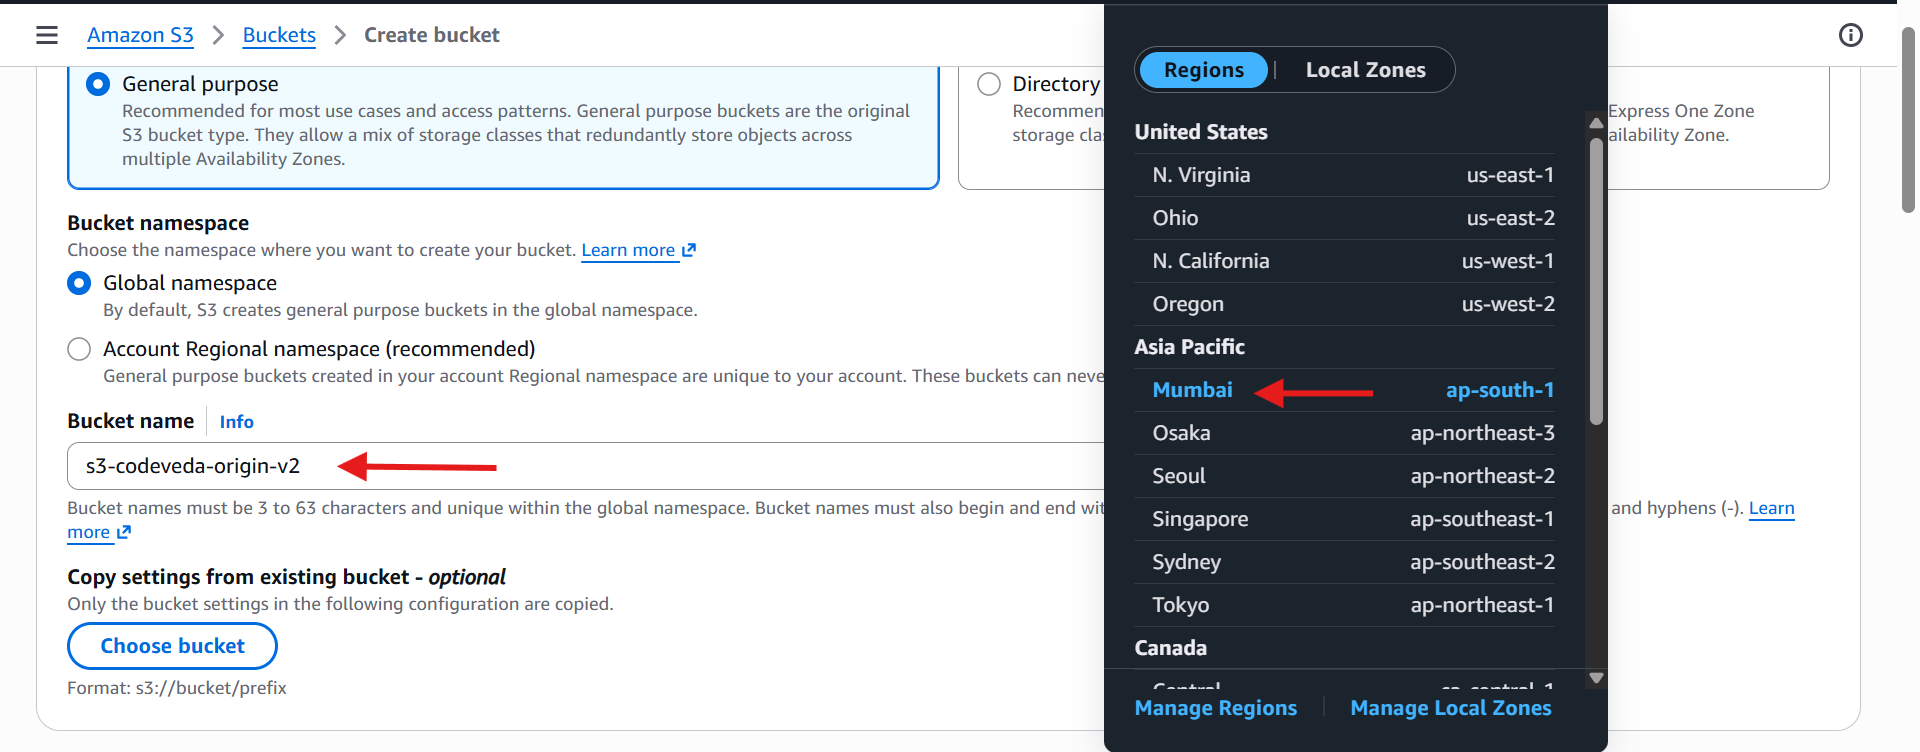
Name:
s3-yourname-origin-v2Region: ap-south-1 (Mumbai)

✅ Enable Versioning (required for replication)
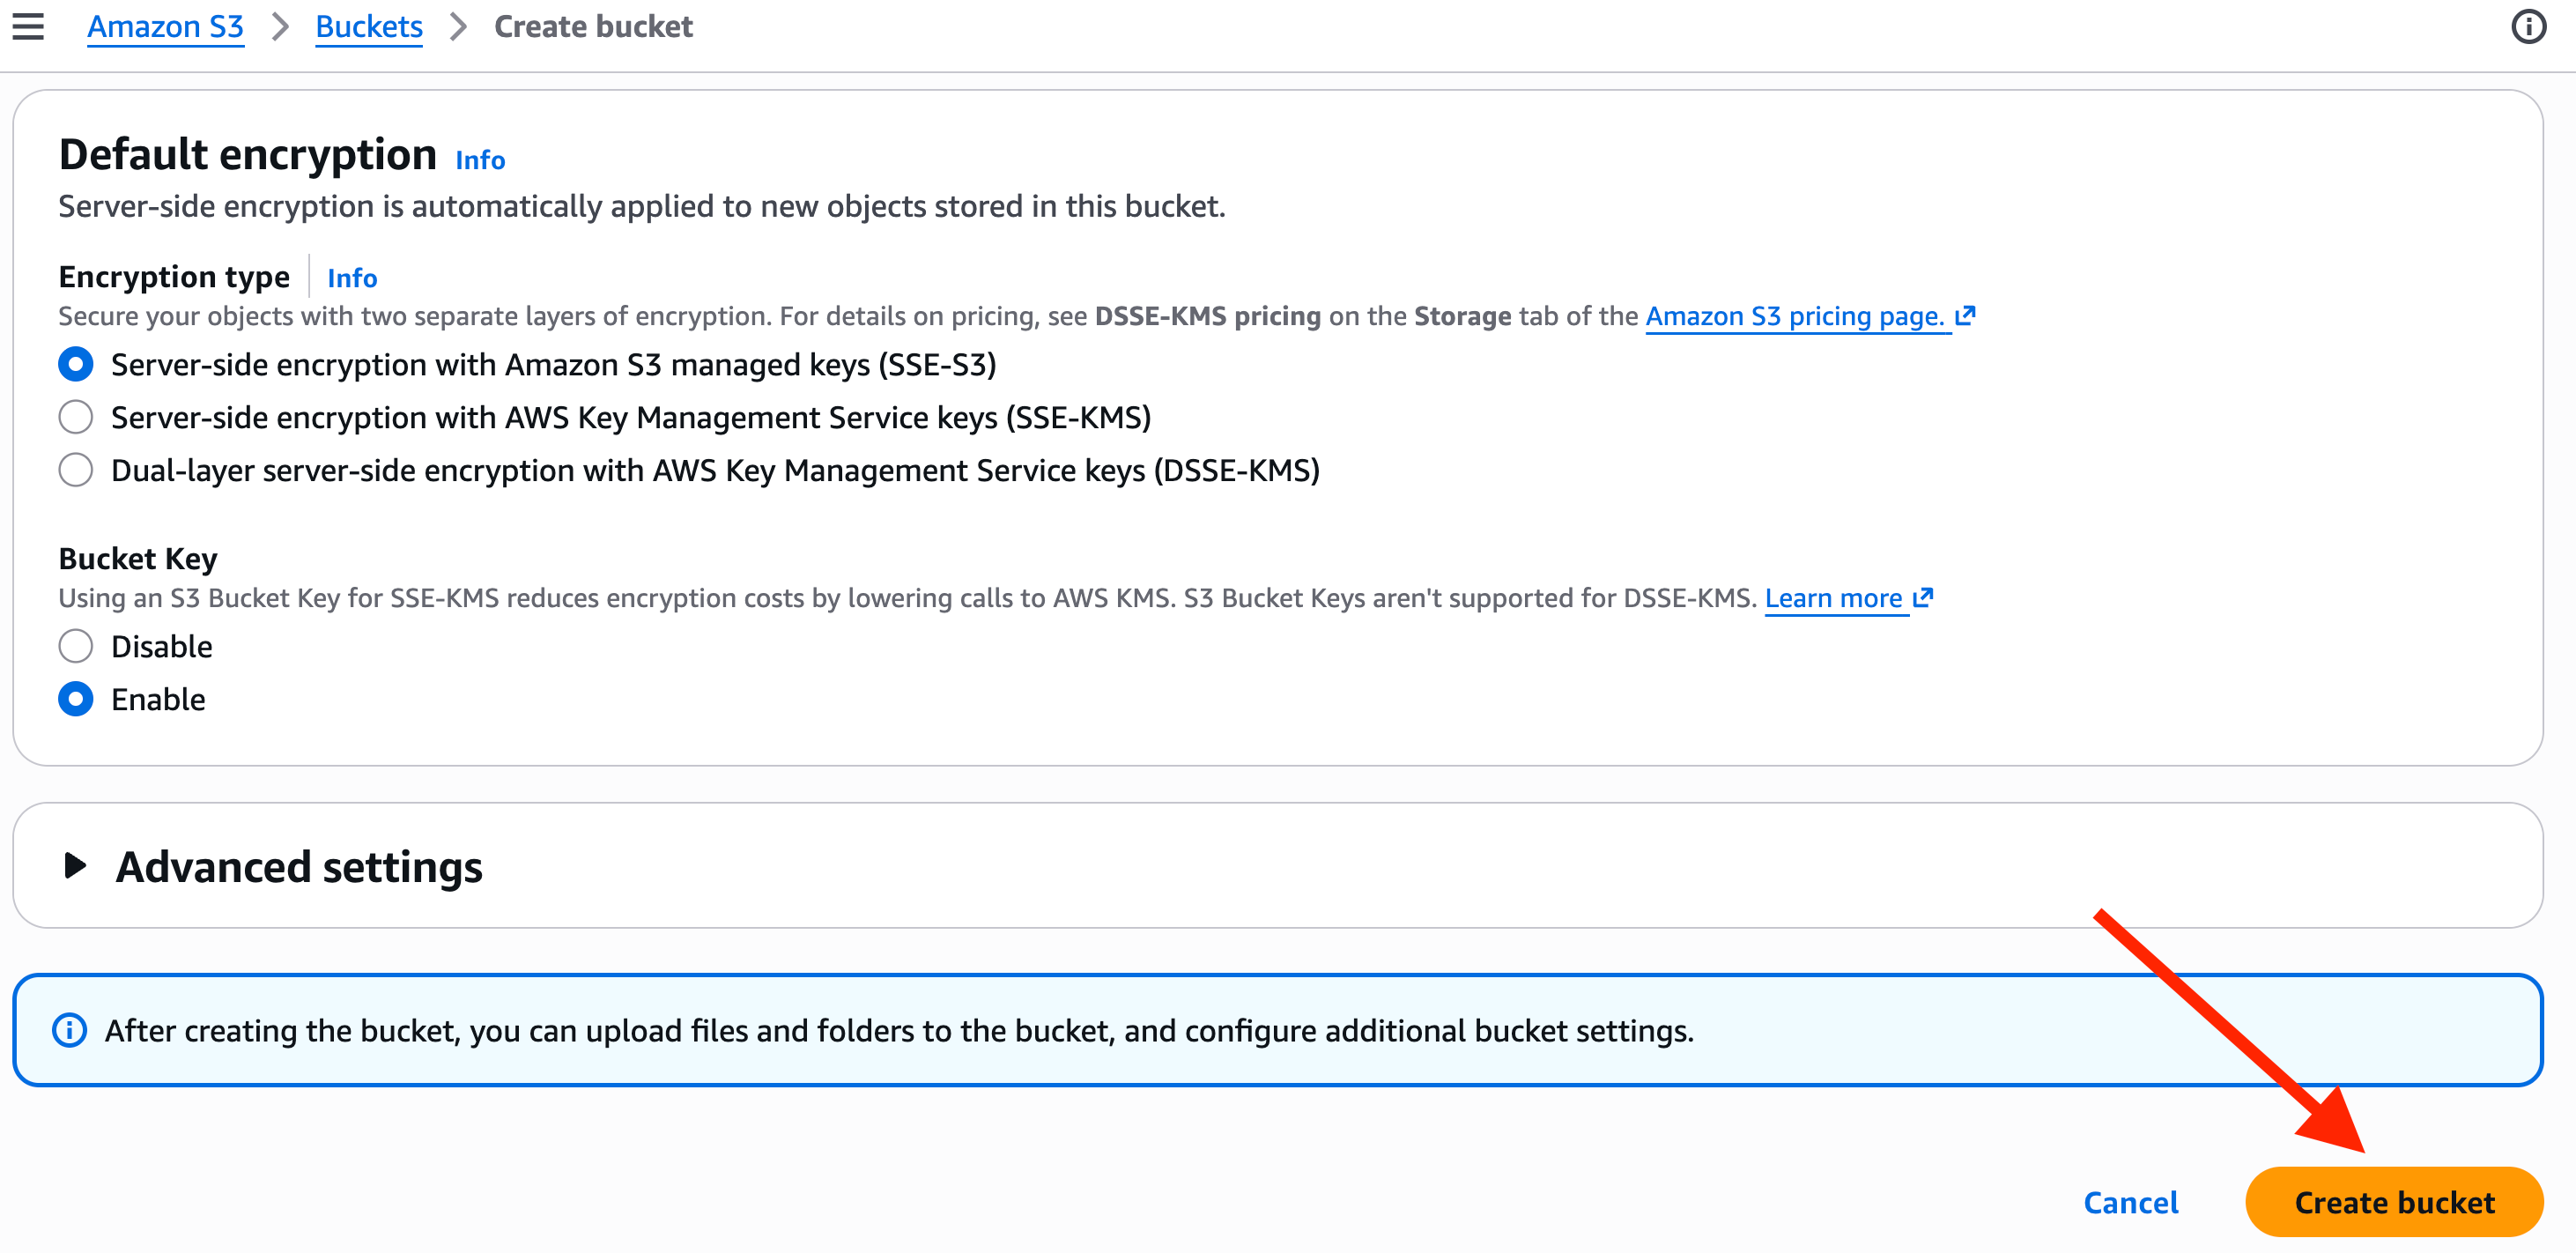
⚙️ Leave all other settings as default.
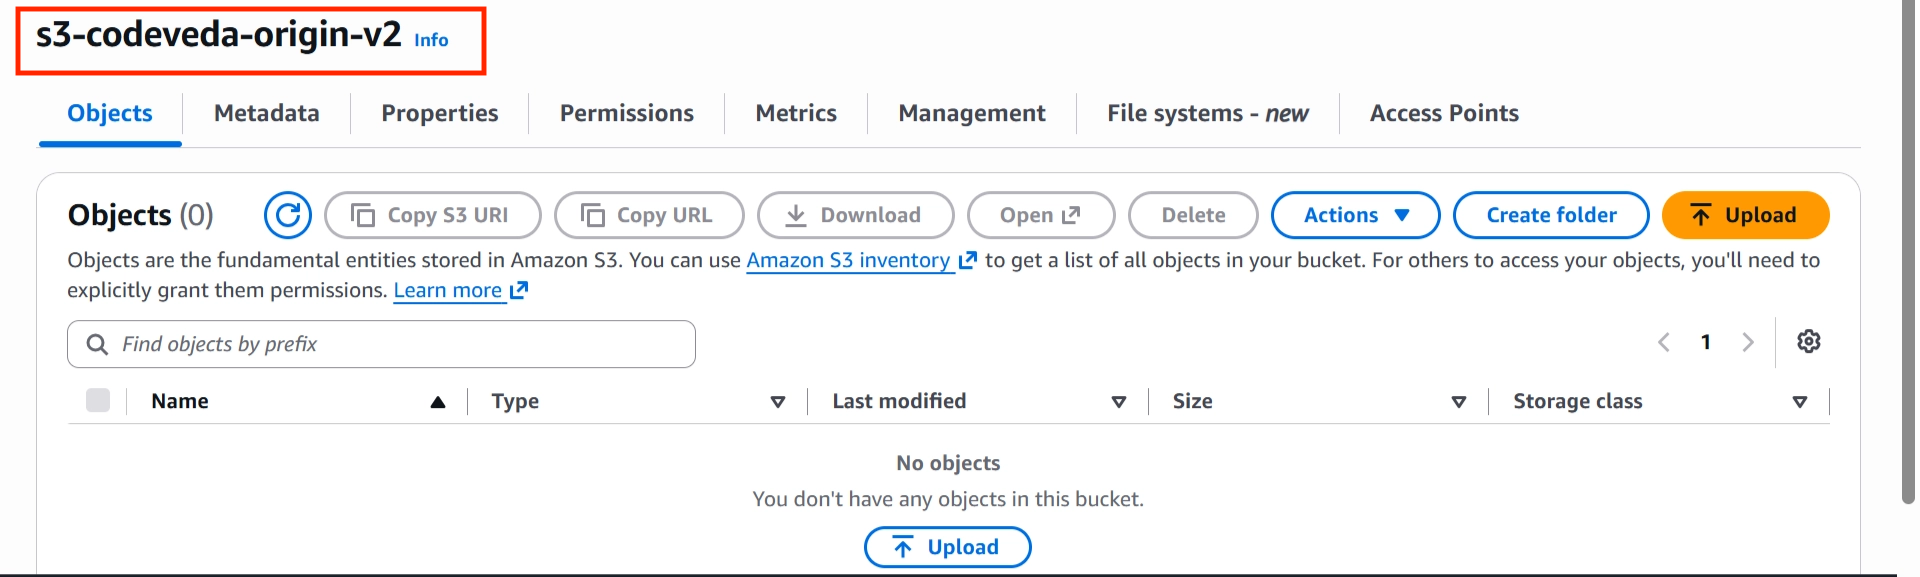
Create the bucket
🛠️ Step 2: Create the Destination Bucket
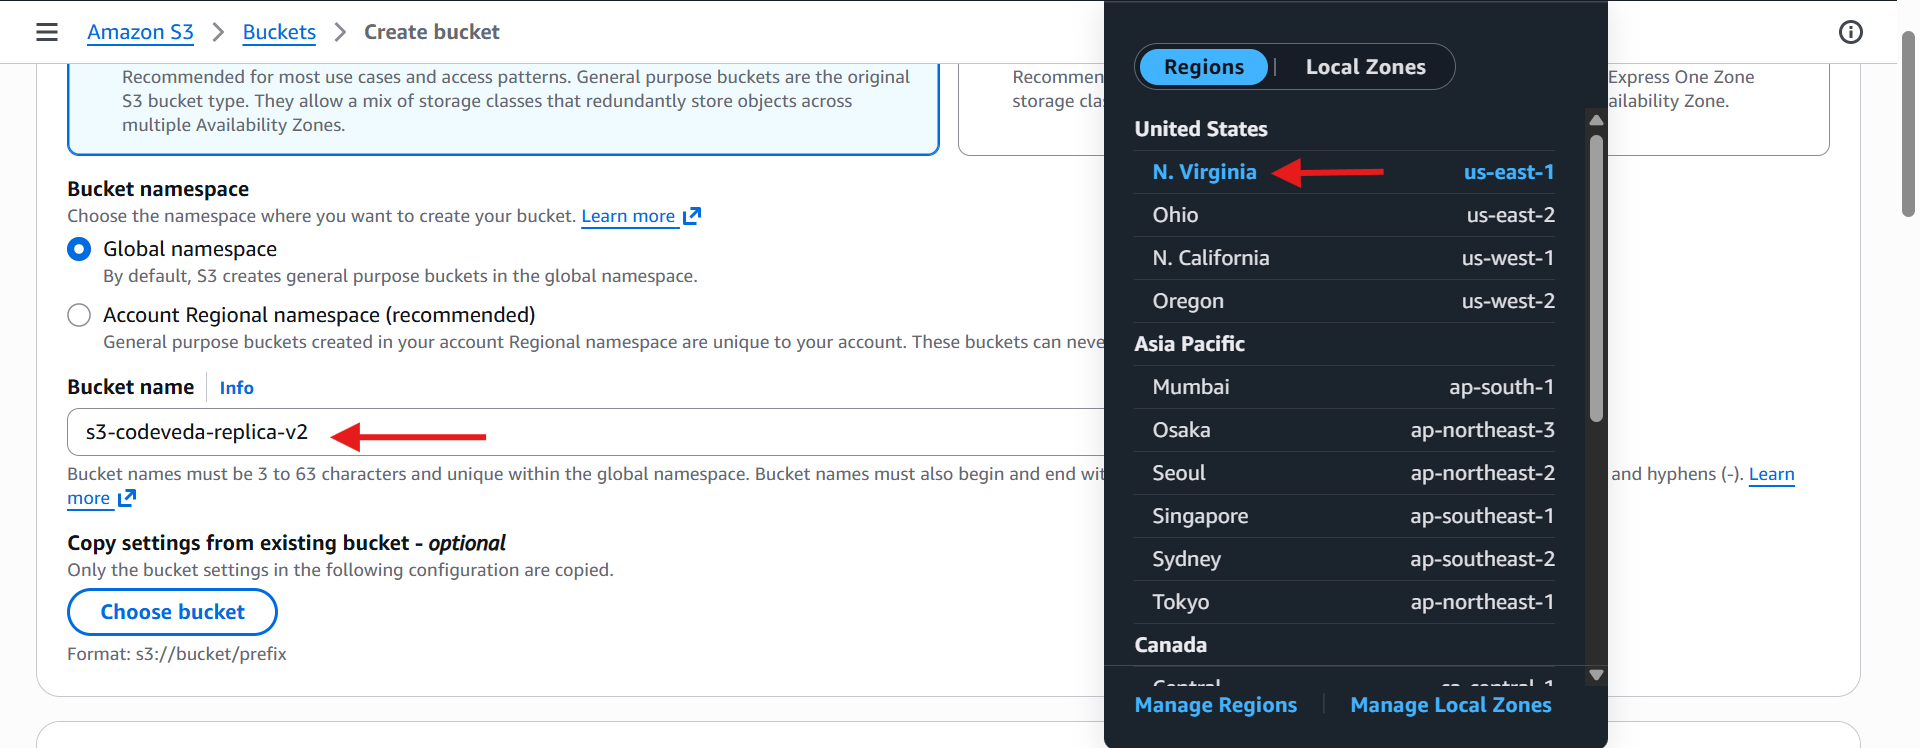
Create another bucket:
s3-yourname-replica-v2Select Region:
Option 1 — Same Region Replication (SRR)
Choose:
Asia Pacific (Mumbai) - ap-south-1Option 2 — Cross Region Replication (CRR)
Choose a different Region, for example:
US East (N. Virginia) - us-east-1In this exercise, choose:
US East (N. Virginia)This demonstrates Cross-Region Replication.

✅ Enable Versioning here too
⚙️ Leave all other settings as default.
Create the bucket
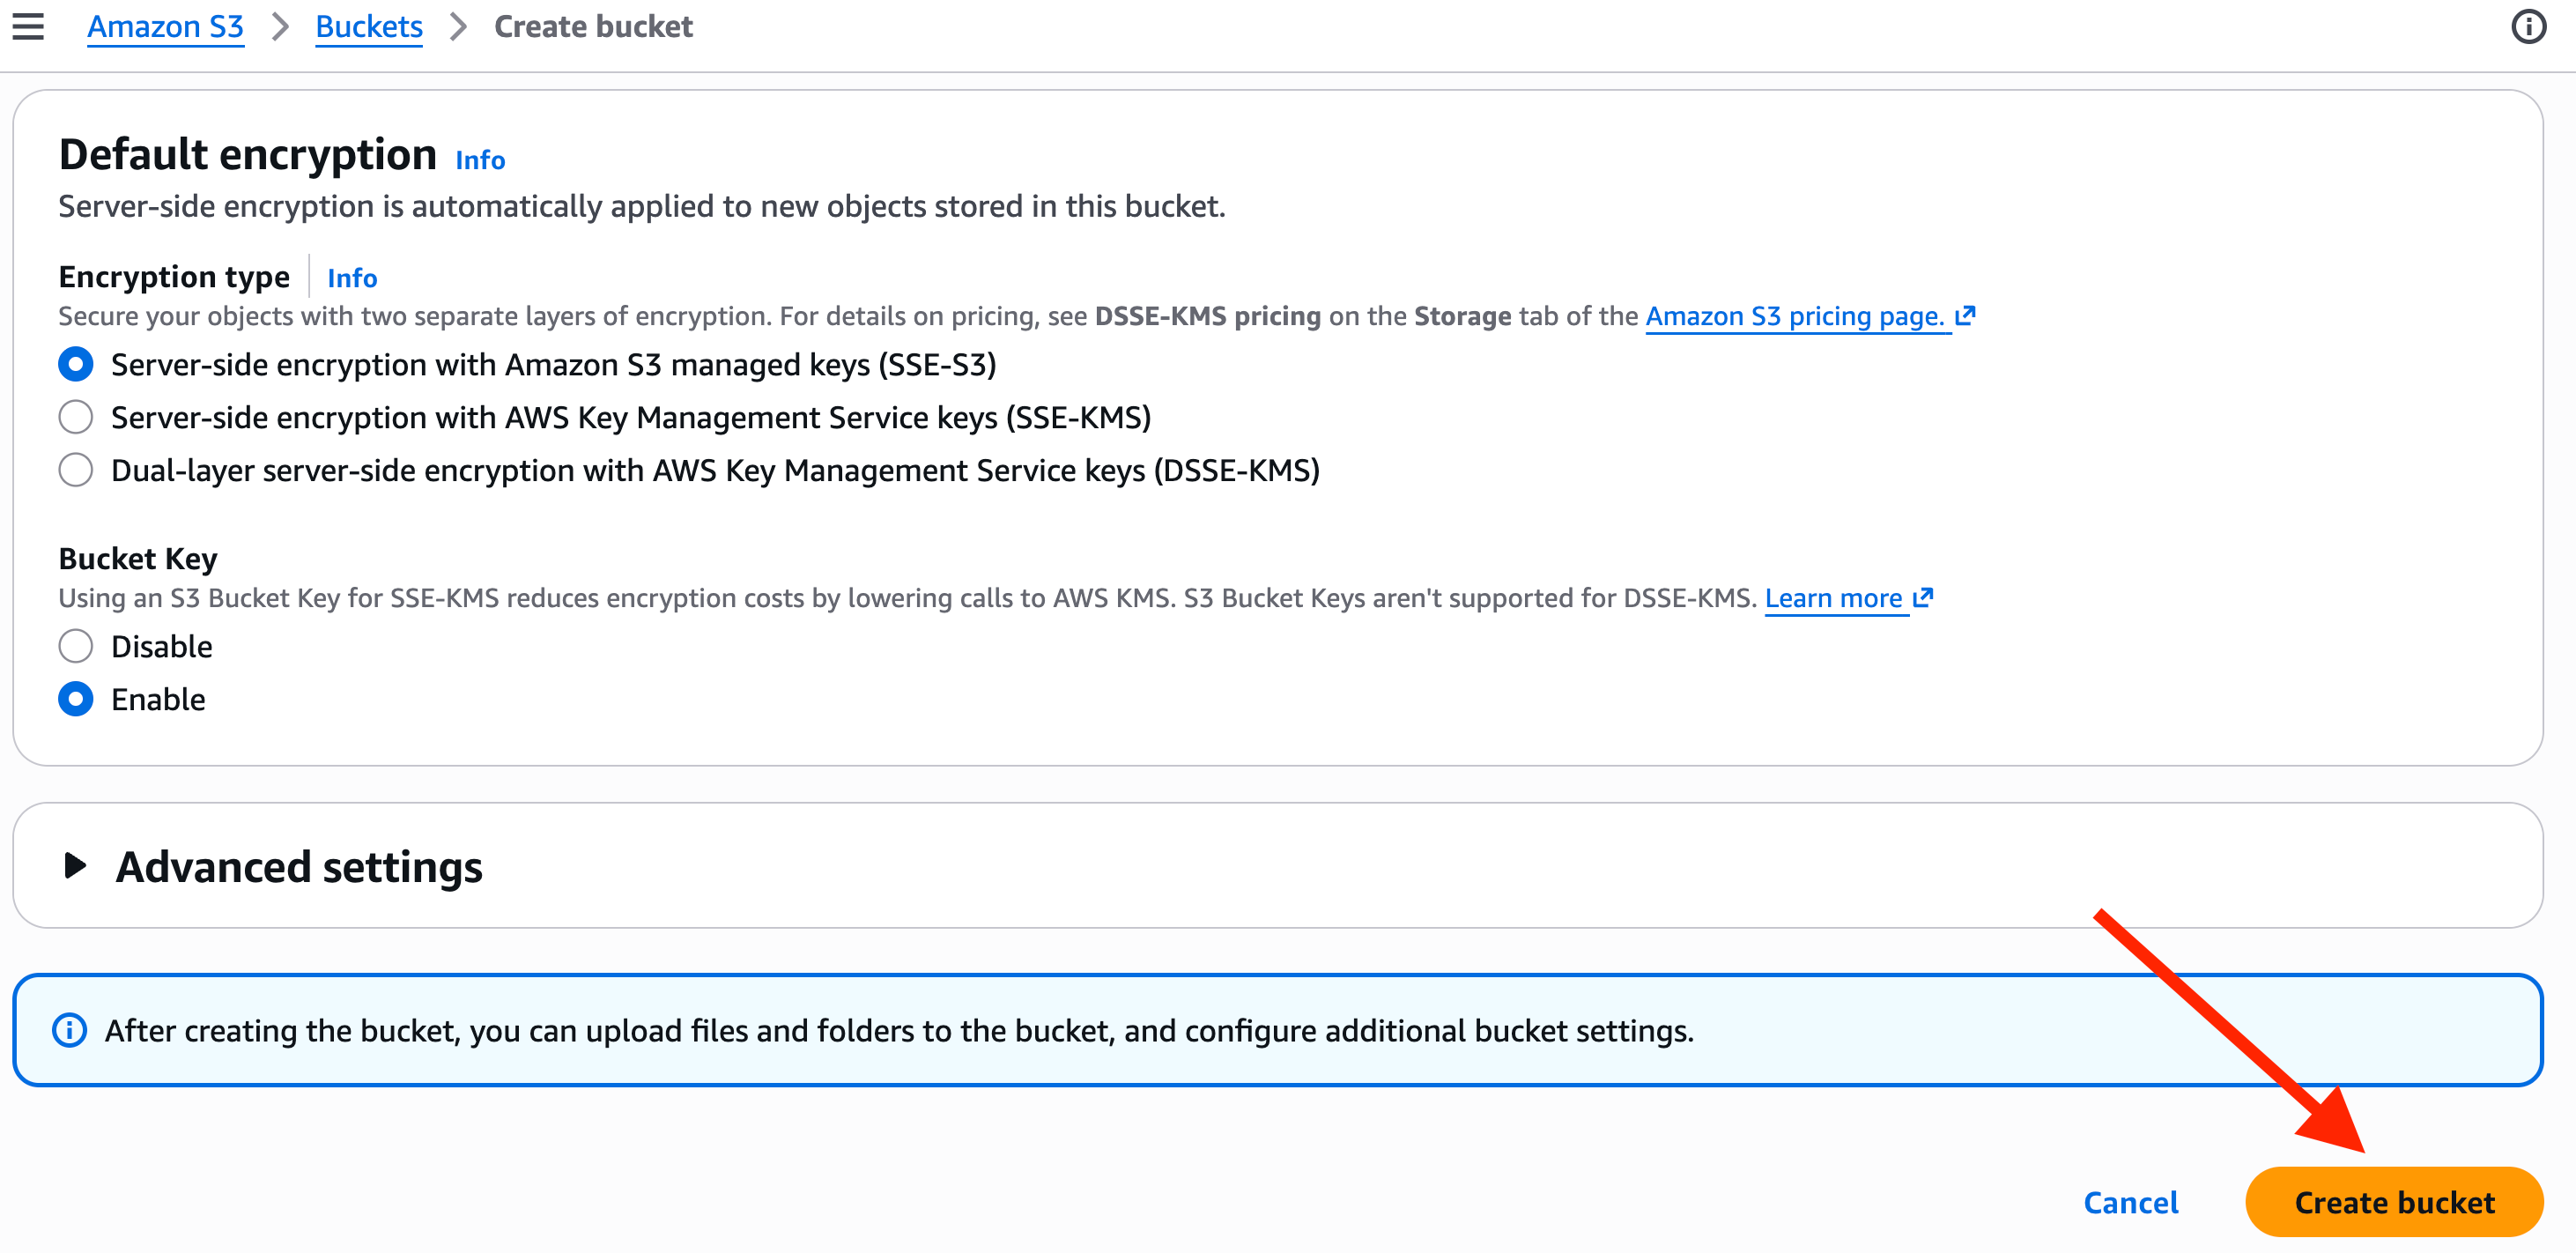
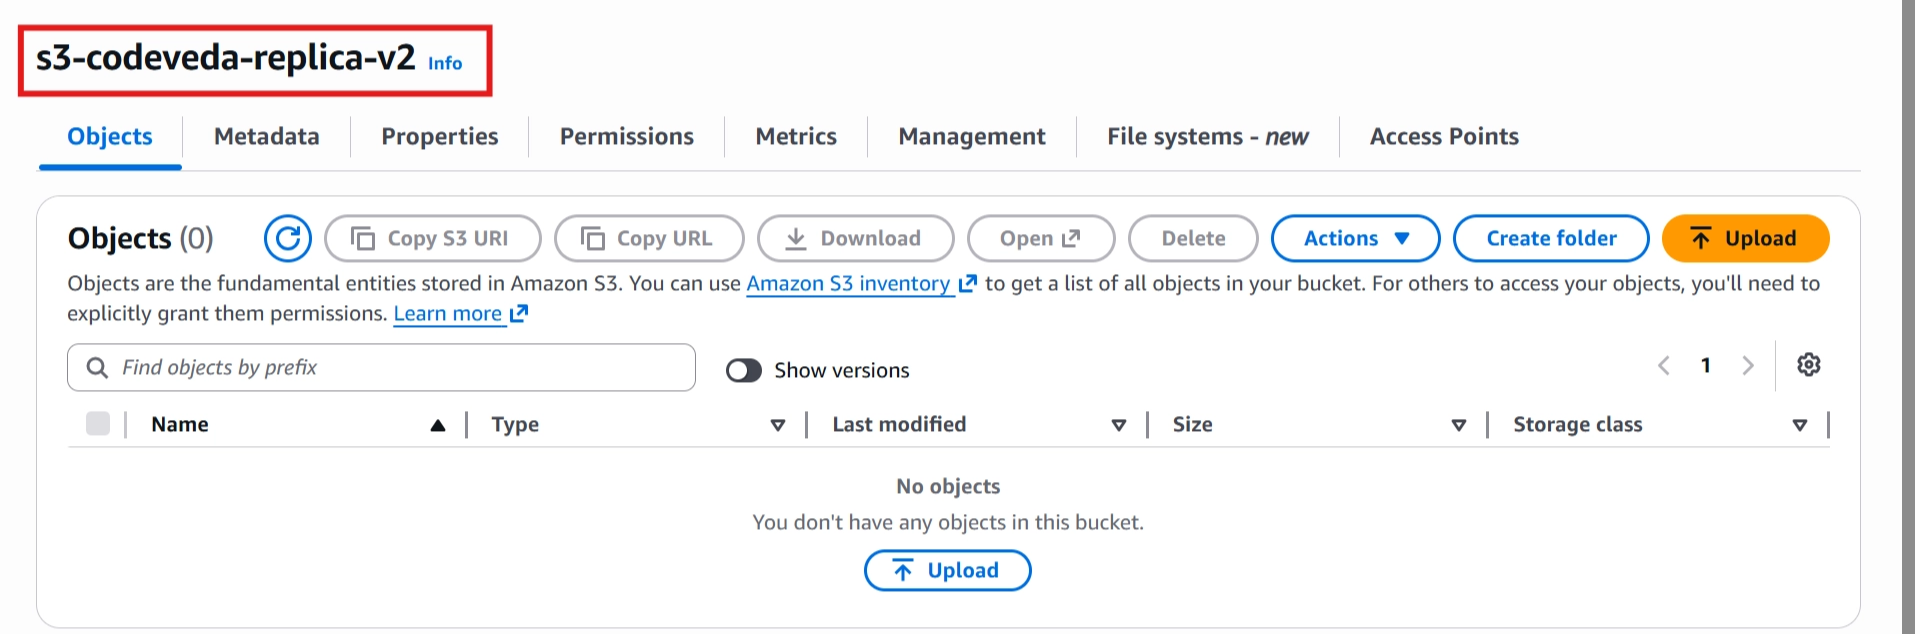
📂 You now have a source bucket and a destination bucket.
🛠️ Step 3: Upload an Object Before Replication
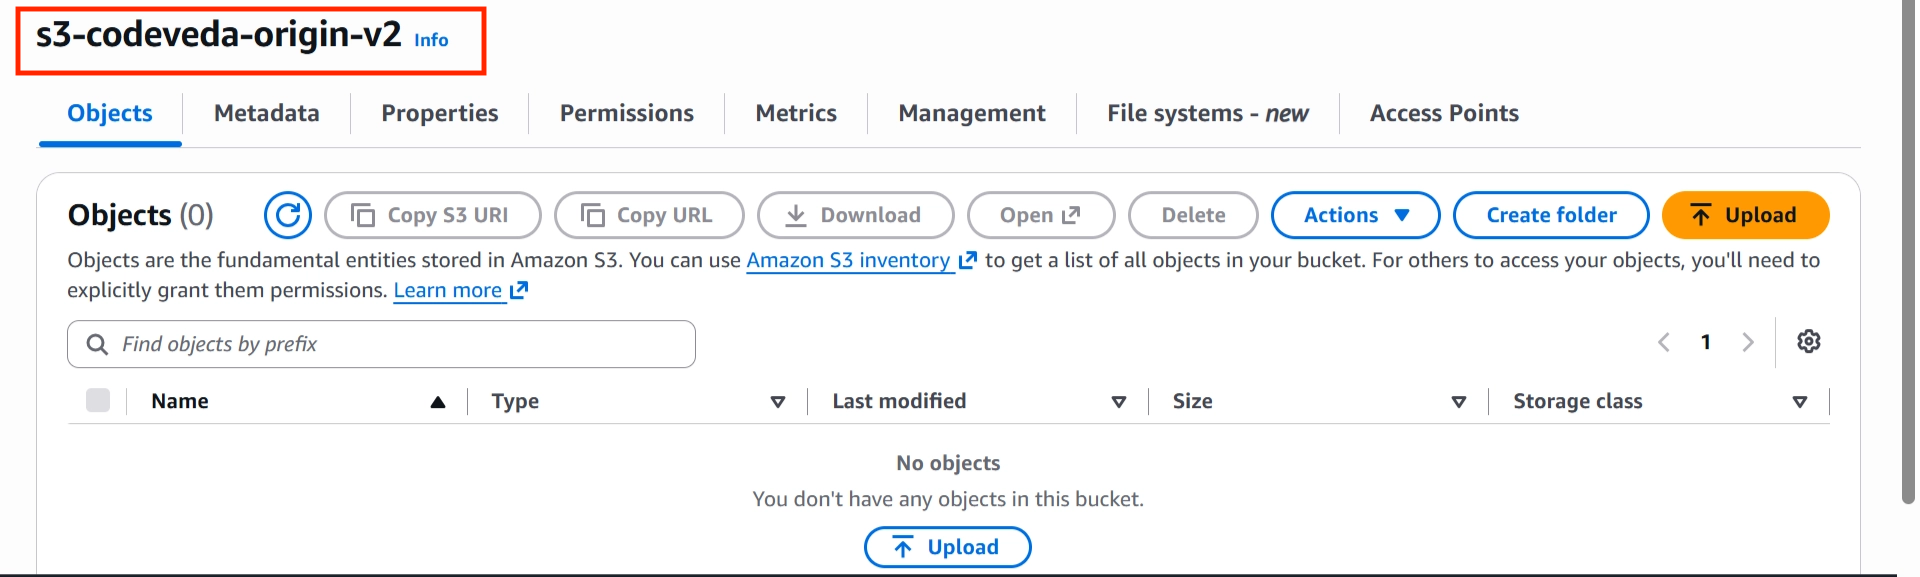
Open your source bucket
(The first bucket you just created).Click Upload.
Click Add file.
Select any image from your computer.
If you specifically want to follow along use this image below
beach.png

Scroll down and click Upload.
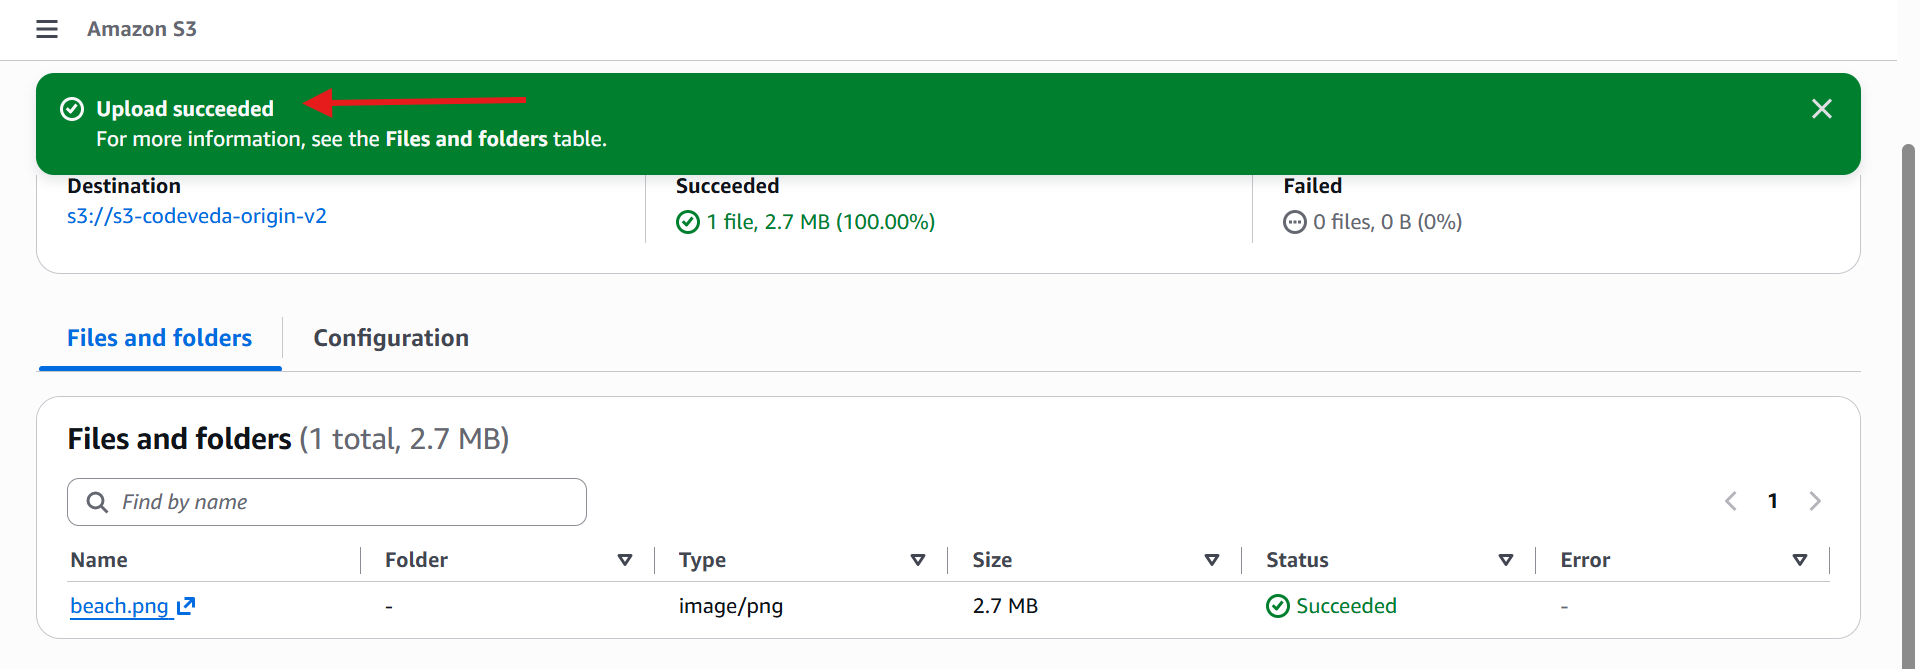
After the upload finishes, return to the bucket. You should now see:
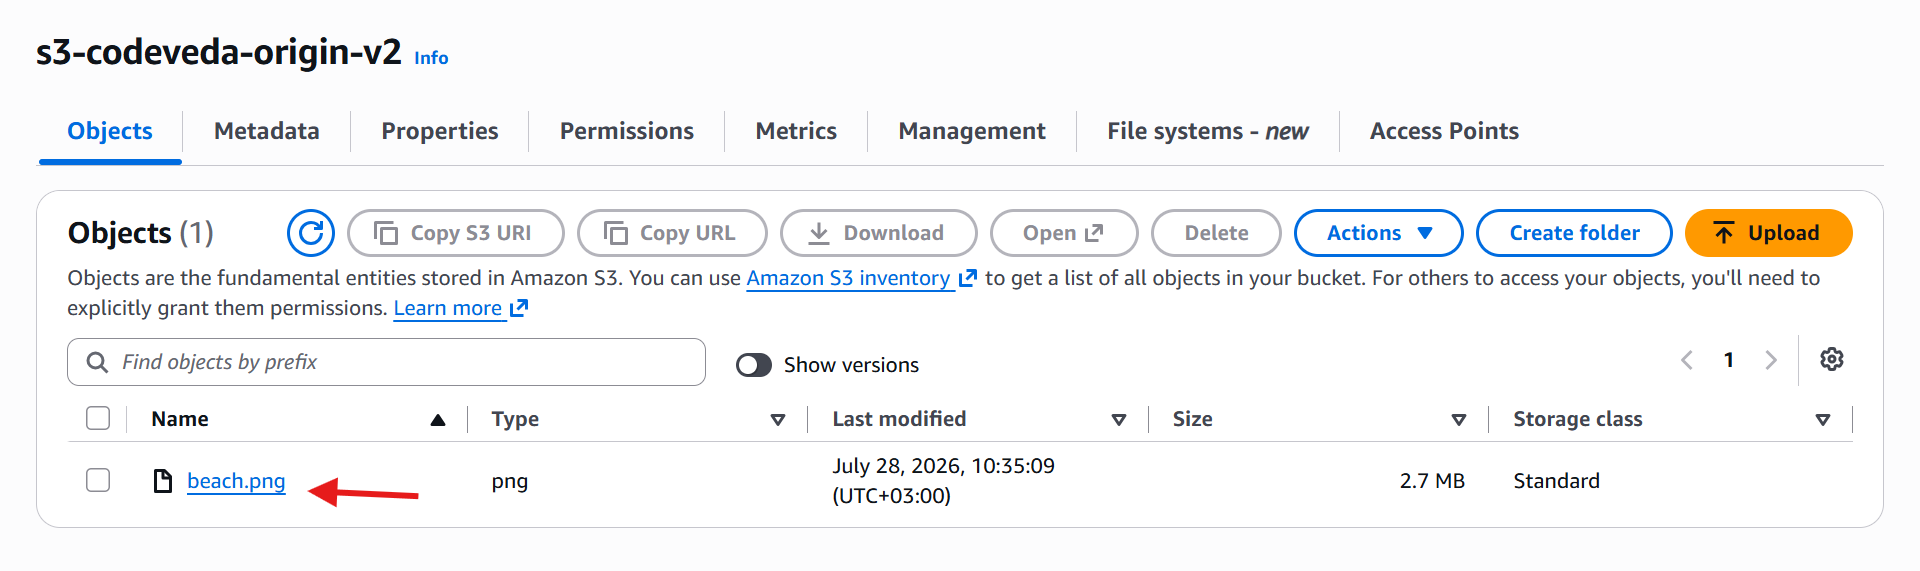
At this point:
✅ The file exists in the source bucket.
❌ It has not been replicated yet because replication has not been configured.
🛠️ Step 4: Configure S3 Replication
Inside the source bucket, click the Management tab.
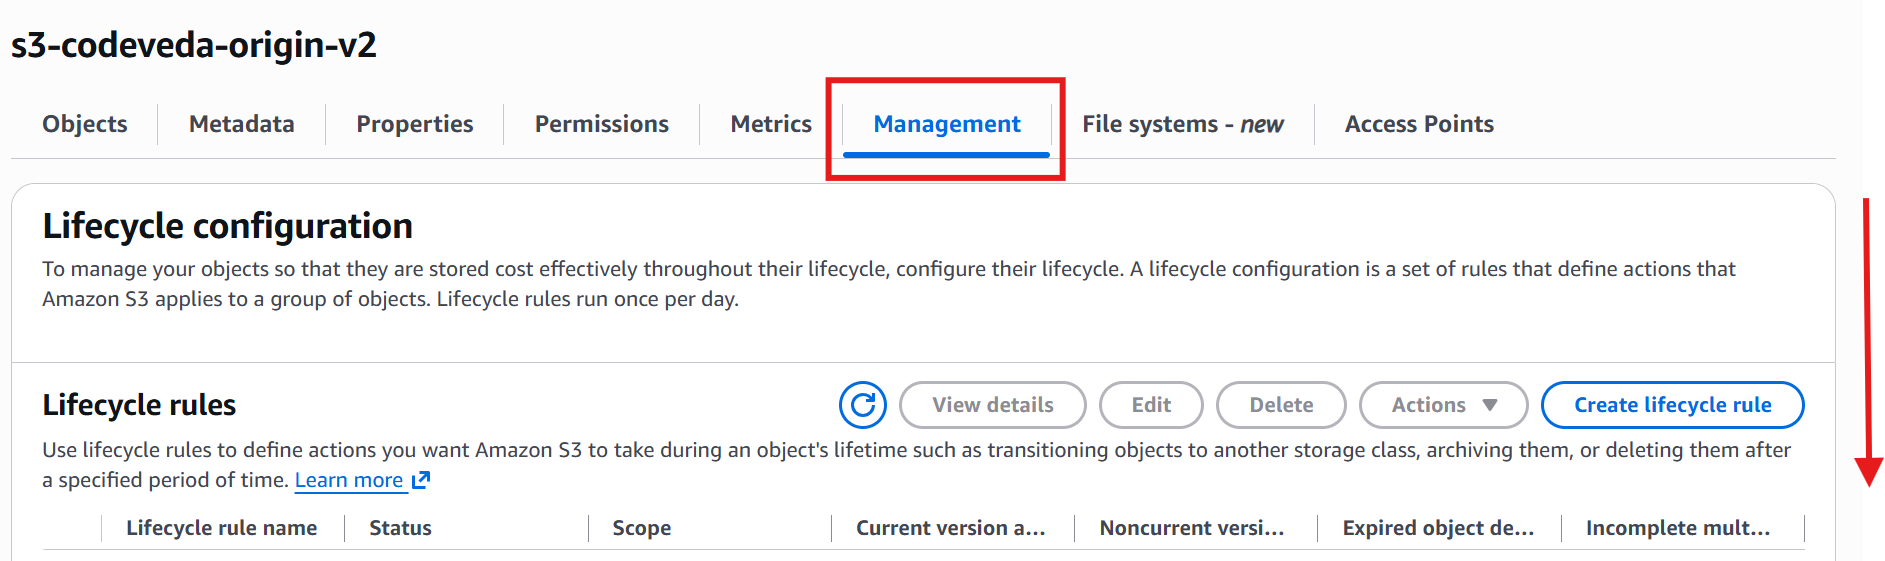
Scroll down until you find:
Replication rules
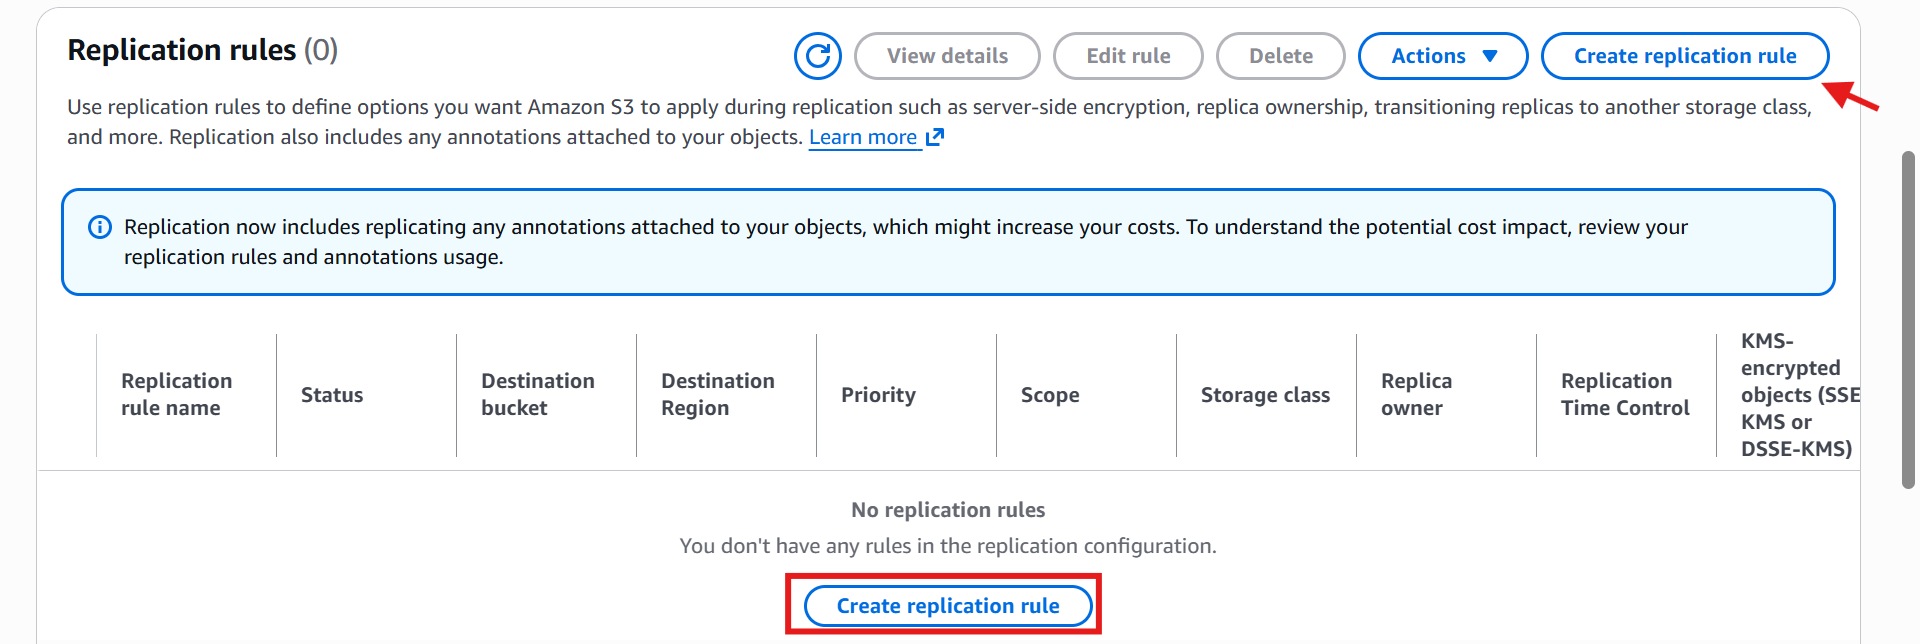
Since none exist yet, you'll see: No replication rules
Click: Create replication rule
Configure the Rule
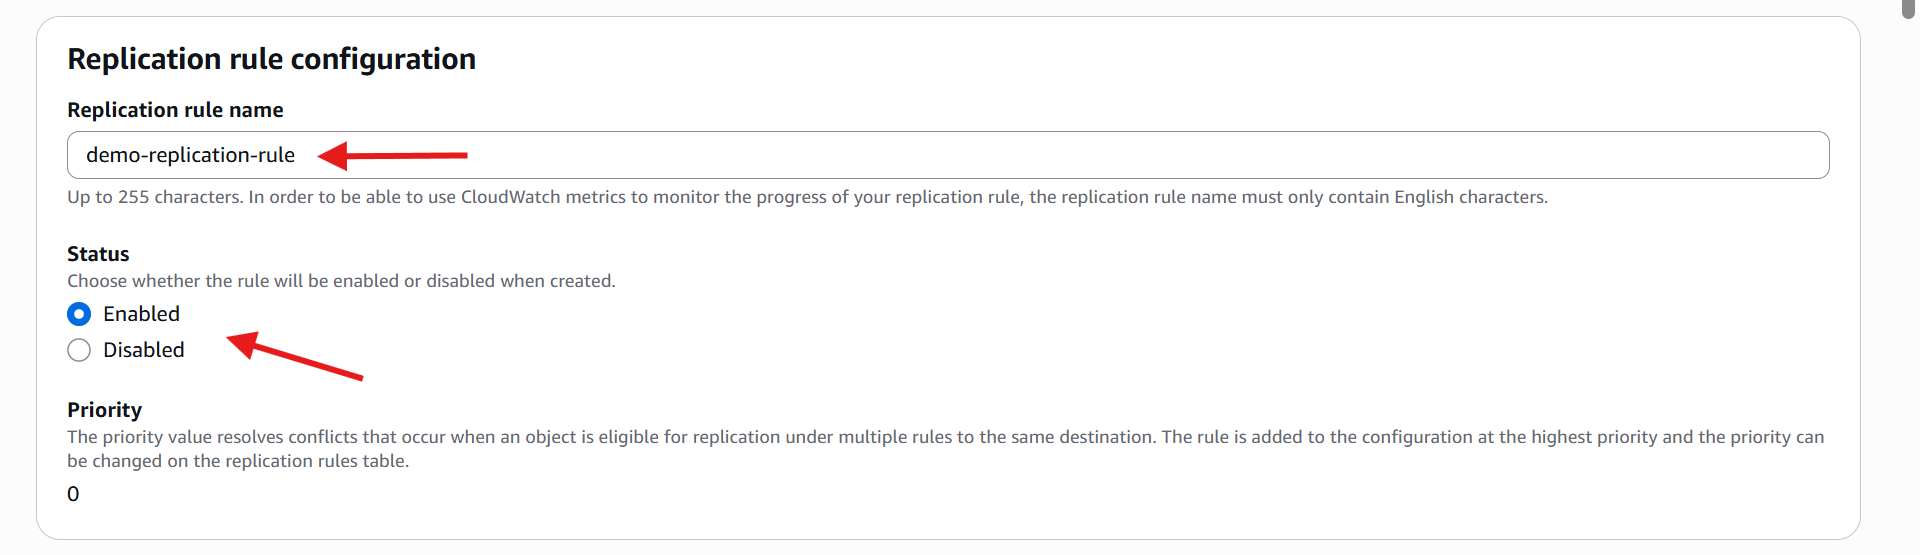
Rule name:
demo-replication-ruleStatus: ✅ Enabled
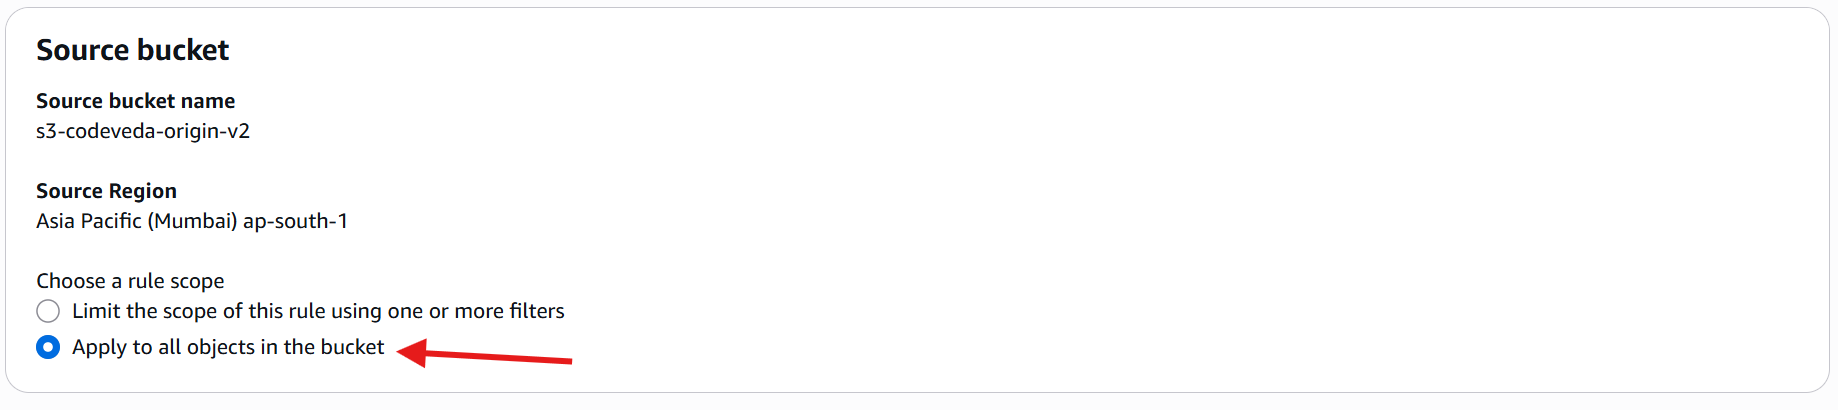
Scope: Apply to all objects in the bucket
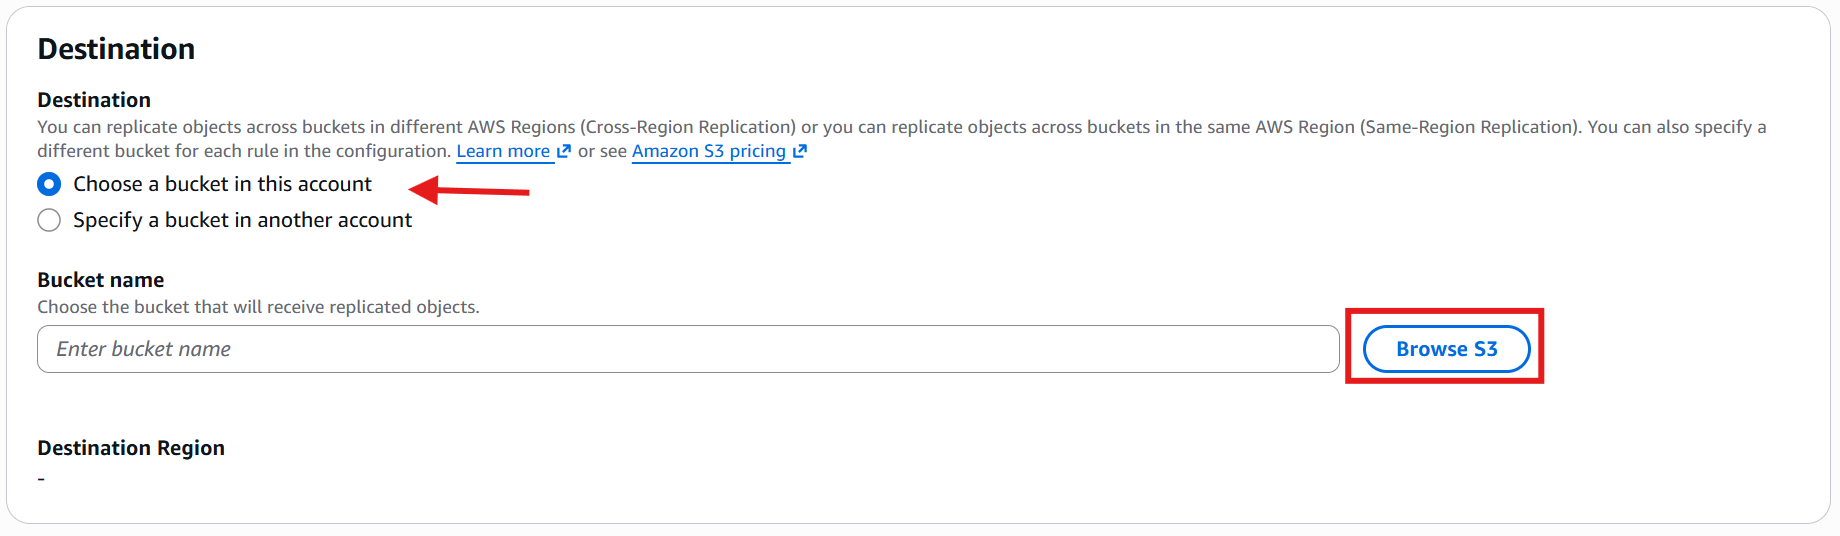
🌍 Since the destination bucket is in us-east-1 — a different Region from your source — AWS automatically detects this as a cross-Region setup.
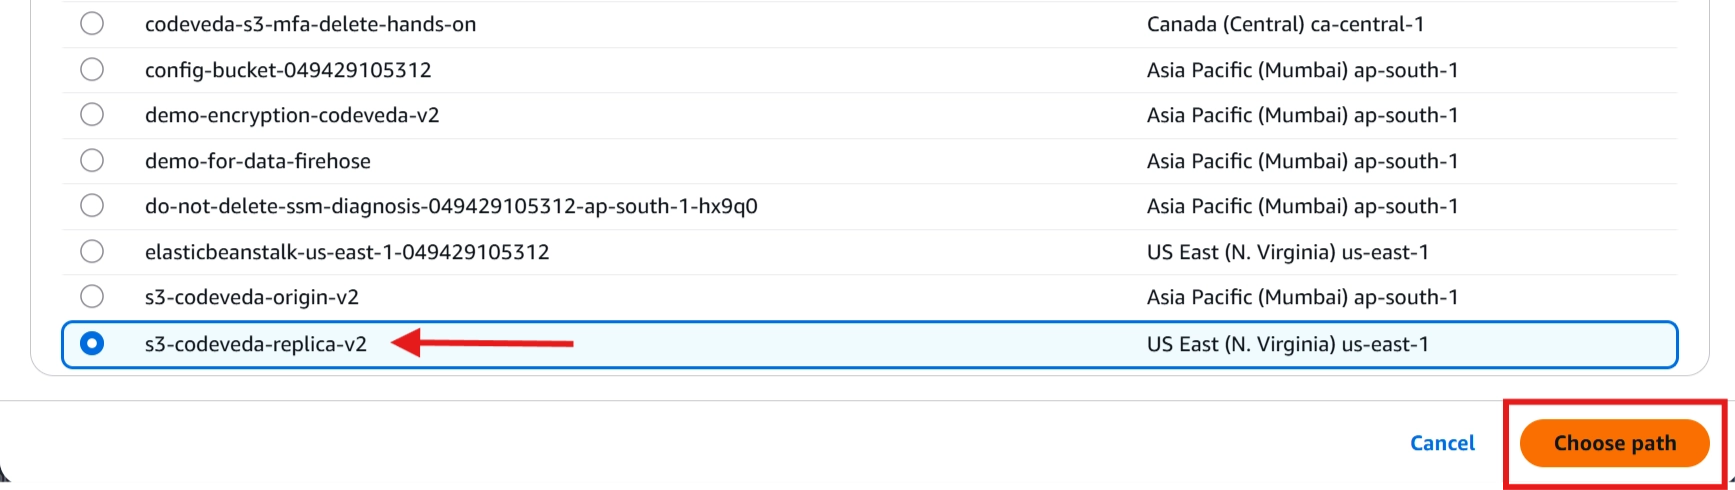
Destination: select your destination bucket (AWS auto-detects it's cross-region)
( Since the destination bucket is inus-east-1— a different Region from your source — AWS automatically detects this as a cross-Region setup )
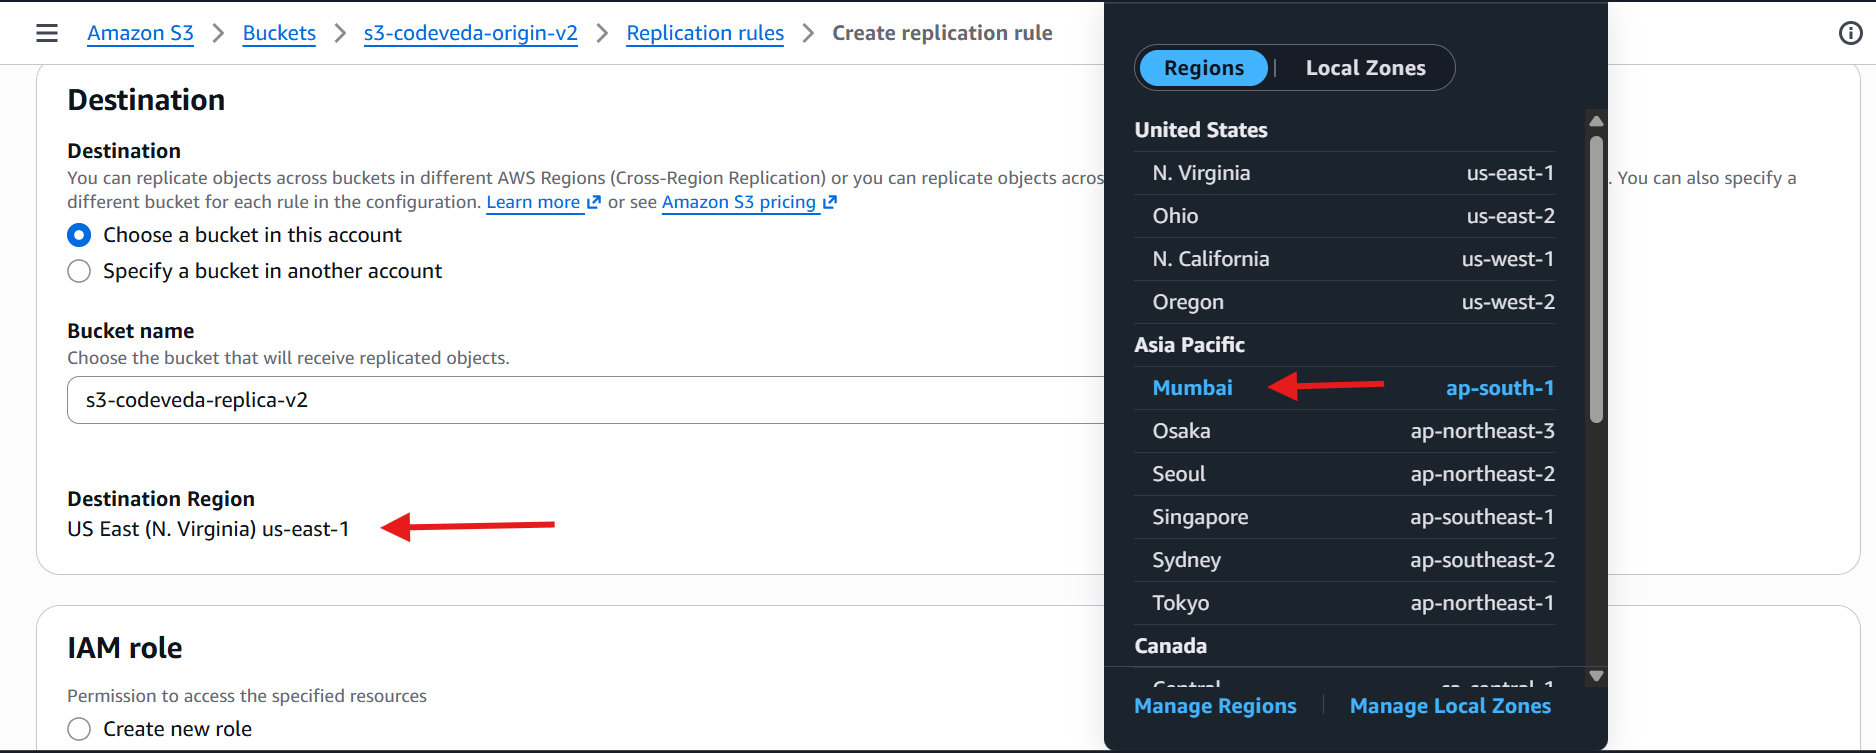
This confirms you're configuring Cross-Region Replication (CRR).

IAM Role: choose Create new role
( AWS automatically creates the IAM Role required for Amazon S3 to copy objects between buckets )⚙️ Leave all other settings as default.
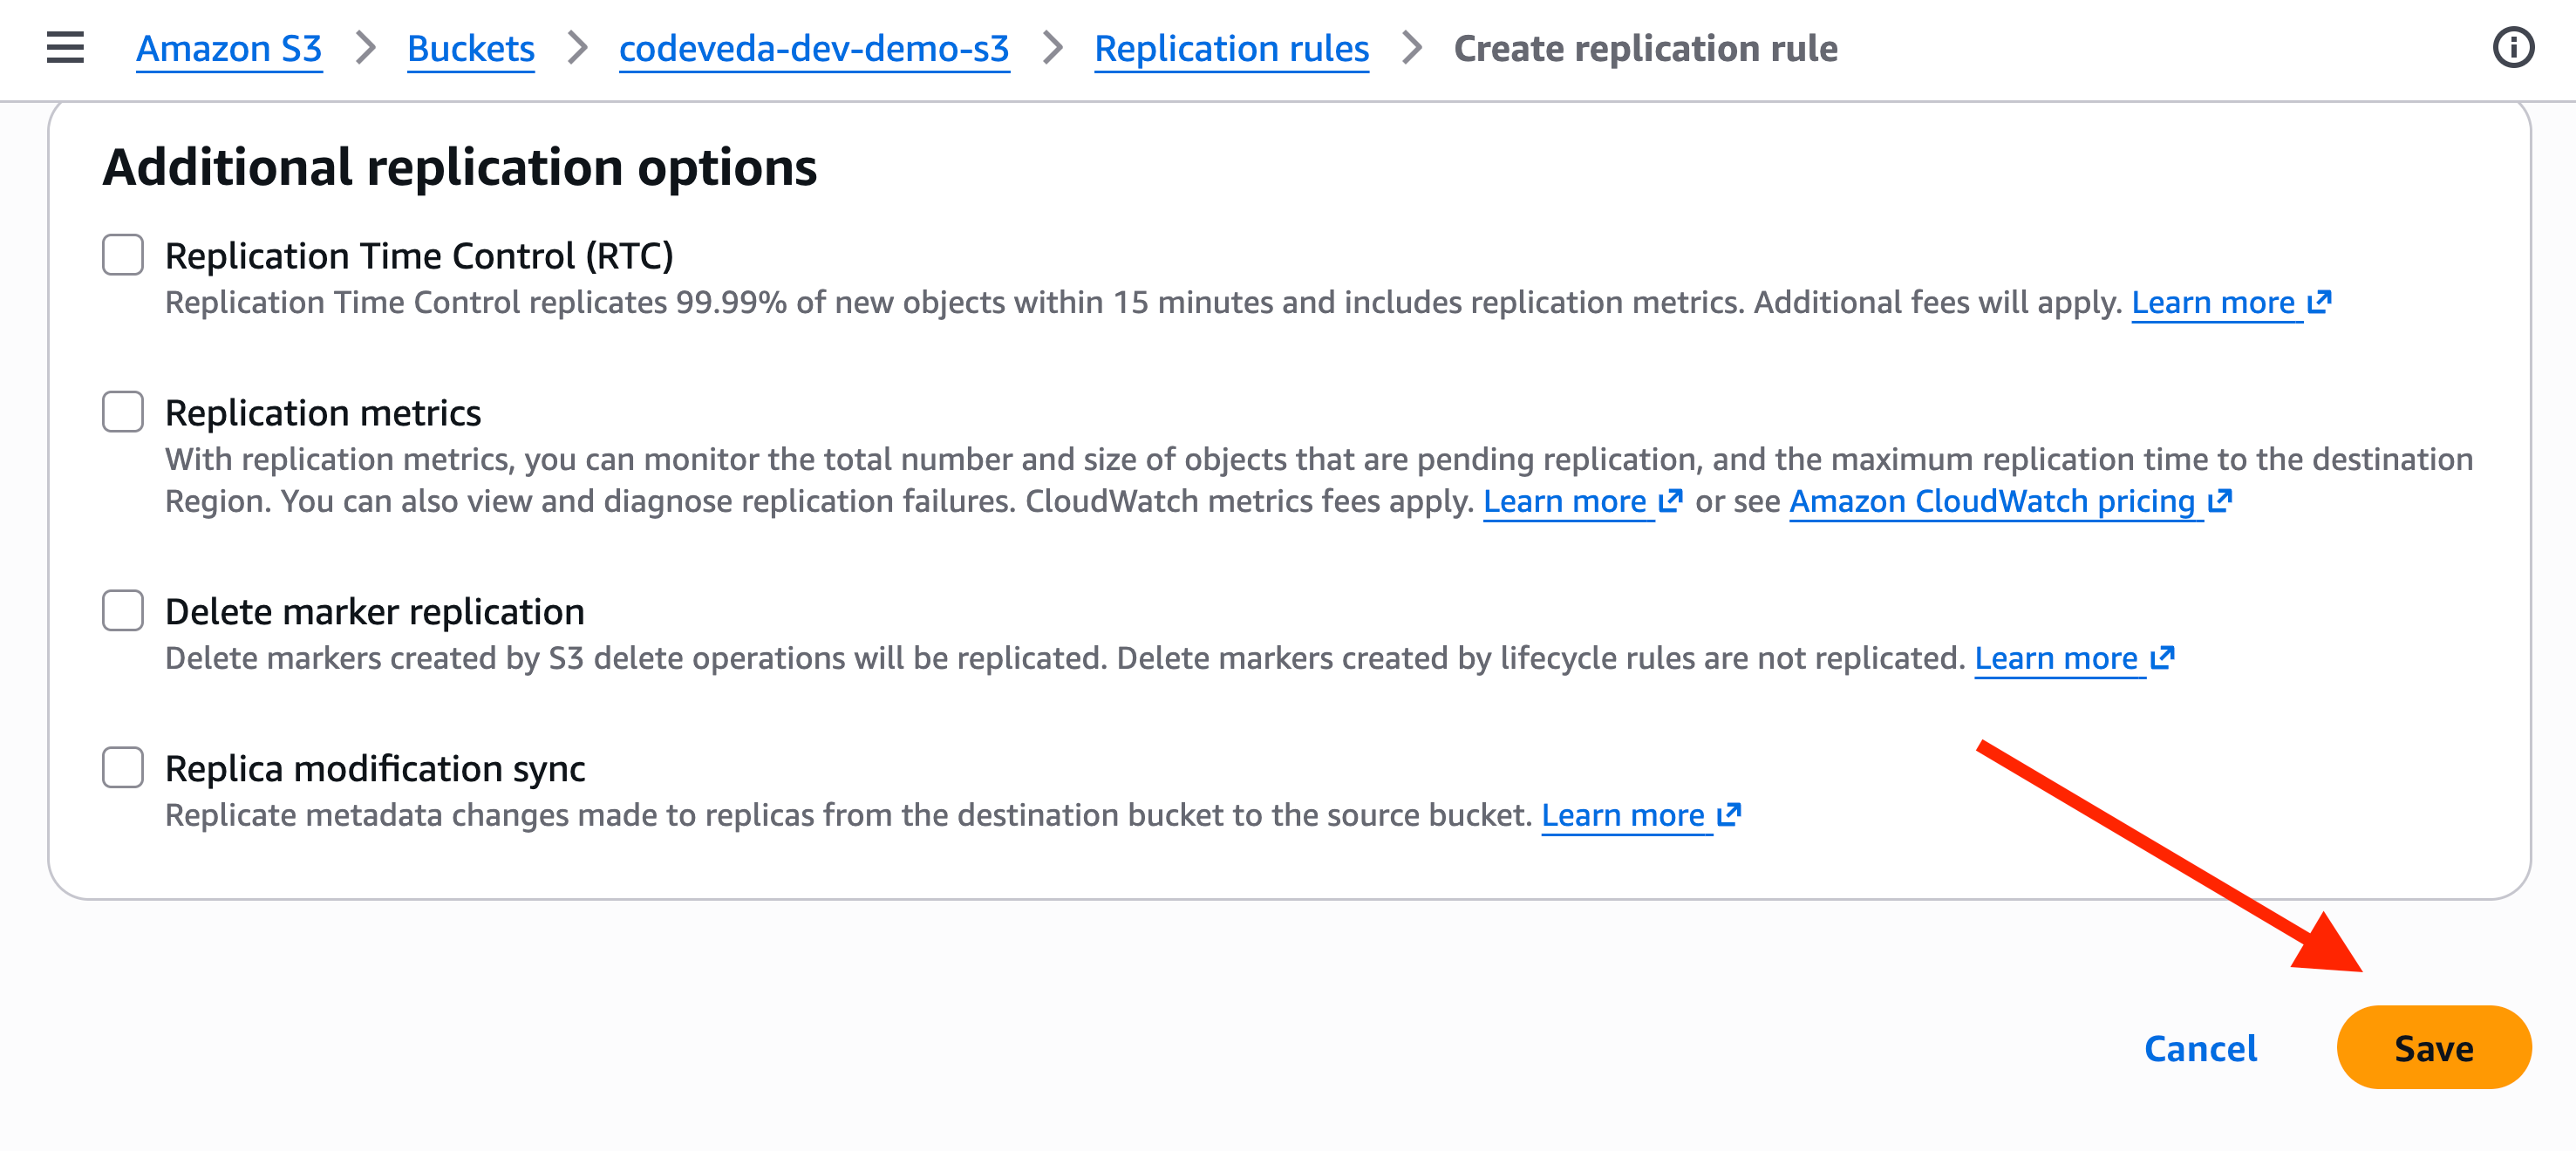
Click Save
🛠️ Step 4: Existing Objects Prompt
After saving the rule, AWS asks:
Do you want to replicate existing objects?Choose: No
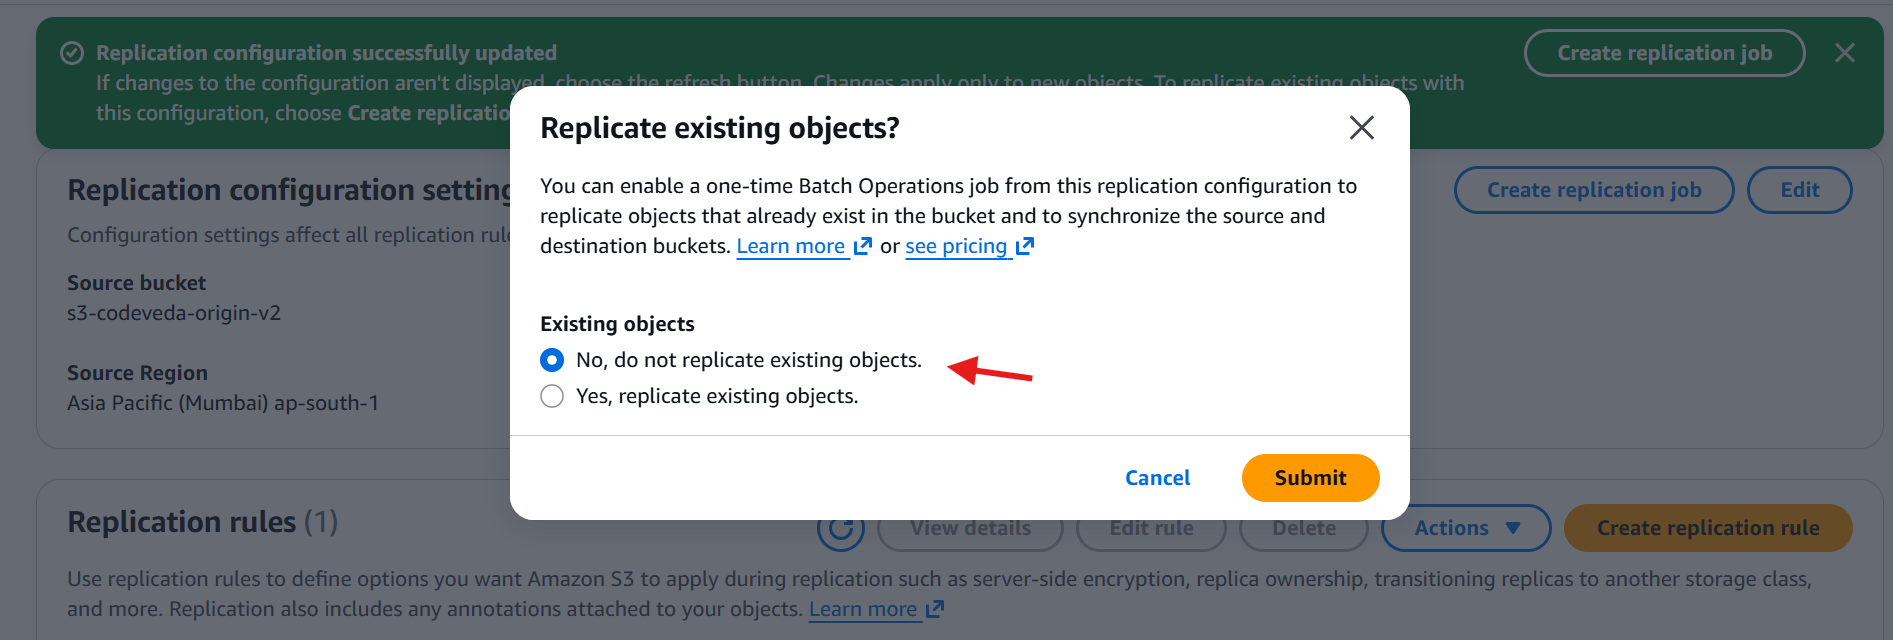
🧠 Replication only applies to new uploads going forward. To copy pre-existing objects, use S3 Batch Operations separately.
🛠️ Step 5: Verify the Replication Rule
Return to the Management tab.
Under Replication Rules, you should now see:
demo-replication-ruleThe rule should show as Enabled.
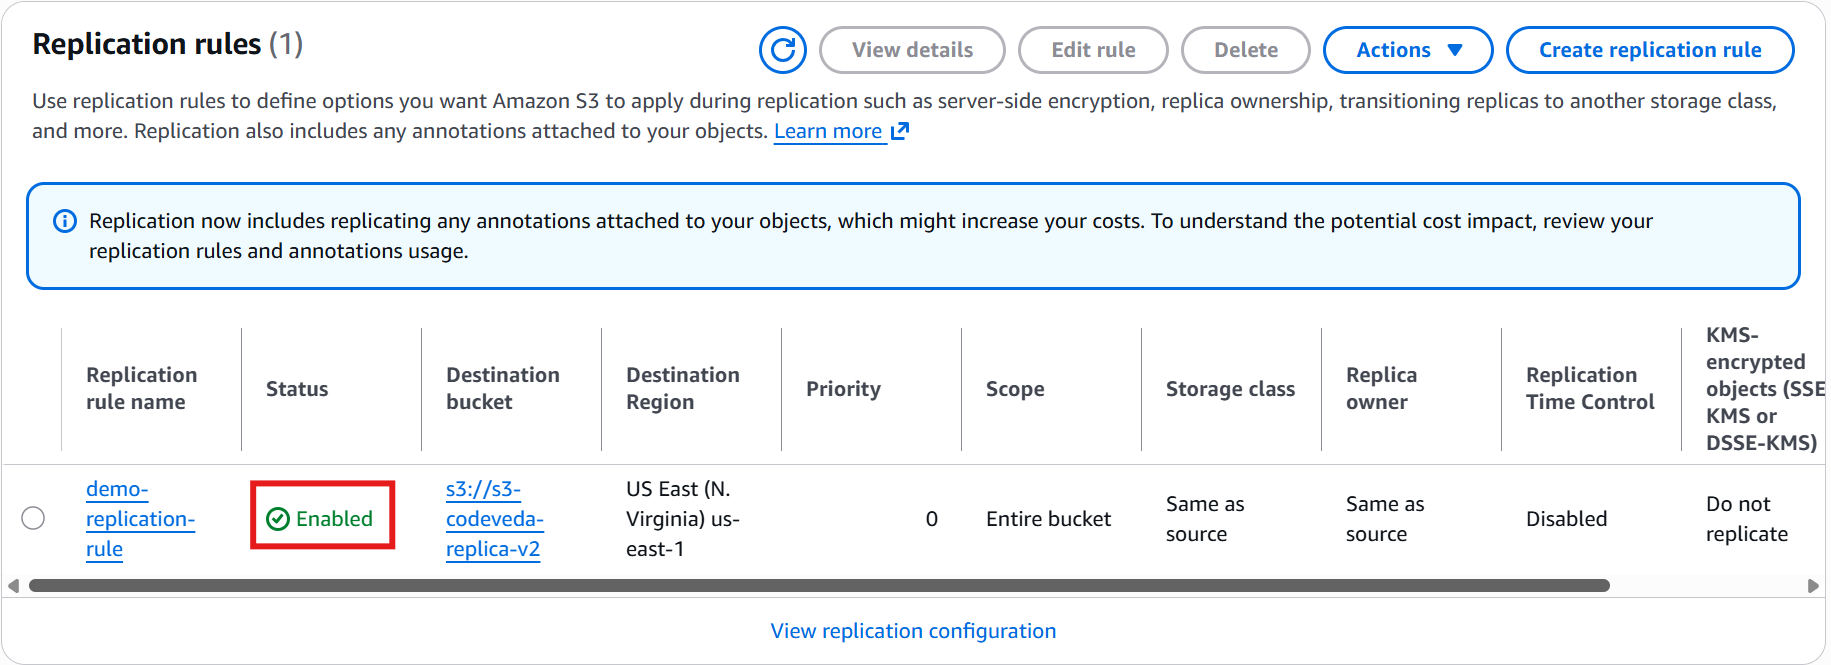
Your replication configuration is now active.
🛠️ Step 6: Test Replication
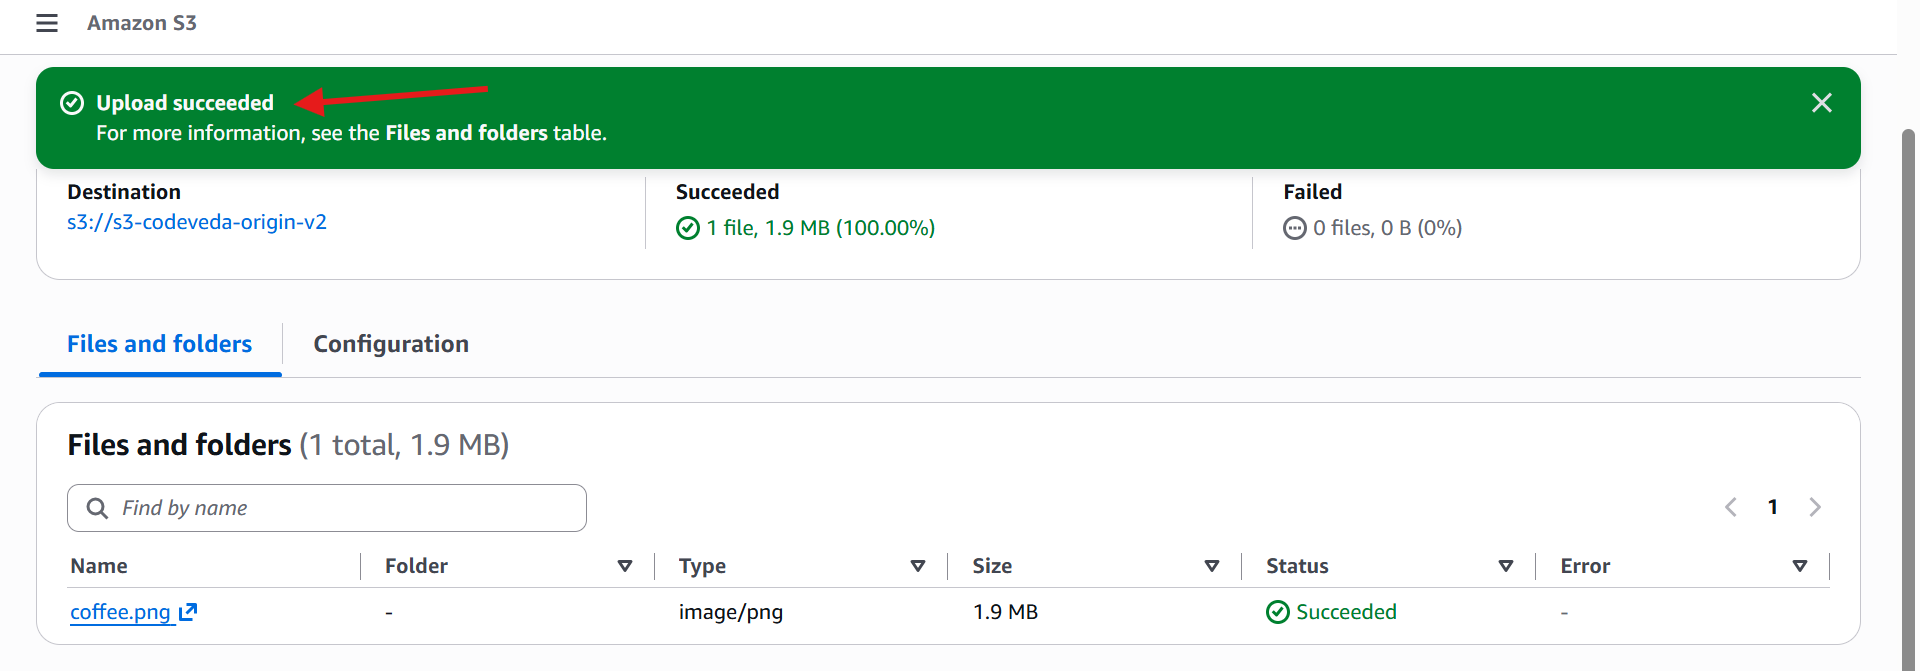
Return to your source bucket.
Click Upload.

Choose another image:
coffee.pngClick Upload.
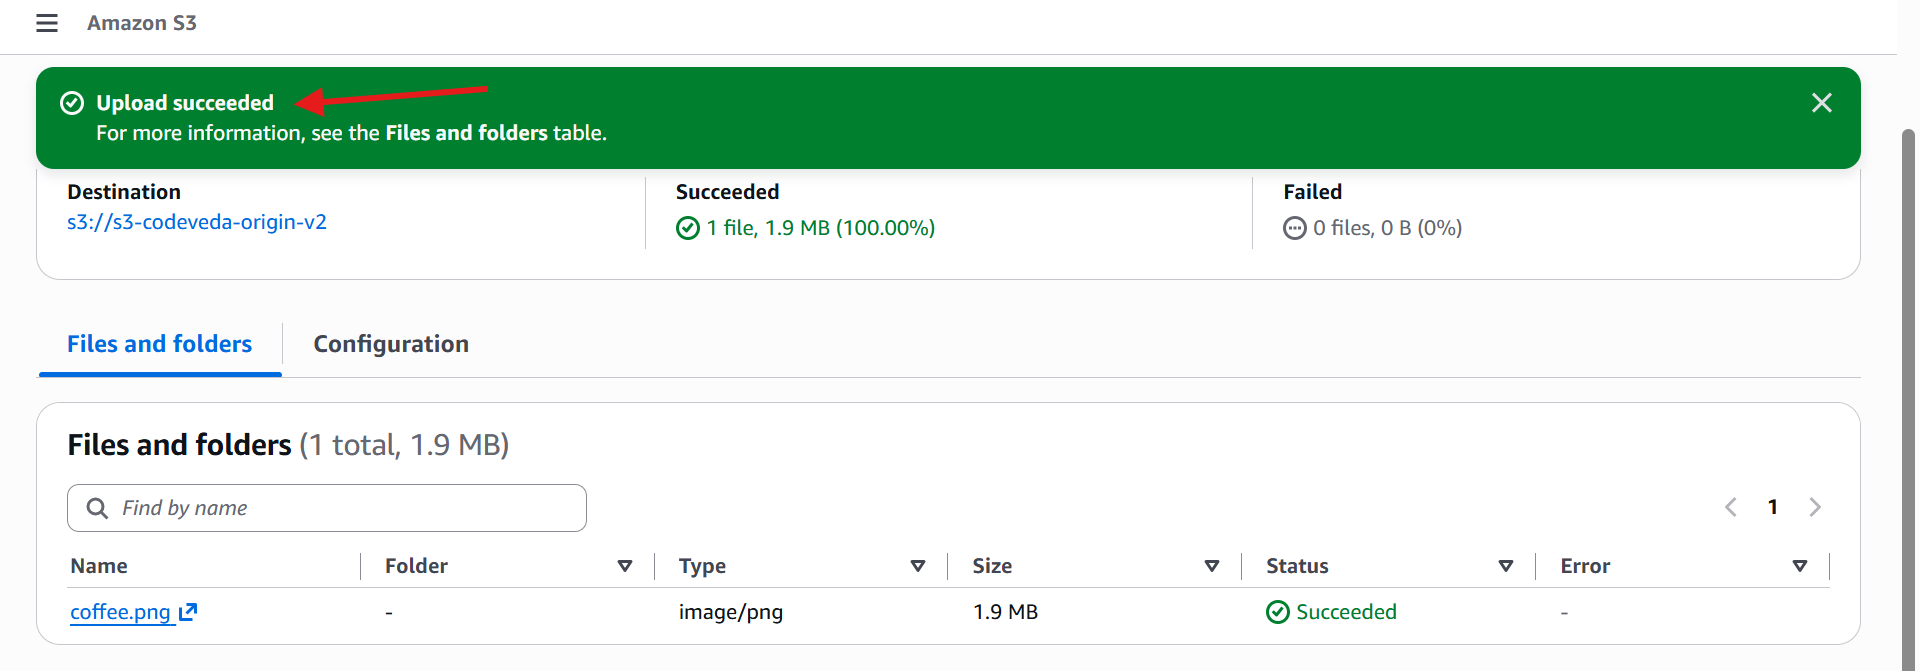
🛠️ Step 7: View the Object Version
Inside the source bucket:
Enable Show versions.
Locate coffee.png
Note its Version ID.
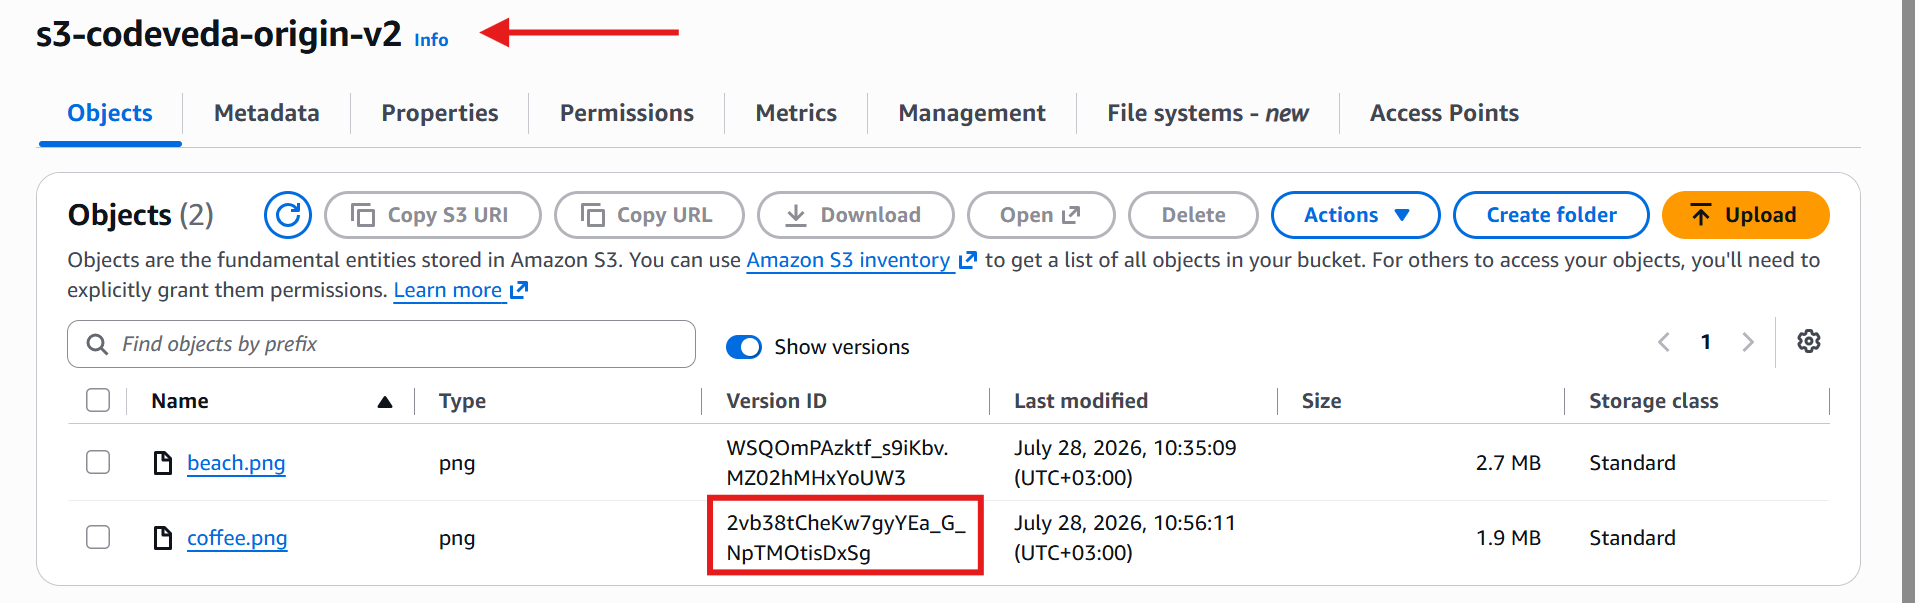
Every uploaded object receives a unique Version ID because versioning is enabled.
🛠️ Step 8: Verify Replication
Open the destination bucket.
Click Refresh.
Replication usually completes within a few seconds, although the initial replication may take slightly longer.
After a short wait, you should see:
coffee.png
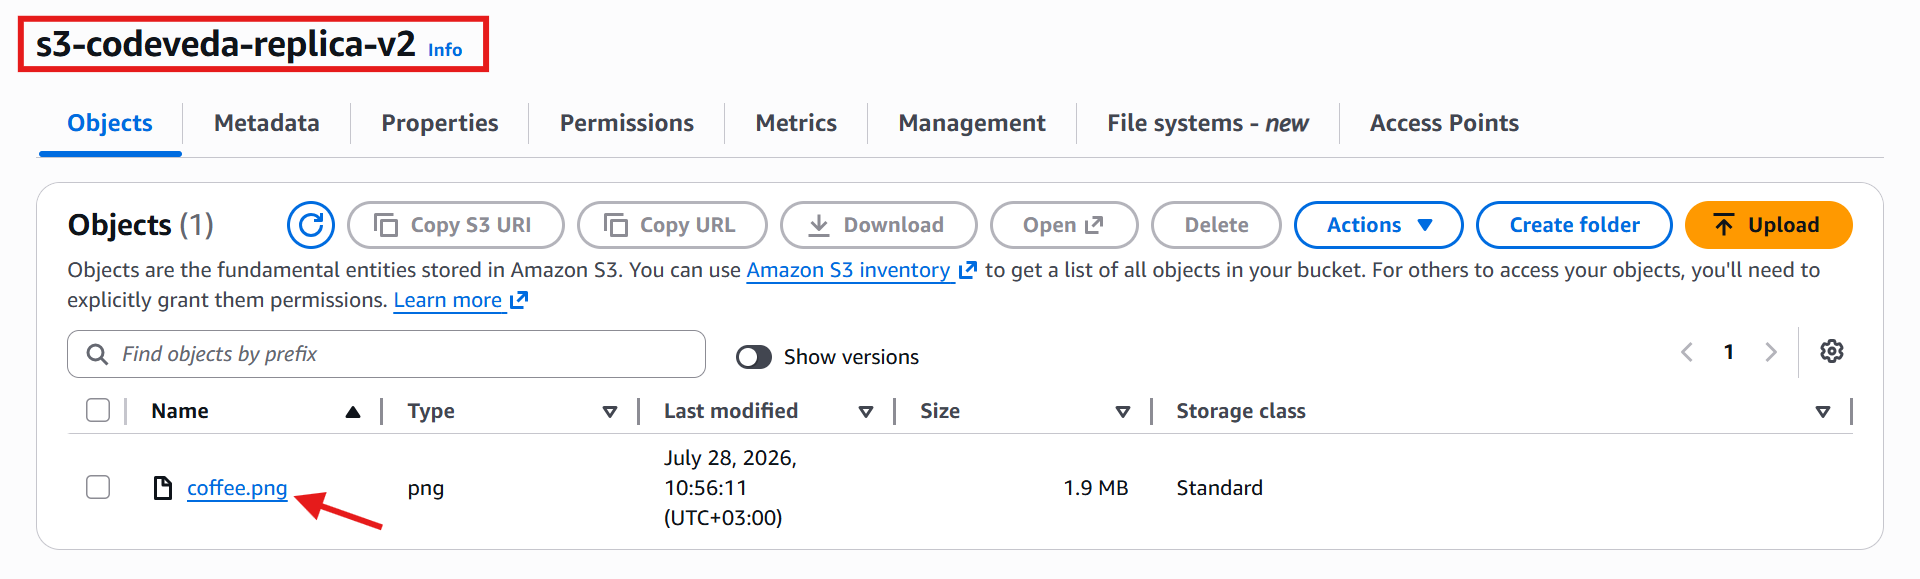
The object has now been automatically copied to the destination bucket.
🛠️ Step 9: Verify the Version ID
Enable Show versions in the destination bucket.
Compare its Version ID with the one in the source bucket.
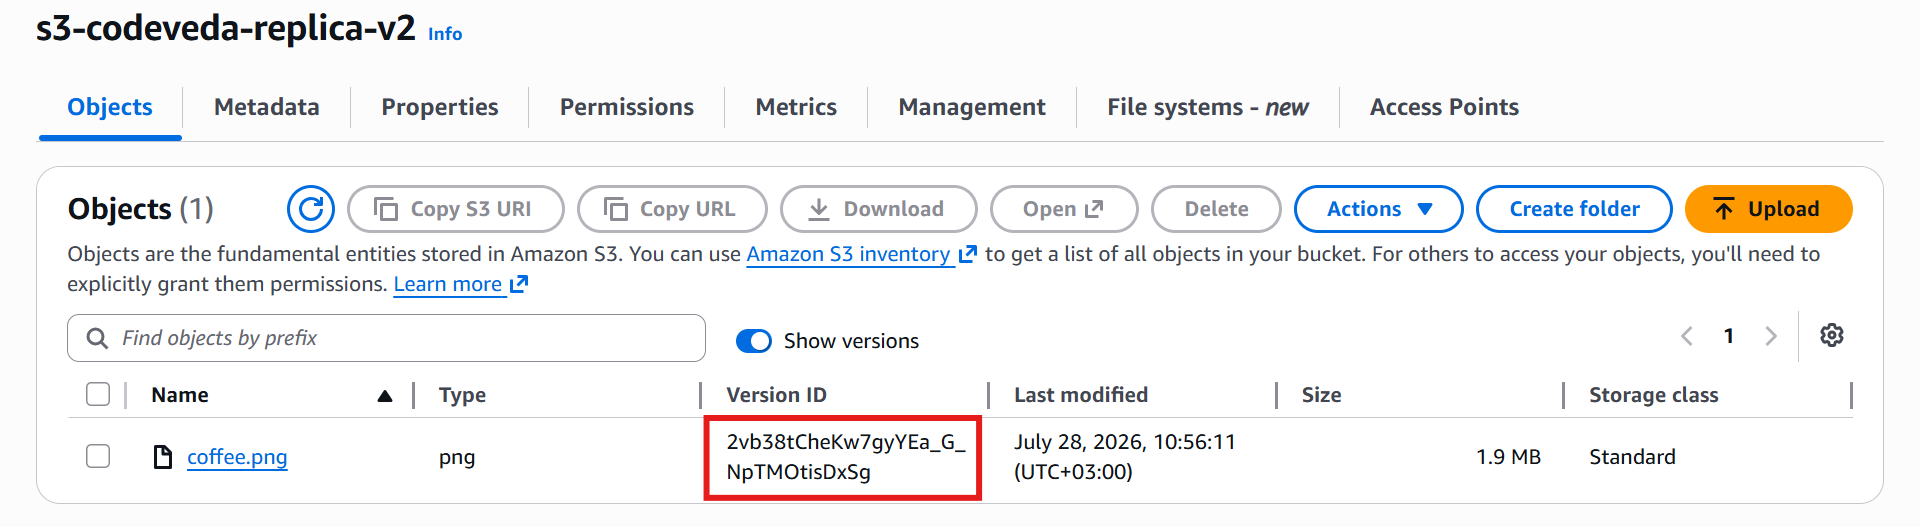
You'll notice: ✅ Both Version IDs are identical.
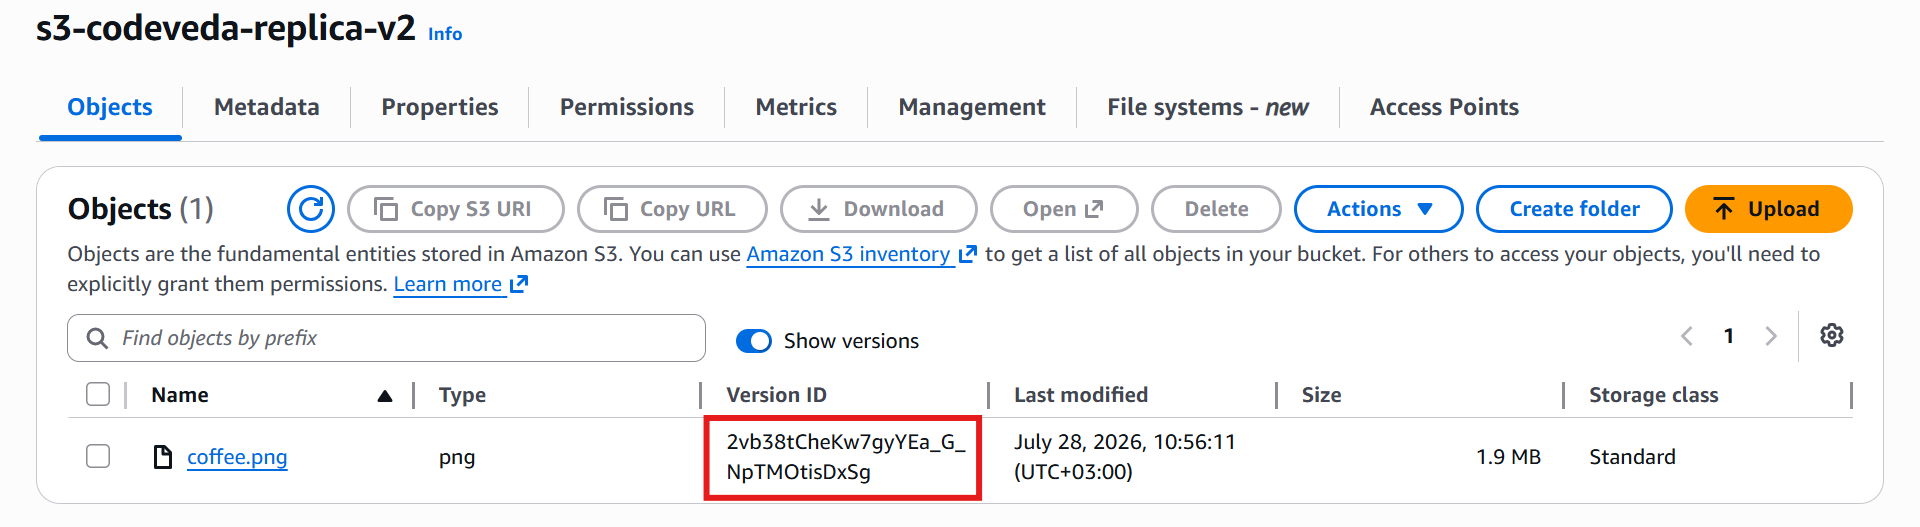
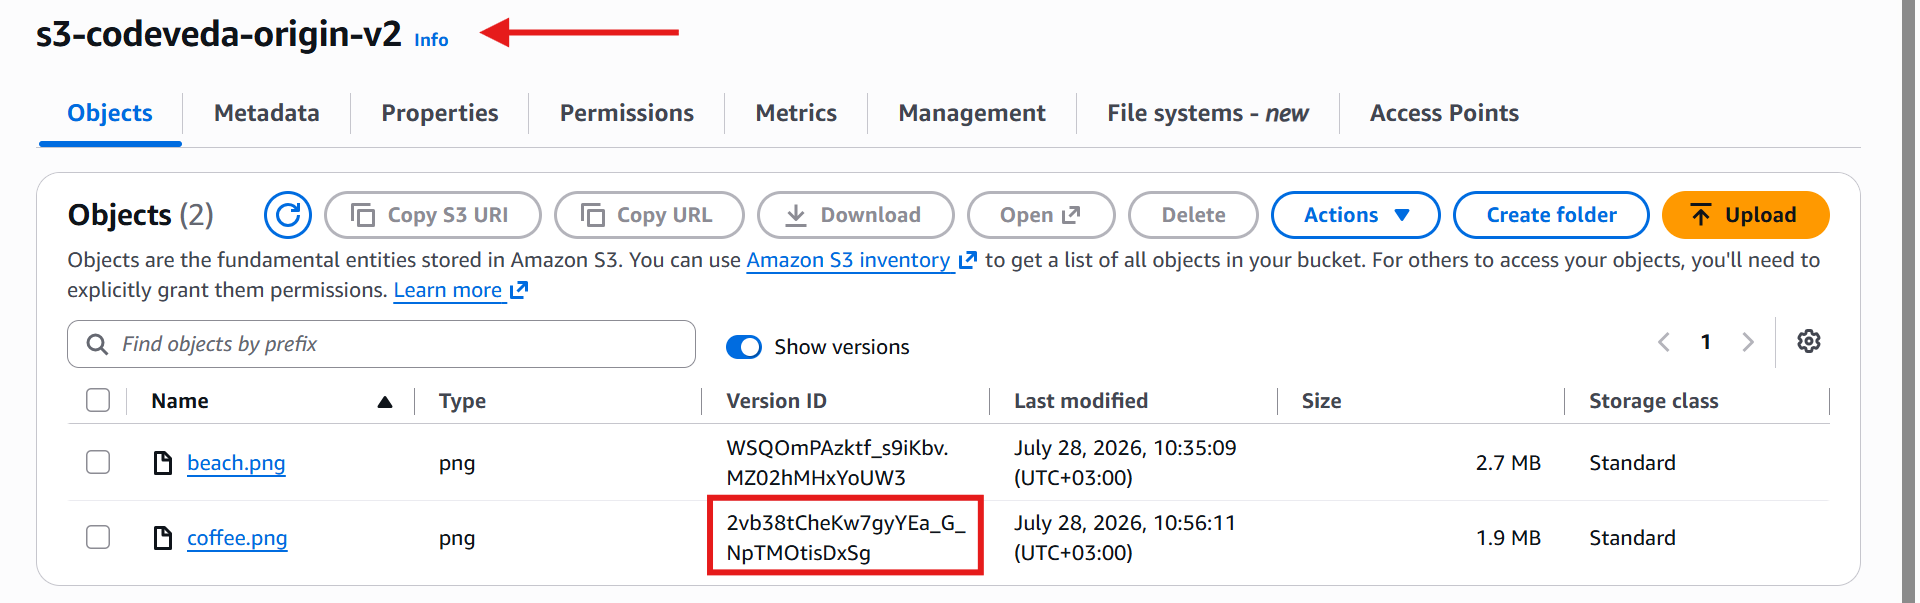
This confirms that Amazon S3 replicates not only the object itself but also its associated version information.
🛠️ Step 10: Re-test with the "Old" File
Remember the beach.jpeg file you uploaded before enabling replication? It was not copied because it already existed before the replication rule was created.
To replicate it:
Return to the source bucket.
Upload beach.png again.
Since versioning is enabled, Amazon S3 creates a new version of the object instead of replacing the existing one.
After the upload completes:
Enable Show versions.
Notice that beach.png now has a new Version ID.
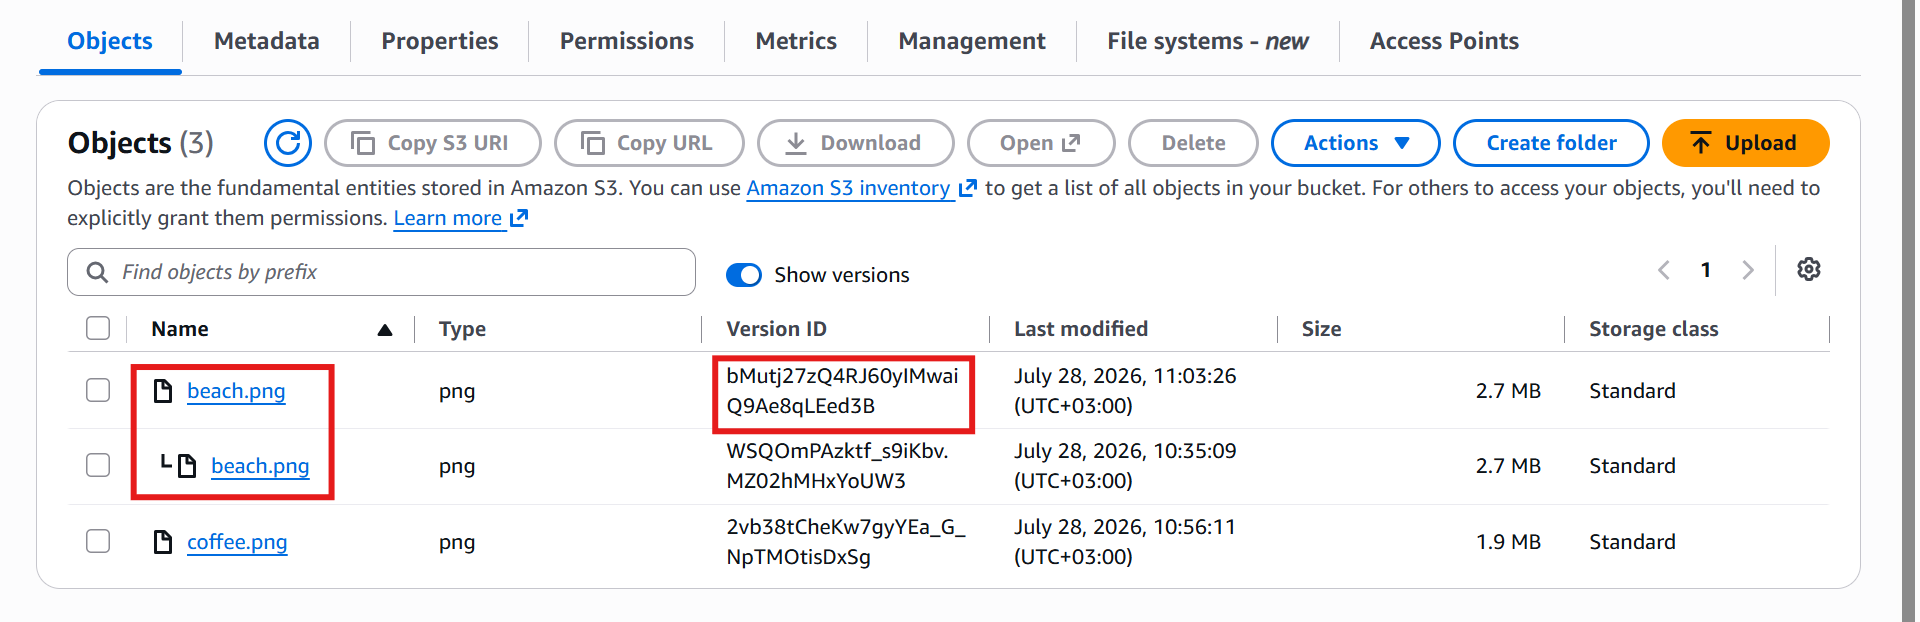
Now return to the destination bucket.
Refresh the page.
After a short delay, you'll see:
beach.png
Open the object versions and verify that the newly created Version ID has also been replicated.
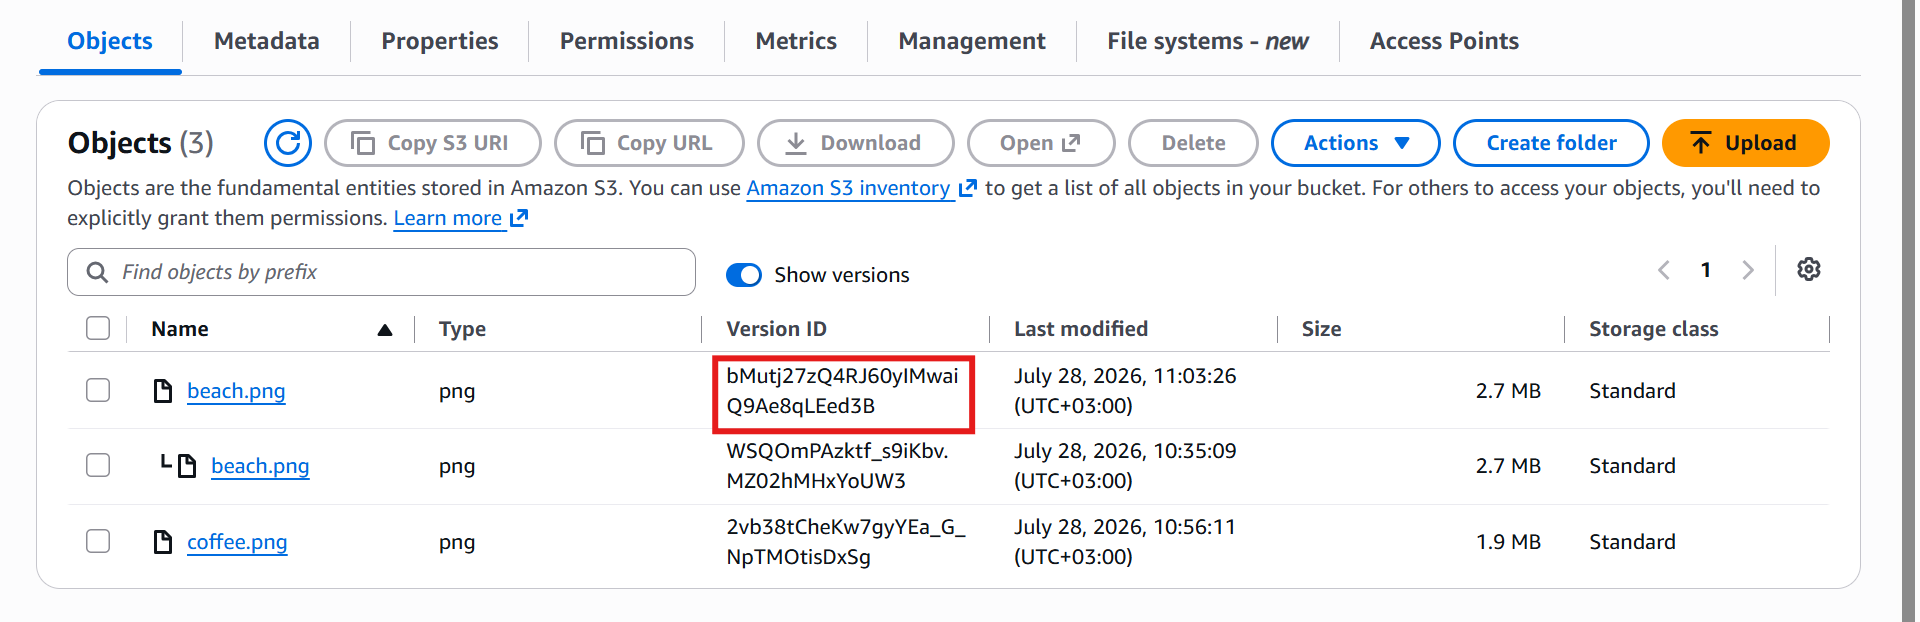
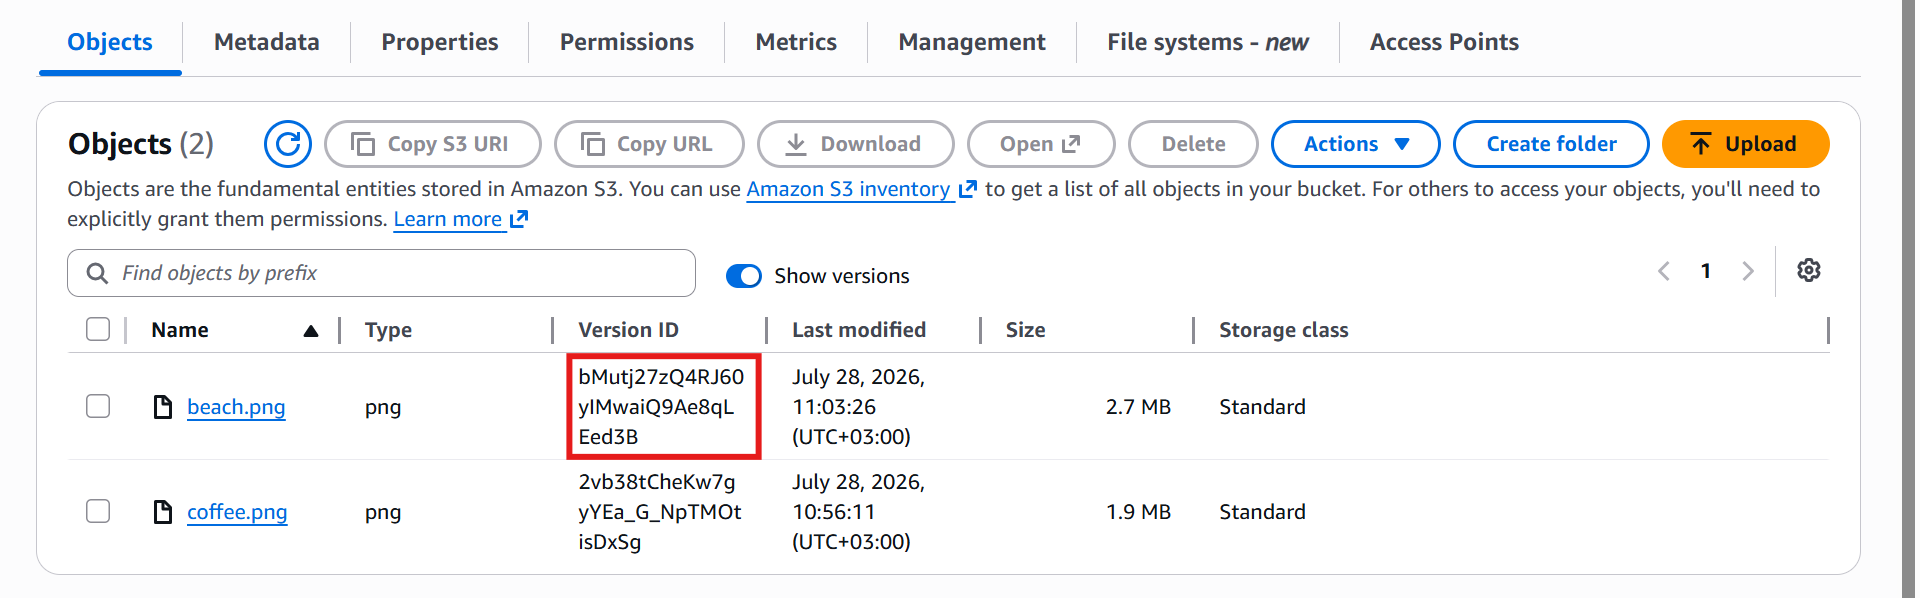
This confirms that new versions of existing objects are replicated, even if the original version was uploaded before replication was enabled.
✅ Key Takeaways
What | Behavior |
|---|---|
🆕 New objects | Replicated automatically |
🆕 New versions of old objects | Replicated automatically |
📦 Objects that existed before the rule | Not replicated (use S3 Batch Operations) |
🔢 Version IDs | Preserved identically across Regions |
💡 Core rule: S3 Replication only copies what's uploaded after the rule is created — it's forward-looking, not retroactive.